25 DIY Wall Art Ideas That Instantly Impress
Your bedroom should feel like a personal sanctuary, and one of the easiest ways to upgrade its look is through creative wall art. With the right DIY projects, you can turn plain walls into a stylish focal point that reflects your personality and enhances comfort. From handcrafted textiles to painted accents and illuminated crafts, these ideas suit every budget and style. Whether you love minimal modern vibes or cozy boho touches, this curated list of DIY wall art for bedrooms will help you refresh your space with elegance and creativity.
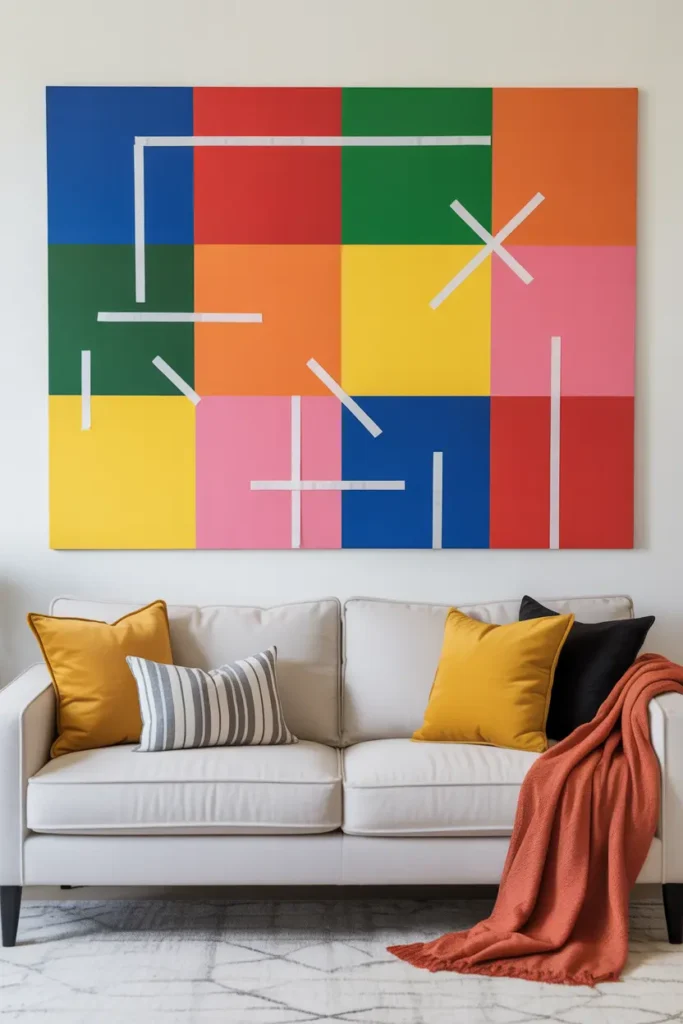
1. Abstract Canvas Using Tape Designs
Materials Needed:
- Blank canvas
- Painter’s tape
- Acrylic paints
- Sponge or brush
- Scissors
Steps:
- Apply painter’s tape in geometric shapes
- Paint each section a different color
- Let it dry fully
- Peel tape off gently
- Hang your artwork
This DIY wall art idea is incredibly popular because it looks high-end without requiring artistic skills. The painter’s tape creates clean, precise lines that produce a modern, designer-style look. You can choose bold pops of color for a vibrant room or soft tones to match a minimalist theme. It’s a perfect project for large blank walls where you want an instant transformation. With just a few materials, you can create a custom masterpiece that feels personal and stylish.
Tape art is very flexible — you can play with shapes like triangles, diamonds, or striped patterns. Try matching the artwork with your furniture colors for a cohesive decor scheme. This project is also great for renters because it makes a big impact without altering the wall itself. You can recreate different versions for hallways, bedrooms, or workspaces. With endless color combinations and layout possibilities, every piece turns out unique and tailored to your style.
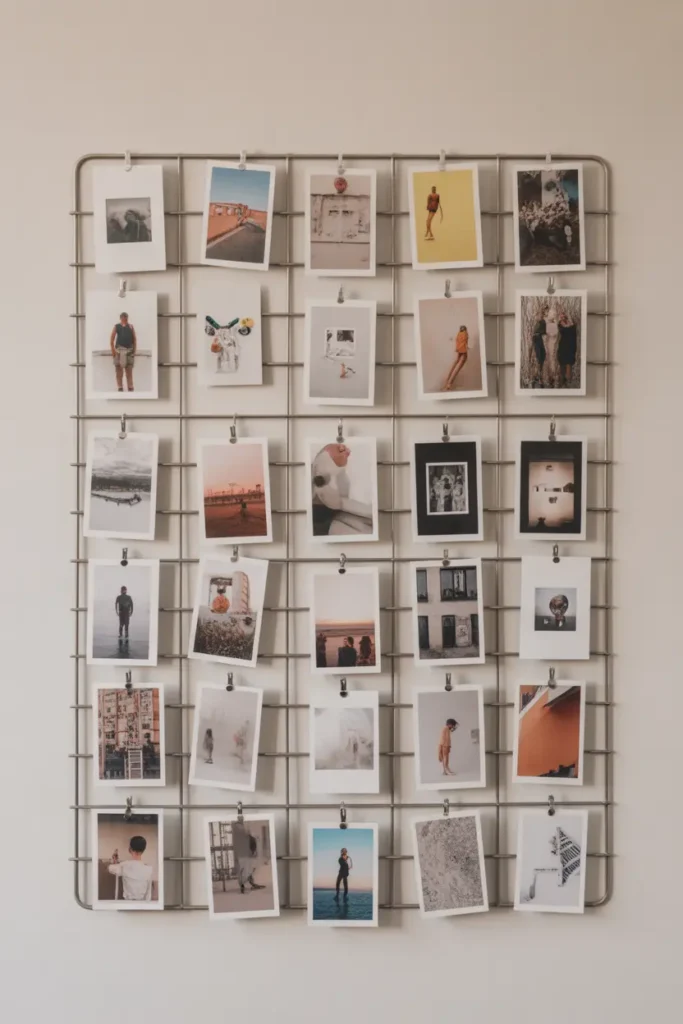
2. Hanging Photo Grid with Metal Clips
Materials Needed:
- Metal grid panel
- Photo clips or mini clothespins
- Printed photos or art
- Hooks to mount
Steps:
- Attach hooks and mount grid on wall
- Clip photos to the metal squares
- Mix orientations for visual interest
- Swap prints seasonally
A photo grid is one of the easiest ways to freshen up your wall decor while showing off memories and inspiration. It works especially well in bedrooms, dorms, or home offices where you want daily motivation. Unlike traditional frames, the open grid style keeps the display light and minimal. You can update it anytime with new travel shots, quotes, or artwork to match your evolving mood.
This DIY wall art has become a TikTok and Pinterest favorite because of how stylish and versatile it is. The metallic lines add a sleek industrial touch while keeping the focus on your visuals. For a more aesthetic look, print in a specific theme like neutral tones, black and white, or pastel palettes. The best part is that the layout isn’t permanent — rearrange anytime for a fresh vibe in just minutes.
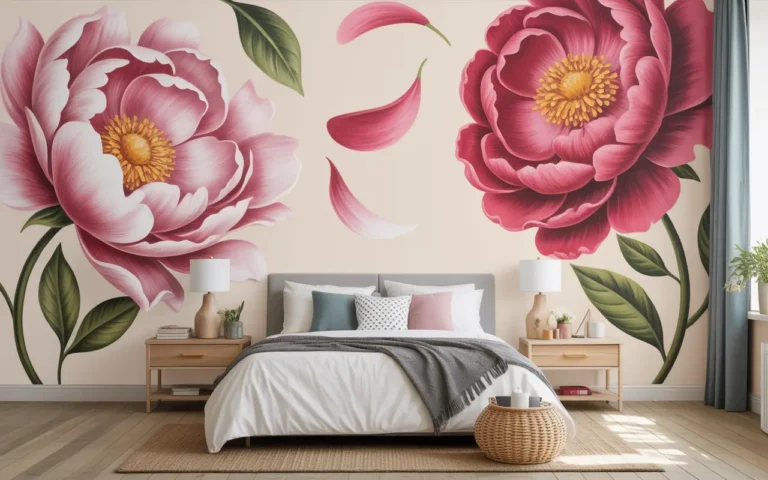
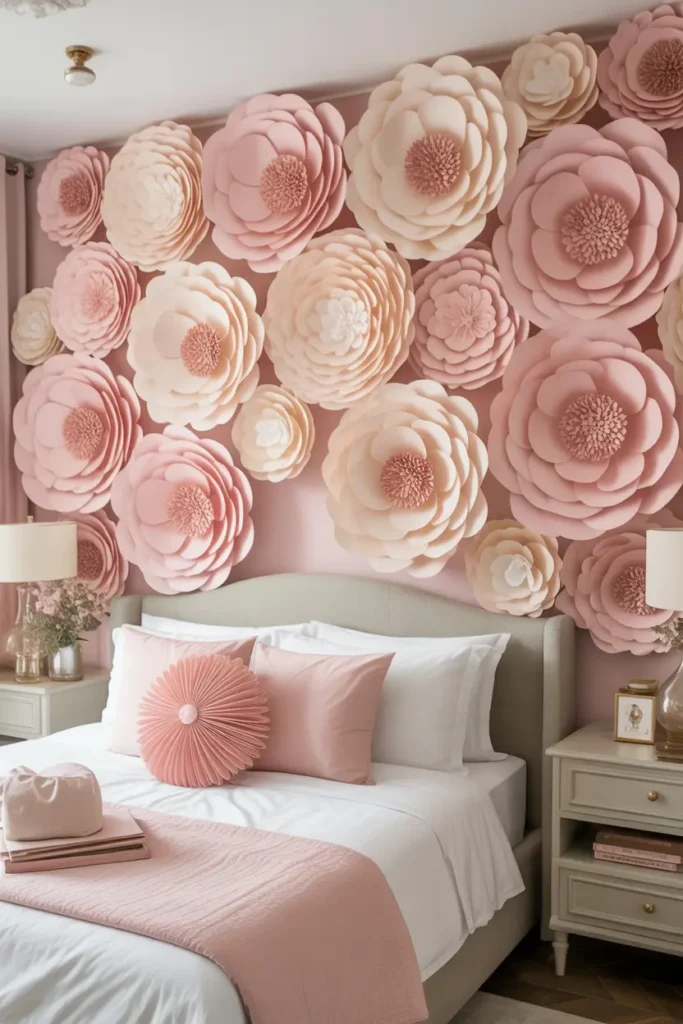
3. Blooming 3D Paper Flower Wall Art
Materials Needed:
- Colored cardstock paper
- Scissors
- Glue gun
- Command strips
Steps:
- Cut flower petal shapes in different sizes
- Layer and glue petals into 3D blooms
- Attach flowers to wall using strips
- Arrange in clusters
Paper flower wall art brings charm and softness into any room without the cost of real floral decor. You can create a full feature wall or a smaller cluster arrangement depending on your space. The 3D effect adds depth and draws the eye upward, making the room feel more decorated and cozy. Soft shades like blush, cream, and lavender are perfect for feminine bedrooms or vanity corners.
The beauty of this craft is that you can customize every part — color, size, and style of the flowers. Larger blooms work well behind the bed as a headboard alternative, while smaller flowers look amazing around mirrors. Since everything is made from paper, it’s lightweight, renter-safe, and easily removable. It’s the perfect budget-friendly decor project for creative DIY lovers who want a dreamy space makeover.
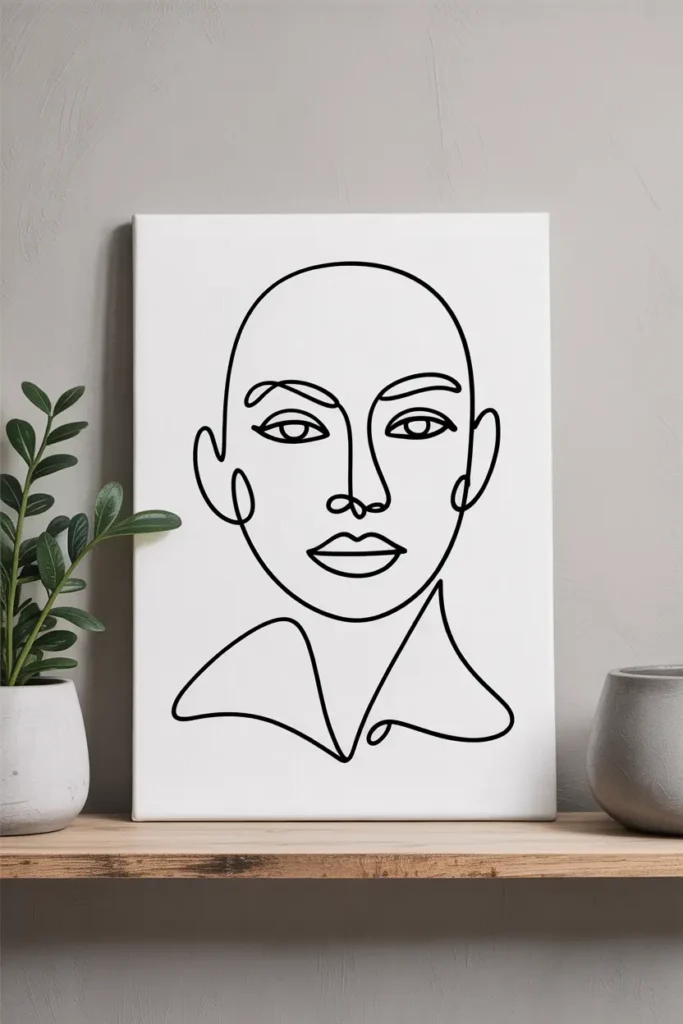
4. Minimalist Line Art on Canvas
Materials Needed:
- Canvas
- Black acrylic paint or paint pen
- Pencil
Steps:
- Sketch a simple face or abstract shape
- Outline with a paint pen or brush
- Let it dry and place in frame
Minimalist line art has become a major design trend because of its simplicity and sophistication. Even beginners can create artwork that looks professional by using one continuous flowing line. The result adds an effortlessly chic look to your home while reflecting modern interior style. Hanging multiple canvases side by side can create a striking wall gallery that is calm yet expressive.
You can try abstract portraits, botanical outlines, or geometric shapes depending on your taste. If you don’t feel confident drawing freehand, you can lightly trace a design first or use a printed reference. The black-and-white palette also makes it easy to match with a wide range of furniture and decor themes. This wall art is perfect for living rooms, bedrooms, and home offices where you want calm, grown-up aesthetics.
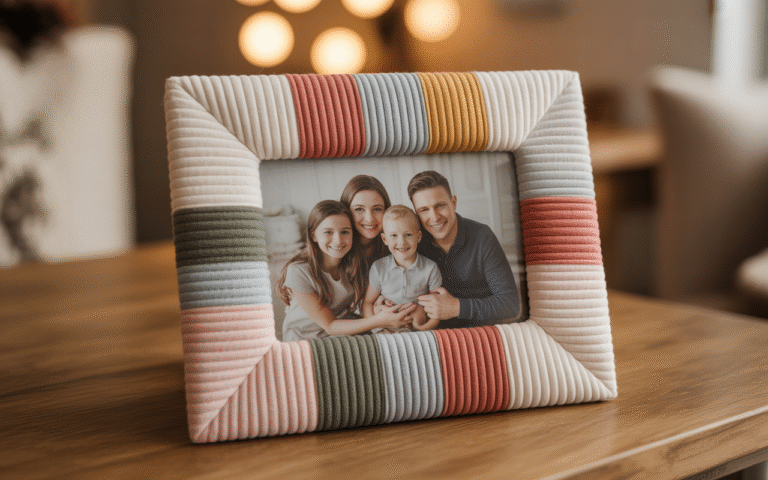
5. DIY Fabric Pinboard Gallery

Materials Needed:
- Cork board or foam board
- Fabric of choice
- Staple gun or glue
- Pins & decor pieces
Steps:
- Wrap and secure fabric around board
- Mount securely on wall
- Pin artwork, reminders, and decor
- Rearrange anytime
A fabric pinboard is perfect for anyone who loves switching up decor often. You can showcase postcards, fashion prints, ticket stubs, or mini artworks without damaging the wall. The fabric adds a soft touch that blends beautifully into the room while allowing for unlimited rearrangements. It encourages creativity and gives you a personal space to express your style and collect memories.
This DIY wall art also brings functionality — ideal for study spaces or craft rooms because it keeps visual inspiration in front of you. Choose trendy fabrics like linen, burlap, or soft pastels depending on your theme. For a cleaner frame, add wooden trim around the edges. Whether you prefer a bold collage or a neat organized grid, your pinboard evolves with you — making it one of the most versatile decor upgrades.
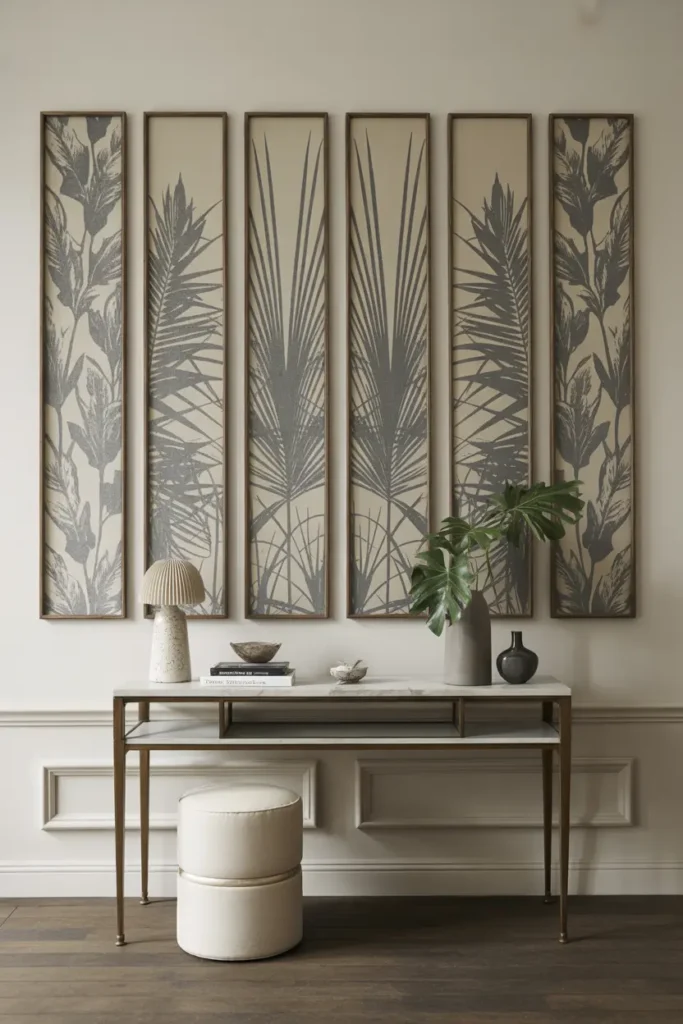
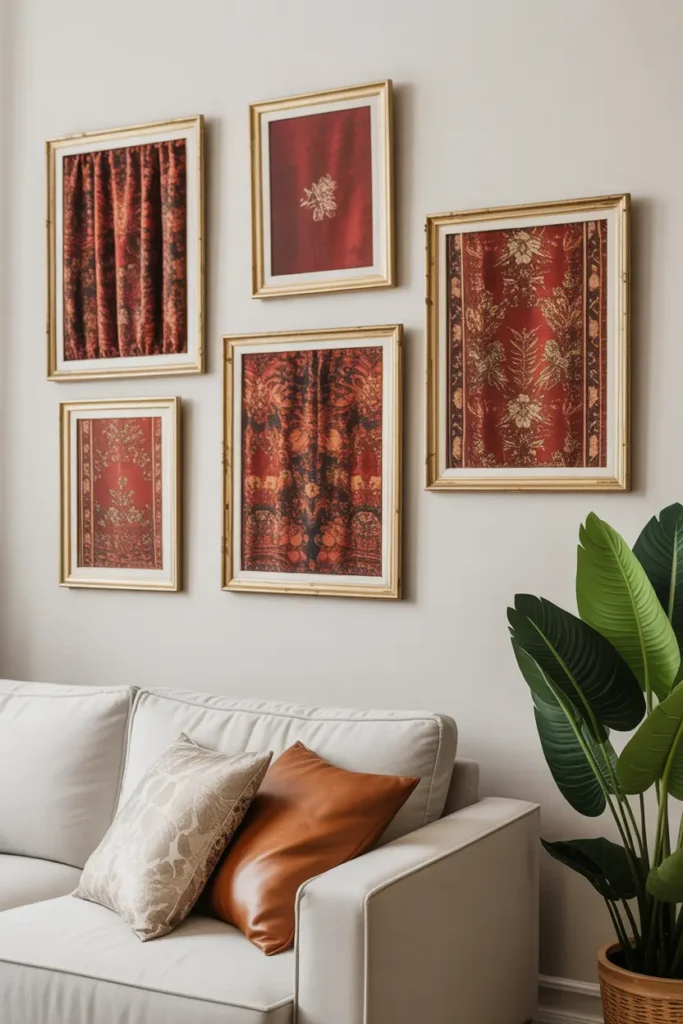
6. Framed Wallpaper Panels
Materials Needed:
- Wallpaper samples or leftover rolls
- Frames or wooden trim
- Scissors + tape or glue
Steps:
- Cut wallpaper to frame size
- Secure inside frames or add trim around edges
- Hang panels evenly spaced
- Adjust layout for best balance
Framed wallpaper art is a genius decor hack for anyone who loves high-end style but prefers an affordable solution. Instead of installing wallpaper everywhere, you highlight the best parts in oversized frames. It’s renter-friendly and trendy — especially with botanical prints, marble textures, or boho patterns. This DIY wall art instantly adds drama and color while keeping the space clean and modern.
You can experiment with triptychs (sets of three), gallery-style layouts, or a single oversized panel as a statement. It’s a perfect way to match wall art with other room textiles like cushions and curtains. You can refresh designs anytime by replacing the wallpaper inside the frames. This stylish upgrade works beautifully in living rooms, hallways, dining areas, and bedrooms where you want premium vibes without premium cost.
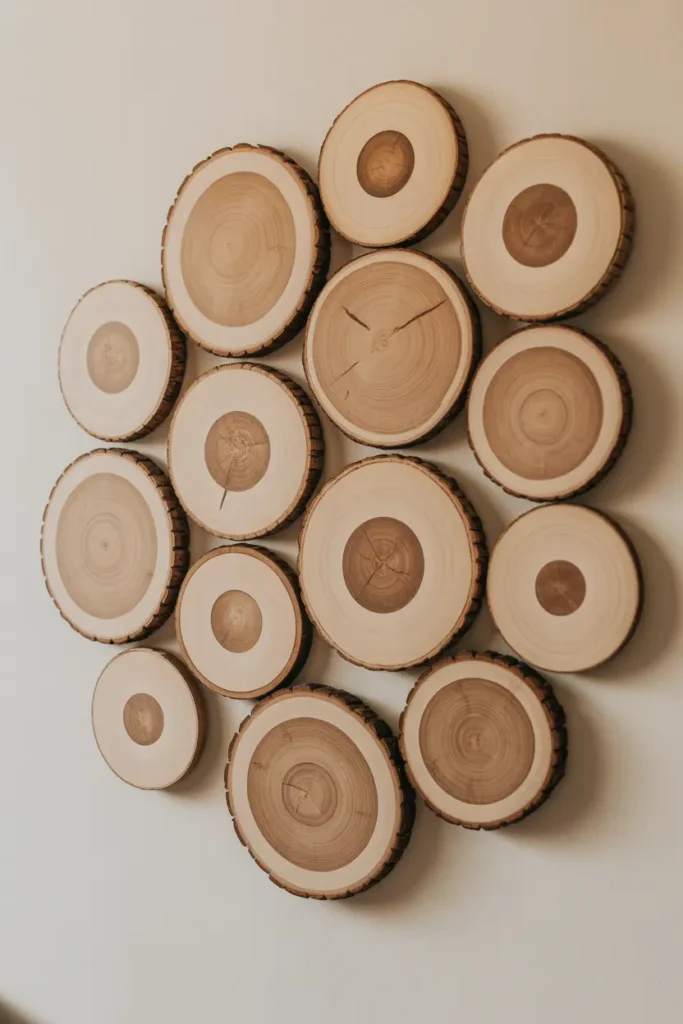
7. Wooden Slice Wall Art
Materials Needed:
- Wood slices (smooth sanded)
- Strong adhesive or nails
- Clear varnish (optional)
Steps:
- Sand and seal slices if needed
- Arrange pattern on floor first
- Mount pieces securely on wall
- Fill gaps with smaller slices
Wood slice art is a perfect blend of rustic charm and modern design. The natural patterns add warmth and unique style that feels handcrafted and high-quality. This DIY wall art is ideal for nature lovers or those wanting to soften modern interiors with organic materials. Whether you create a circular cluster or a free-form pattern, the result feels artistic and cozy.
You can leave the wood raw for a farmhouse aesthetic or varnish it slightly for richer tones. Mixing small and large slices helps create eye-catching texture. This project also pairs beautifully with indoor plants and woven decor items. It works great behind sofas or beds because it elevates the main wall without overwhelming the room. It’s a durable, timeless art piece that showcases your creativity.
8. Hand-Painted Quote Banner

Materials Needed:
- Canvas fabric
- Black fabric paint or markers
- Wooden dowel + rope
- Scissors
Steps:
- Cut canvas into banner shape
- Write or stencil your quote
- Attach dowel and rope for hanging
- Display on wall
A quote banner is a charming and motivational piece of DIY wall art that reflects your personality. It’s perfect for adding positive energy where you spend your most relaxing or creative moments. You can choose elegant typography styles and meaningful sayings to match your aesthetic — whether modern, boho, or minimal. The soft canvas texture helps tone down harsh walls and adds a handmade touch.
This is also one of the easiest crafts to customize. You can dye the canvas, add stitched borders, or include small illustrations beside your lettering. The vertical hanging style helps fill narrow wall spaces efficiently. It’s lightweight and renter-safe, making it easy to move around as your room evolves. With just a few inexpensive supplies, you can create statement art that speaks to your heart.
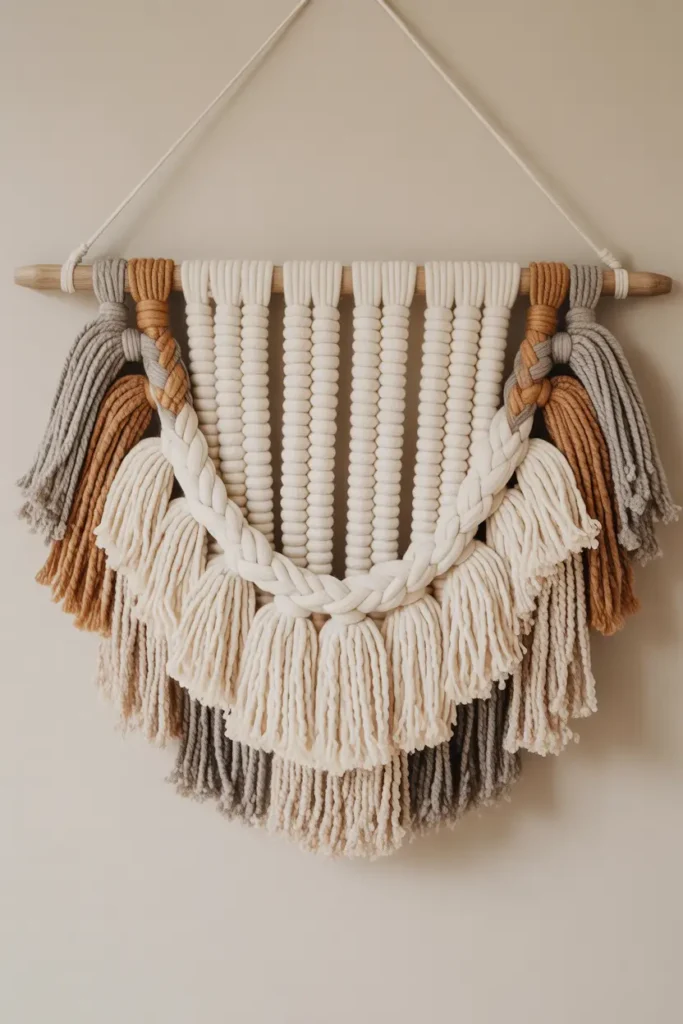
9. DIY Woven Yarn Hanging
Materials Needed:
- Thick & thin yarn varieties
- Wooden dowel or branch
- Scissors
Steps:
- Cut yarn strands to desired length
- Fold and knot onto dowel
- Add braids or twists for detail
- Trim ends neatly
Yarn wall hangings bring the same cozy appeal as macramé but require less skill and time. The soft fabric texture instantly warms up a room and gives a Pinterest-worthy bohemian look. You can mix different thicknesses and colors for visual interest that suits your existing decor. This DIY wall art is especially perfect for bedrooms and living rooms that need more comfort and character.
For a fuller statement, make the center strands longer and sides shorter for a slight V-shape. You can also incorporate beads, metallic yarn, or small tassels for extra flair. This décor pairs beautifully with wooden furniture, indoor plants, and neutral textiles. Affordable, quick, and completely customizable — this project brings a handcrafted vibe that’s both modern and inviting.
10. Vintage Plate Wall Display

Materials Needed:
- Vintage or thrifted plates
- Plate hangers or adhesive discs
- Level and measuring tape
Steps:
- Lay out arrangement on floor first
- Hang central plate, then work outward
- Adjust spacing symmetrically
- Ensure secure hold
Vintage plates make stunning wall art because each piece brings history, pattern, and charm. It’s a sustainable way to reuse ceramics that may otherwise sit stored away. This DIY works great in dining areas or kitchens where you want decorative flair without overwhelming the space. The circular shapes naturally create a visually pleasing flow across the wall, making the space feel curated and stylish.
Mixing different plate designs — florals, minimalist prints, or bold colors — adds playful character. For a cleaner look, choose plates within the same color palette like whites and blues. You can form unique shapes such as spirals, clusters, or straight rows depending on your wall size. This craft shows off your personality while giving a classy, timeless impression that guests will always notice.
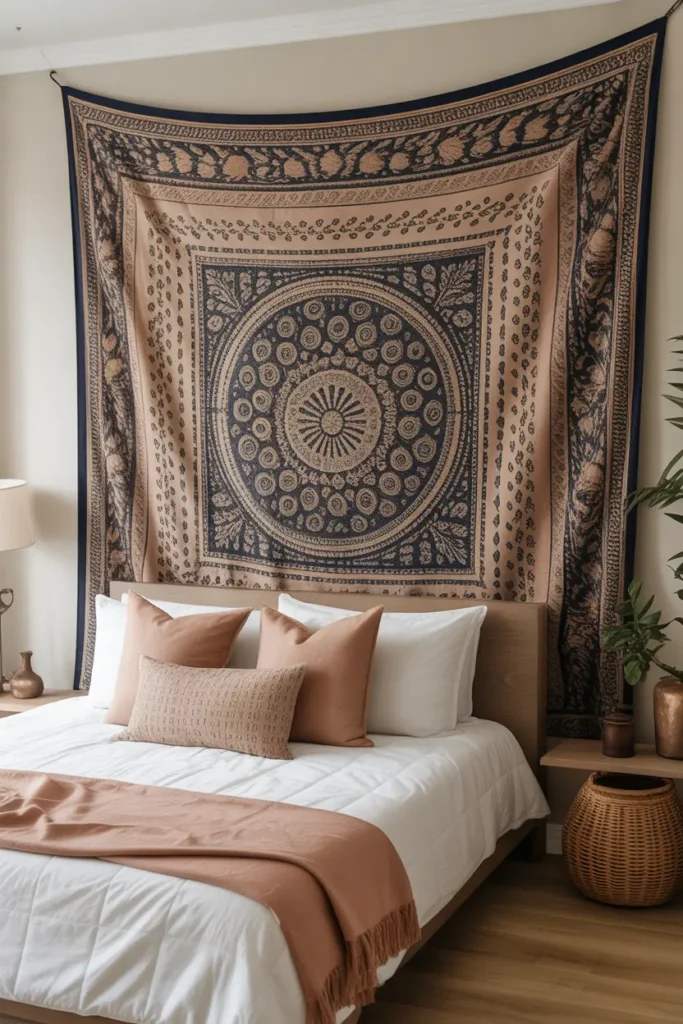
11. Statement Tapestry Wall Art
Materials Needed:
- Tapestry fabric or printed cloth
- Curtain rod or removable hooks
- Hanging string (optional)
Steps:
- Attach tapestry to rod or hooks
- Center it above the furniture
- Smooth fabric edges
- Add fairy lights if desired
A statement tapestry is perfect for anyone who wants impactful wall art with minimal effort. It can stretch across large walls, making the room feel fuller and more styled. From mandala designs to floral or boho prints, tapestries bring cultural art and color to any space. They work especially well in bedrooms, college dorms, or cozy lounging corners. Soft fabric also helps enhance the acoustics of the room, reducing echoes.
You can choose bold prints for energetic decor or soft neutrals for a calming effect. Tapestries are lightweight and renter-safe — simply hang with removable adhesive hooks. You can even layer a string of lights around the edges for an elevated visual glow. This is one of the easiest DIY wall art ideas that instantly impress without requiring paint or crafting skills.
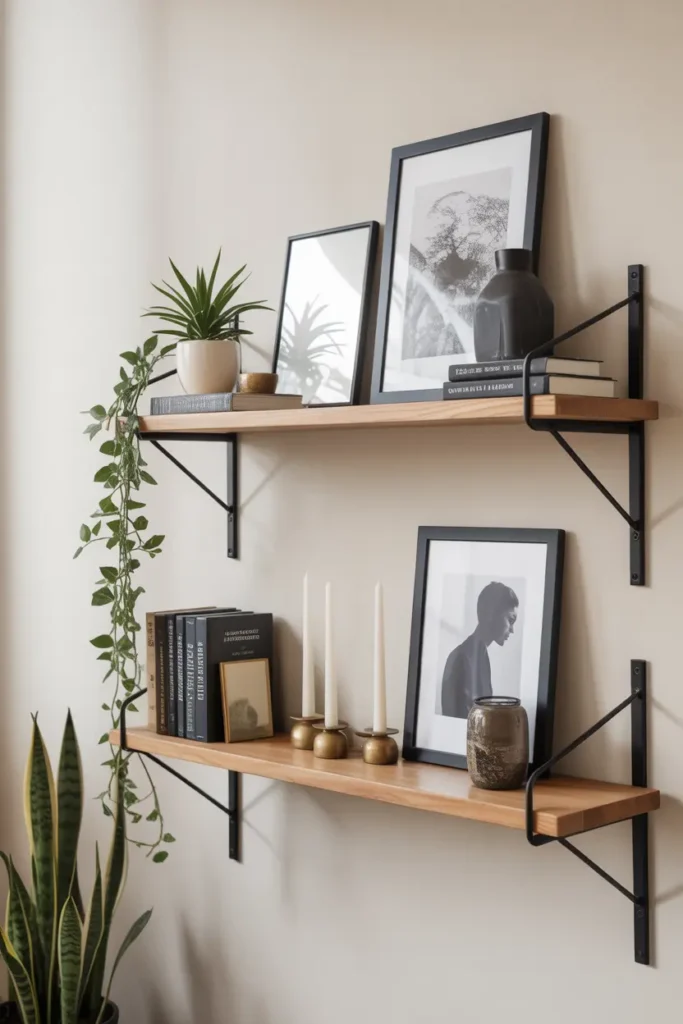
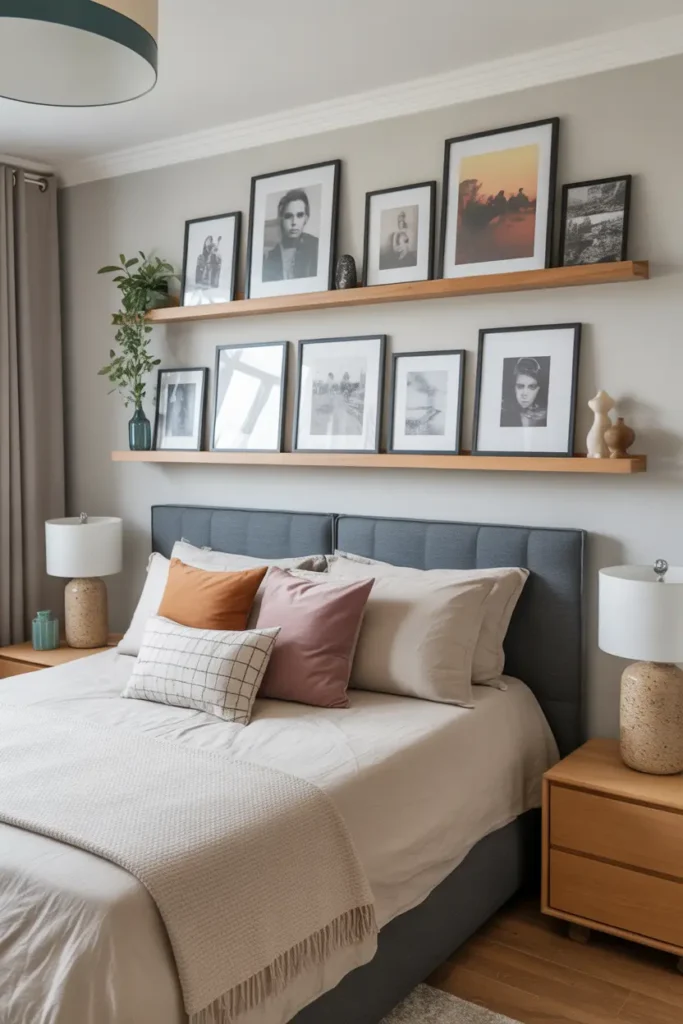
12. Floating Shelf Art Display
Materials Needed:
- Floating shelves
- Screws and anchors
- Framed prints + decor pieces
Steps:
- Install shelves securely
- Place the biggest items first
- Layer small decor around
- Rearrange seasonally
Floating shelves are a smart, flexible alternative to traditional wall art. They give you a platform to showcase multiple stylish items that reflect your personality. You can mix photos, mini artworks, figurines, and indoor plants to create the perfect styled vignette. This DIY wall decor idea is ideal for renters too — instead of drilling many holes for frames, you only install the shelves once.
You can re-style the shelves anytime without changing what’s on the walls. Create a color theme like earthy neutrals or bold modern tones for a cohesive look. Floating shelves are especially useful in small rooms because they provide both decoration and storage. They instantly draw the eye upward, making the space feel taller and thoughtfully designed.
13. Custom Map Wall Art

Materials Needed:
- Printable map file (custom)
- Printer or print shop
- Frame + mat board
Steps:
- Download map of any city
- Print in preferred size
- Place inside frame
- Hang at eye level
Custom map wall art adds personal storytelling to your space. Whether it’s your hometown or a dream destination, the map acts as a meaningful reminder of the places that shaped you. You can choose a modern design — black and white, gold foil, or pastel tones — to match your interior theme perfectly. It’s a professional-looking craft that still feels deeply personal.
Hang as a single statement piece, or create a trio showing multiple cities — like where you were born, where you live now, and where you dream to go next. Maps also pair beautifully with travel photos on adjacent walls. This is one of the most versatile wall art projects, making it a favorite for travelers, students, and newlyweds decorating their first home.
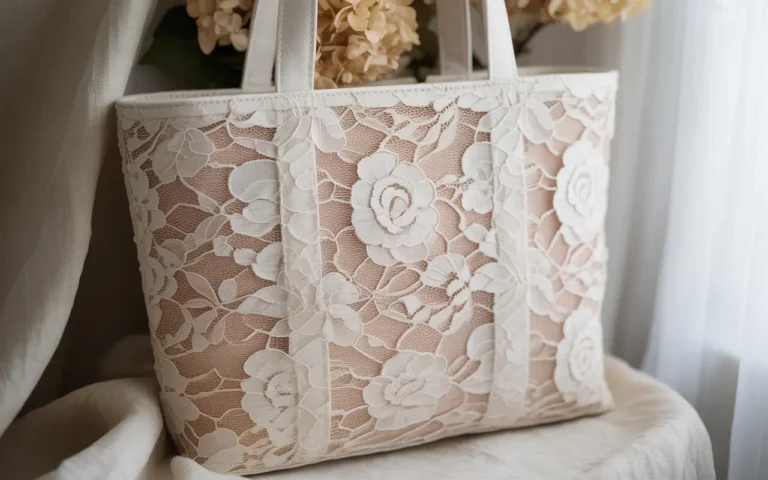
14. Framed Fabric Wall Art
Materials Needed:
- Fabric scraps or samples
- Frames
- Scissors
Steps:
- Cut fabric slightly larger than frame backing
- Smooth and secure inside frame
- Hang in grid or row pattern
If you love textiles and patterns, this DIY project transforms fabric into gallery-worthy artwork. It’s budget-friendly because you can use leftover scraps or inexpensive swatches. Bold prints help fill up large spaces with color, while subtle fabrics add soft texture to neutral rooms. This is a quick and renter-friendly way to refresh any wall.
The best part is how easy it is to switch fabrics — seasonal updates, new trends, or mood changes can be reflected anytime. You can create a beautiful symmetrical gallery above a sofa or bed, forming a cohesive design moment. It’s an affordable upgrade that still feels custom-crafted and luxurious.
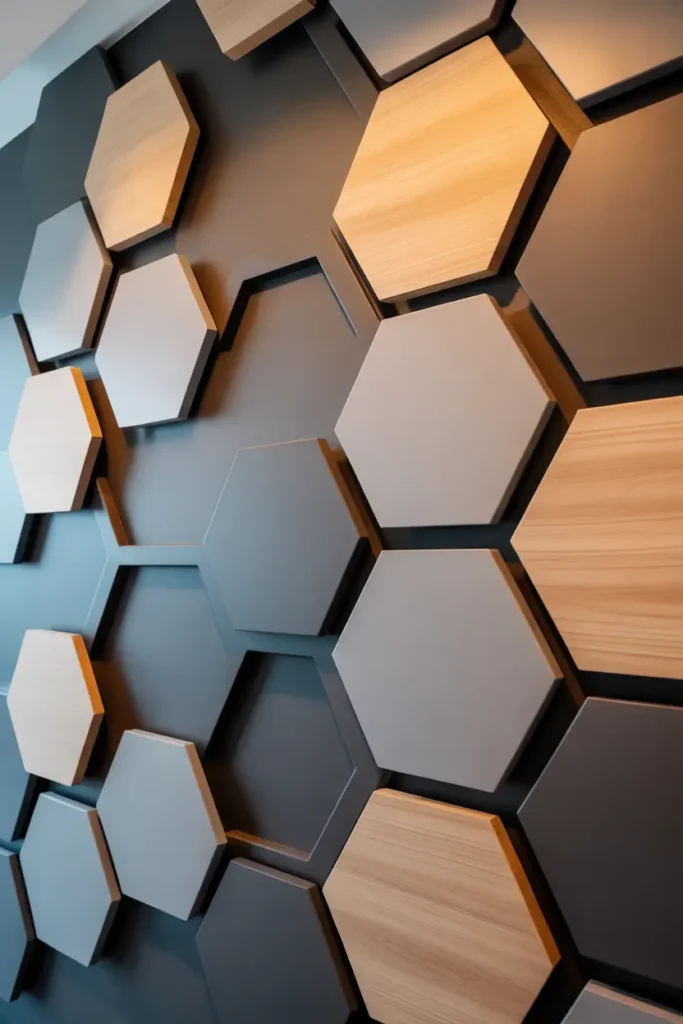
15. 3D Hexagon Wall Panels
Materials Needed:
- Foam or wood hexagon tiles
- Strong adhesive
- Measuring tools
Steps:
- Measure and mark layout on wall
- Attach hexagon pieces firmly
- Mix colors/textures for contrast
- Expand pattern as desired
Hexagon panels bring modern architectural flair into your home without needing a contractor. The geometric design adds texture and depth, making the wall visually dynamic. You can combine colors like white, black, gray, and wood tones to elevate a boring room into a high-style environment. It’s perfect for someone who loves minimal yet striking decor.
While the pattern looks complex, the installation is straightforward once you plan your layout. Adding LED strips or spotlights enhances the 3D effect beautifully. These panels also help with sound absorption — a bonus for bedrooms and media rooms. It’s a trending DIY wall art idea that gives professional-quality results at a fraction of the cost.
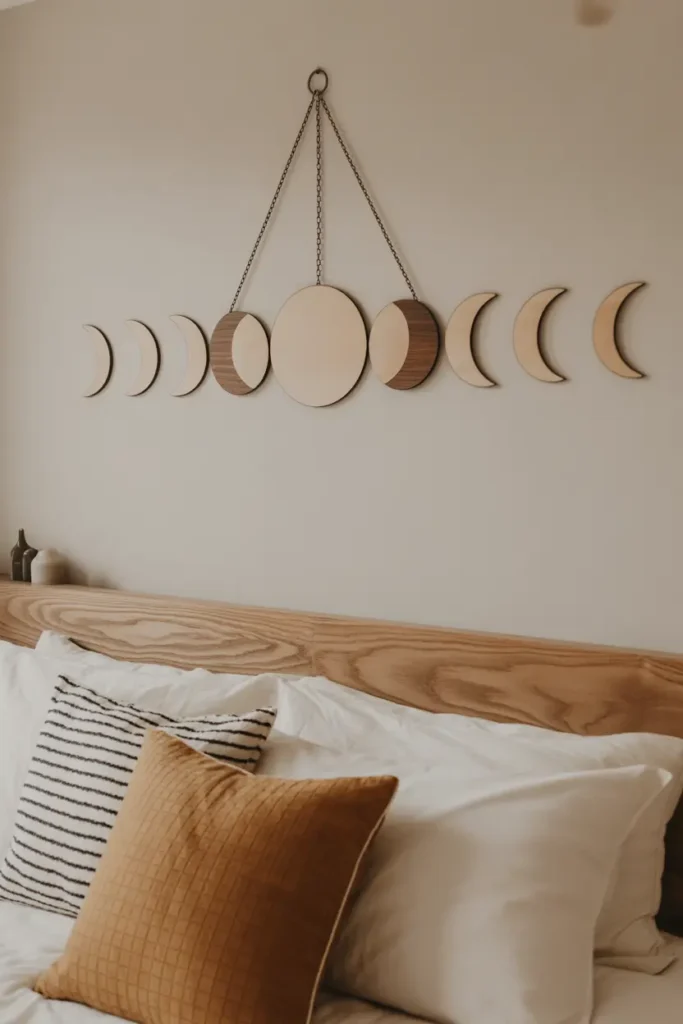
16. 3D Moon Phase Wall Hangings
Materials Needed:
- Thin wooden circles
- Matte black & white paint
- Chain or twine
- Hot glue + hooks
Steps:
- Paint each circle as a different lunar phase
- Attach them evenly on a chain
- Hang above headboard
- Adjust spacing for symmetry
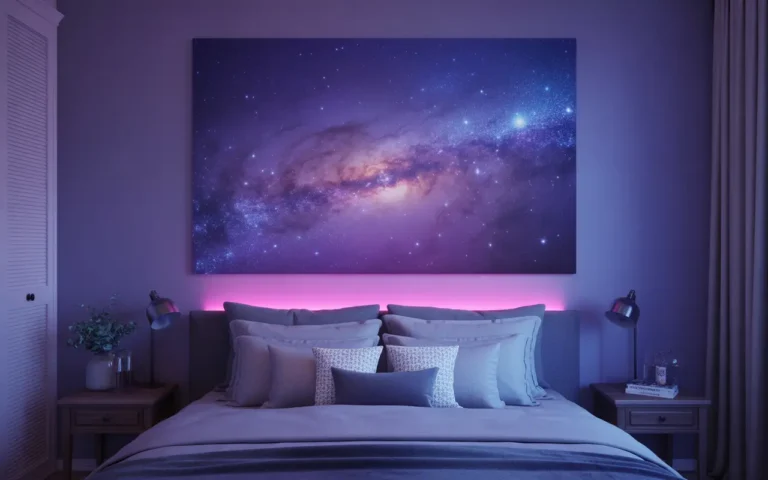
Moon phases make a beautiful and symbolic piece of wall art, especially for bedrooms where relaxation is key. The rounded shapes bring harmony and calmness into the space, making the wall feel thoughtfully designed rather than plain. You can go minimalist with a monochrome palette, or add touches of gold to elevate the look. The lightweight pieces make installation quick and renter-friendly — no heavy drilling required.
This DIY connects style with meaning. Moon phases represent change and growth — a perfect message for a cozy, personal space. You can scale the artwork to fill large empty walls or create a smaller strip for compact rooms. Paired with warm lighting, the lunar shapes cast soft shadows that enhance the dreamy effect. This modern boho DIY instantly refreshes bedroom decor while staying budget-friendly.
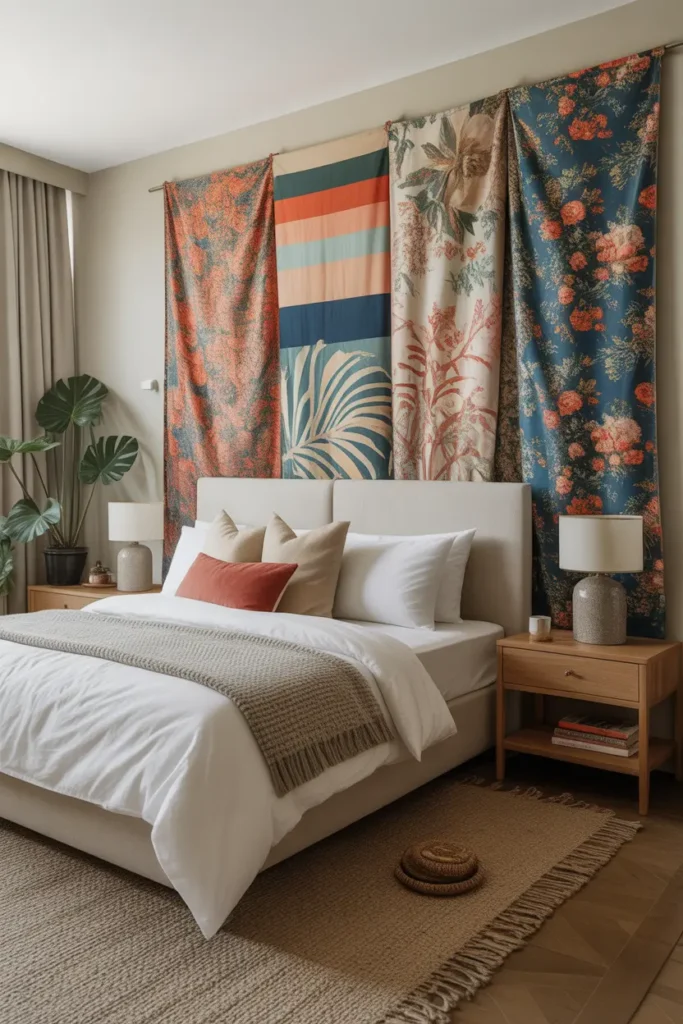
17. Fabric-Wrapped Canvas Art
Materials Needed:
- Fabric of choice
- Staple gun
- Canvases or cardboard panels
- Scissors
Steps:
- Wrap fabric tightly around the panels
- Staple edges securely
- Arrange panels in a row
- Mount using wall-safe strips
Fabric-wrapped canvas art is perfect for bedrooms needing a quick color refresh. You can use bold printed fabrics to introduce a theme or neutral textiles for a calming vibe. It allows you to experiment with styles without commitment — simply change the fabric when you redecorate. Oversized canvases visually anchor the bed area and create professional-looking design impact.
This DIY is lightweight, inexpensive, and ideal for renters wanting damage-free decor. You can mix different fabric textures for depth — linen, velvet, and cotton prints. Add matching throw pillows or curtains to tie everything together beautifully. With minimal effort, you get wall art that feels intentional, stylish, and perfectly customized to your bedroom.
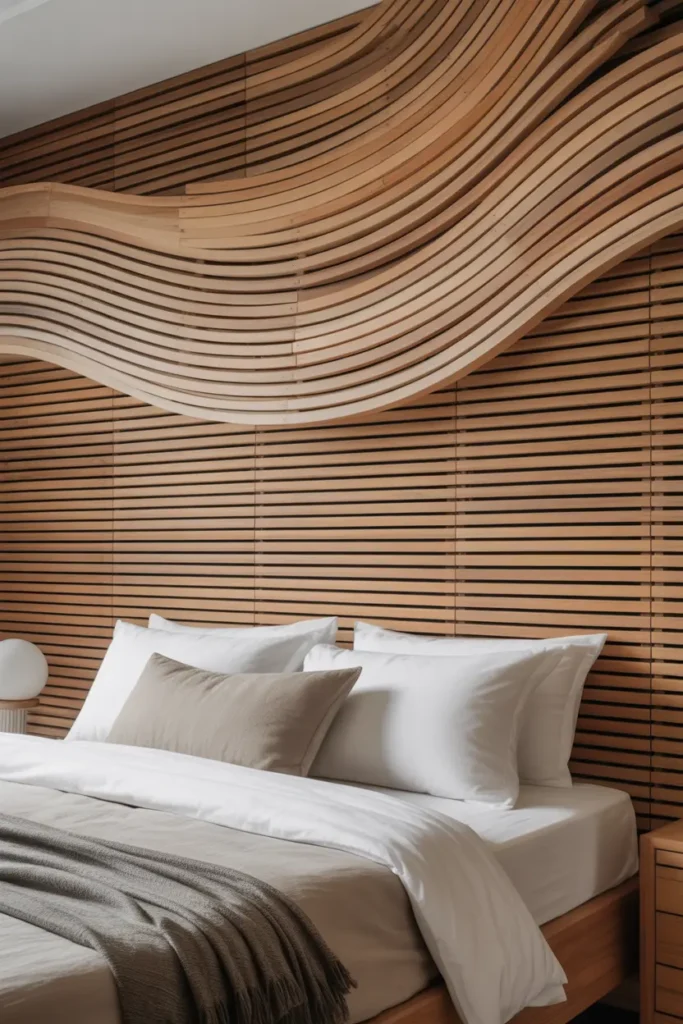
18. Layered Wood Wave Art
Materials Needed:
- Thin plywood strips
- Wood stain
- Jigsaw
- Wood glue + nails
Steps:
- Cut strips into flowing curves
- Sand and stain for a smooth finish
- Layer and glue onto a backing board
- Mount securely on wall
Wave wood art adds elegance and texture without overwhelming the room. The flowing lines are soothing, perfect for creating a restful bedroom atmosphere. Whether stained dark walnut for luxury or kept light for Scandinavian vibes, this wall art instantly increases visual richness. The shadows produced by each layer give the wall depth and movement.
Though it looks like designer art, the project is achievable with simple wood tools. You can control the width and flow of the waves to match your bed’s scale. Soft lighting enhances every curve and adds peaceful energy. This DIY delivers a modern, handcrafted aesthetic that turns your bedroom into a stylish retreat.
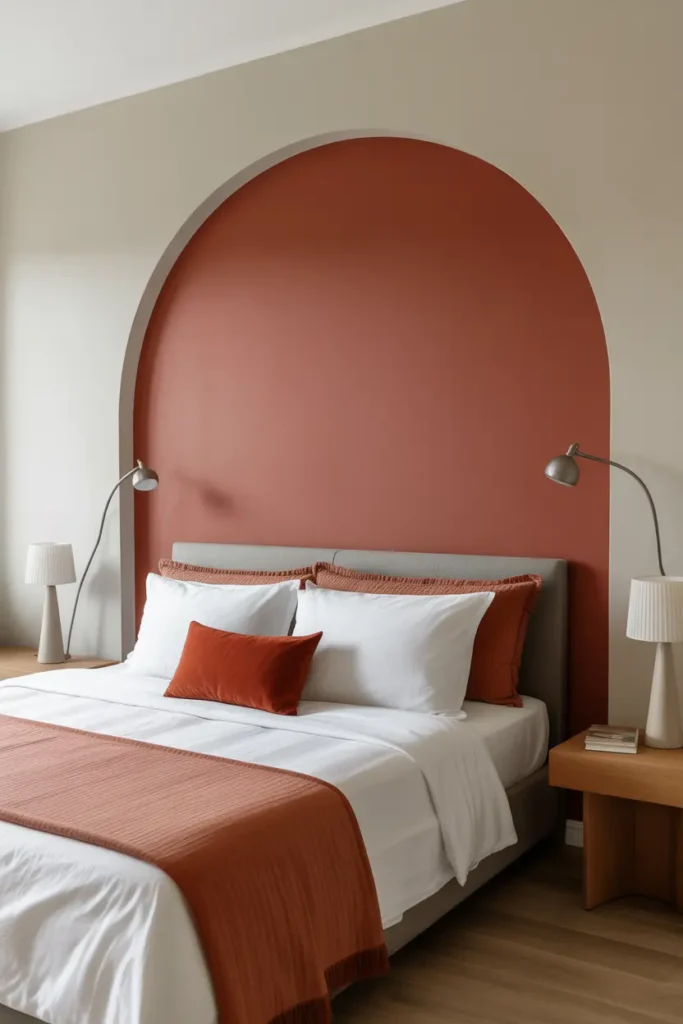
19. Painted Arch Accent Wall Art
Materials Needed:
- Paint in two colors
- Painter’s tape
- Measuring tools
- Roller + brush
Steps:
- Mark arch shape with a string + pencil
- Tape edges for clean lines
- Paint inside the arch
- Remove tape and tidy edges
Painted arches add instant architectural personality to plain walls. The curved form draws focus toward the bed and defines the space beautifully. You can choose earthy tones for warmth, muted pastels for softness, or bold shades for a designer look. It’s one of the easiest ways to transform bedroom style without buying décor.
This design also works great in small rooms — instead of crowding with furniture, the paint creates the illusion of structure. You can extend the arch wider than the bed for extra drama. Add framed pictures or sconces inside the arch to enhance the effect. With minimal materials, you achieve a chic statement feature that feels both cozy and modern.
20. Floating Shelf Gallery Wall
Materials Needed:
- Floating shelves
- Hooks + drill
- Frames + small dekor
- Level tool
Steps:
- Install shelves evenly
- Arrange art in layered heights
- Add small accessories for style
- Update seasonally or by theme
A gallery wall with shelves offers freedom to change decor anytime. You can display travel memories, inspirational quotes, or seasonal art without constantly drilling new holes. Shelves also add small storage space for candles, mini plants, and keepsakes that represent your style.
Keep a consistent color theme in frames for a harmonious look. The layered depth gives the wall a designer feel and helps break up large blank spaces. Whether your room leans modern, rustic, or boho, this flexible wall art idea grows with your creativity and personality.
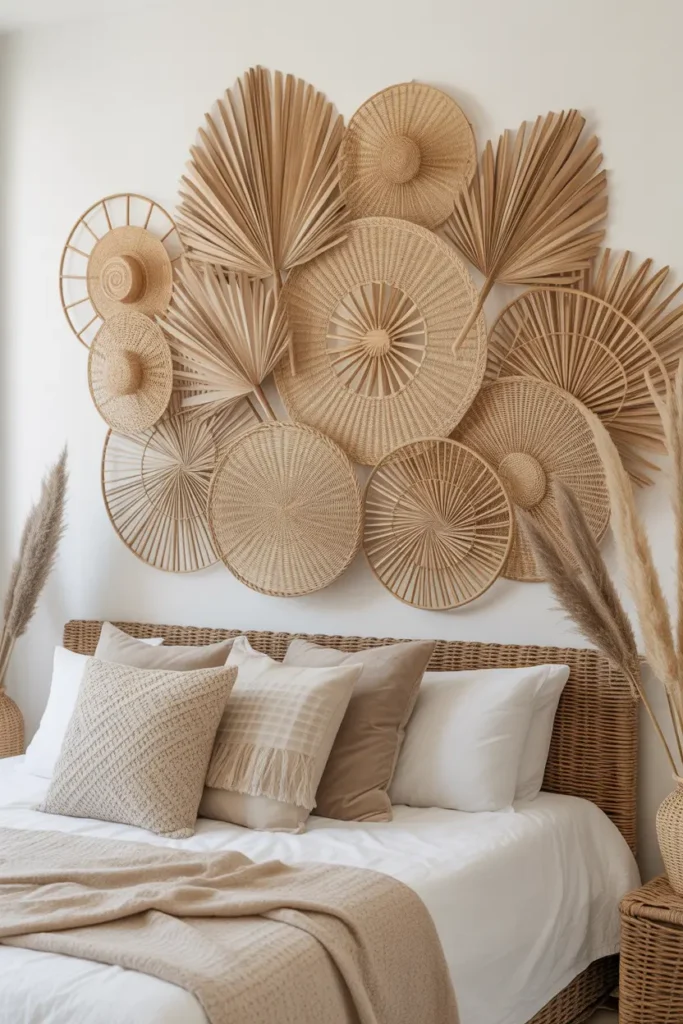
21. Rattan Fan Wall Art
Materials Needed:
- Rattan fans
- Nails or sticky hooks
- Optional: white paint or stain
Steps:
- Arrange layout on floor first
- Mount fans in mixed sizes
- Layer some pieces for depth
- Adjust spacing for balance
Rattan is a stunning material that instantly warms up any bedroom decor. Using handcrafted fans as wall art delivers coastal, bohemian charm with minimal effort. Each fan has a unique weaving pattern that stands out beautifully against plain-painted walls.
You can keep a natural look or paint a few pieces white for contrast. The lightweight nature of rattan makes installation easy and renter-safe. As a bonus, the fans match perfectly with indoor plants, jute rugs, and soft neutral bedding — creating a calm, airy space for relaxation.
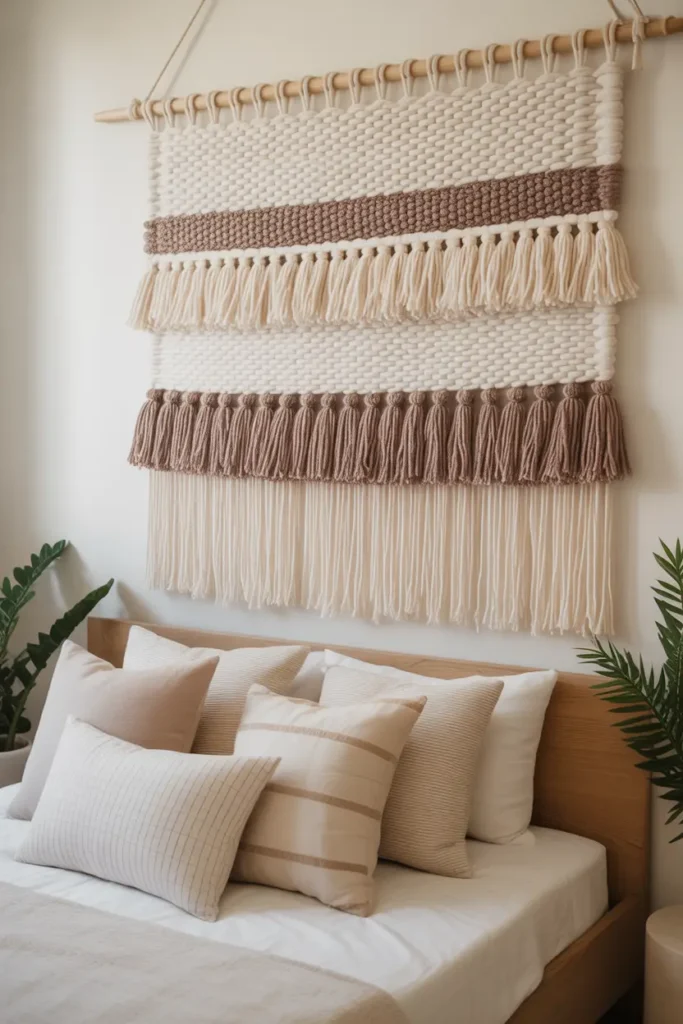
22. Textile Weaving Wall Art
Materials Needed:
- Yarn in different textures
- Weaving loom (or cardboard frame)
- Wooden dowel
- Scissors
Steps:
- Create pattern with rows + knots
- Add tassels for movement
- Tie top to dowel
- Hang with hooks
Weaving wall art feels cozy and artistic — ideal for bedrooms where comfort matters most. You can mix thick wool, braided yarn, and woven ribbons to create rich texture that pops on the wall. Handmade details add emotional value and uniqueness.
Choose calming colors like beige and cream for restful vibes, or add touches of mustard, rust, or sage green for trendy accents. Because the piece is soft and light, it is renter-proof and easy to reposition. This DIY brings handcrafted elegance and warmth right above your bed.
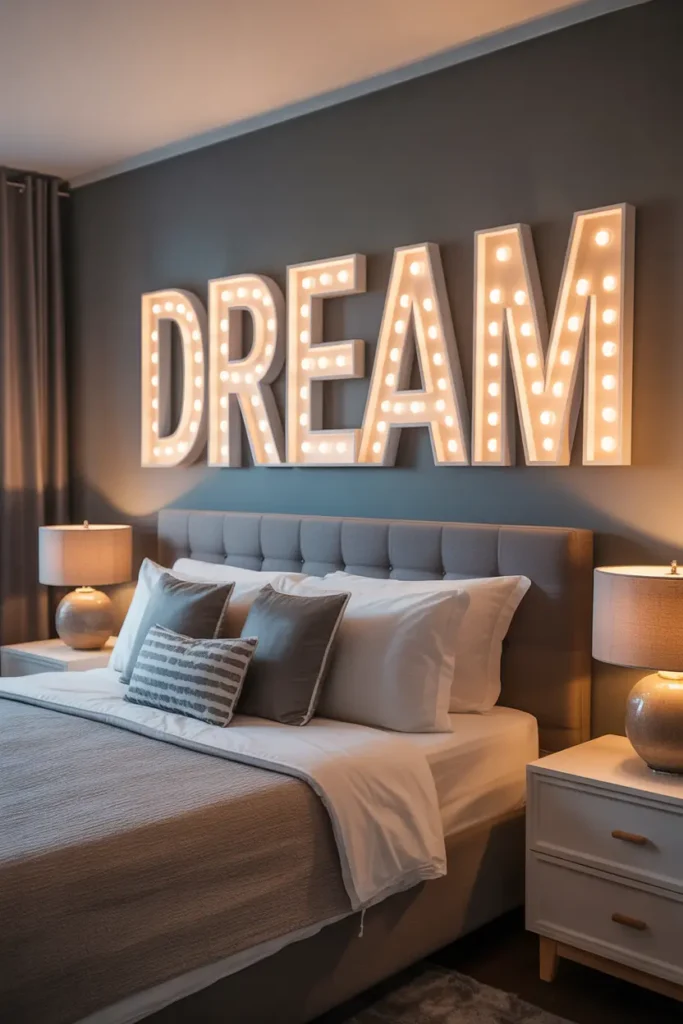
23. Illuminated Word Art
Materials Needed:
- MDF letter cutouts
- LED strip lights
- Strong tape or hot glue
- Hooks
Steps:
- Attach LED strips behind letters
- Mount letters using hooks
- Hide wires for clean look
- Light up and enjoy
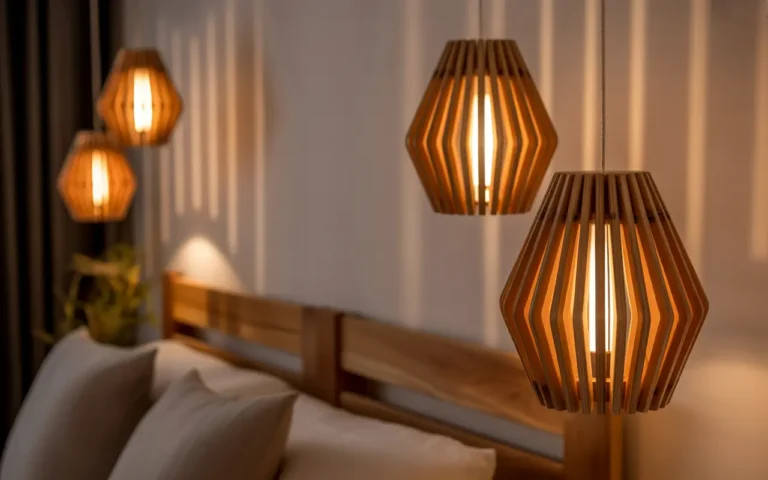
Word art adds a personal message to your bedroom while doubling as soft ambient lighting. It becomes a focal point both in daylight and at night. Inspirational words remind you to unwind and recharge in a positive atmosphere.
You can choose elegant cursive fonts for a modern luxe look or block letters for a playful style. LED lights offer energy-efficient illumination ideal for nighttime reading or relaxing. It’s stylish, meaningful, and perfect for creating a cozy vibe without traditional lamps.
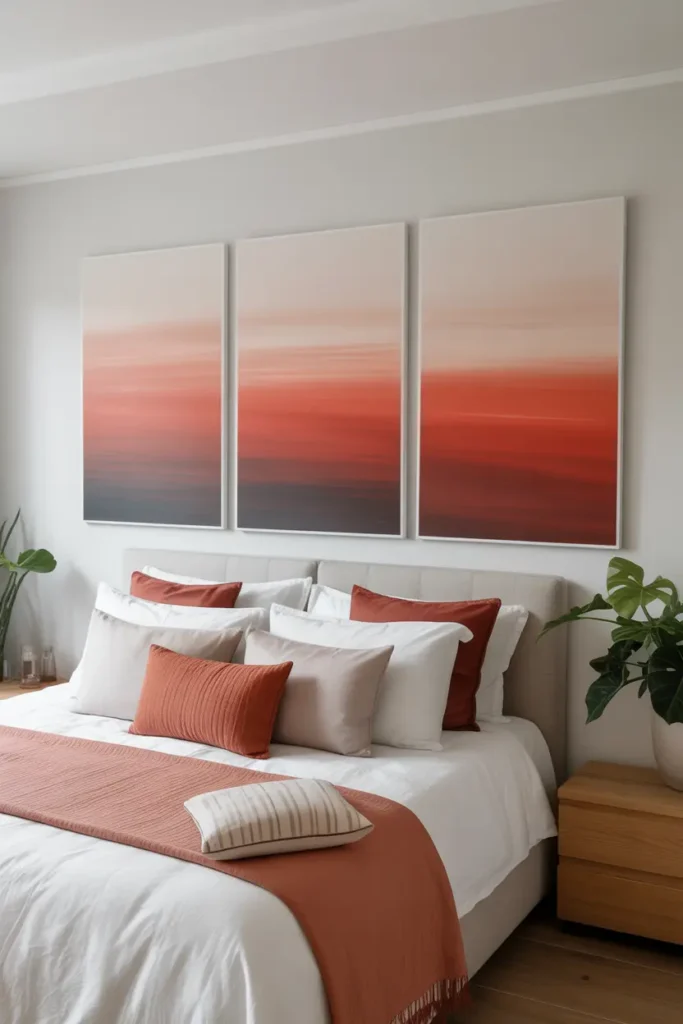
24. Gradient Painted Canvas Set
Materials Needed:
- Acrylic paint in 3–4 shades
- Canvases
- Sponge + brush
- Painter’s tape
Steps:
- Tape edges for clean panels
- Blend paints from light → dark
- Hang evenly spaced above bed
- Seal for long-lasting color
Gradient canvas art adds soothing color movement across the wall. Whether you choose ocean blues, warm neutrals, or sunset tones — the transition creates visual comfort ideal for bedrooms. It feels artistic yet minimal, giving balance and harmony to the space.
This DIY is mess-free and beginner-friendly. You can create extra depth by adding metallic touches or mixing vertical and horizontal gradients. It’s a beautiful way to bring your room’s color scheme together at low cost — while looking like a designer piece.
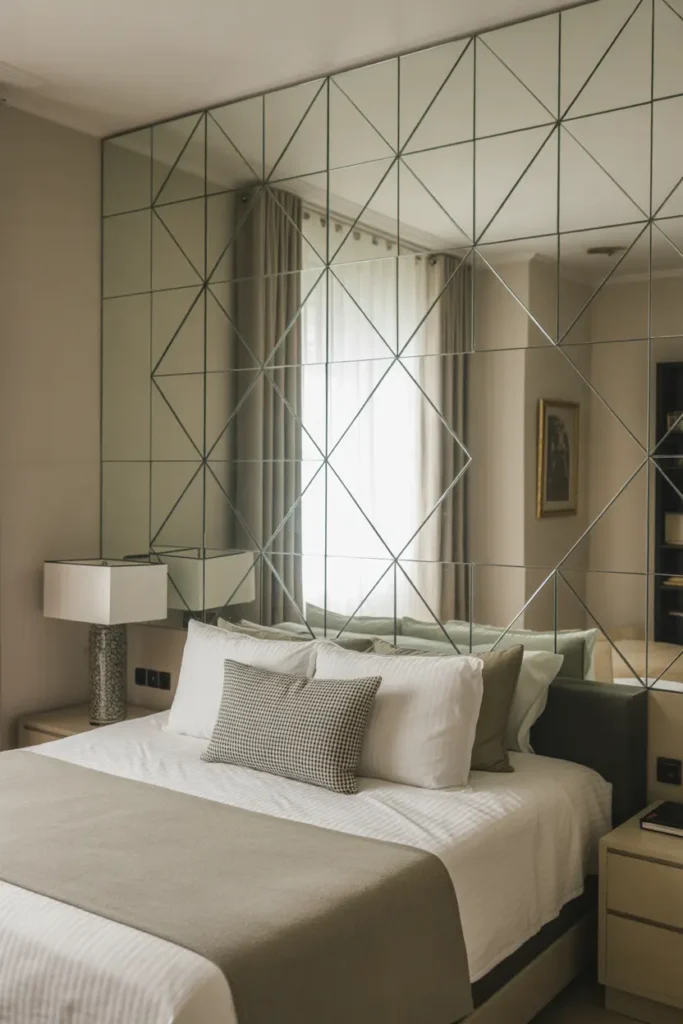
25. Mirror Tile Pattern Art
Materials Needed:
- Small mirror tiles
- Strong adhesive
- Ruler + pencil
- Level tool
Steps:
- Create layout on paper
- Attach tiles one by one
- Ensure perfect alignment
- Clean surfaces for shine
Mirror art instantly opens up a room by bouncing available light. In bedrooms, it feels luxurious without being overwhelming. You can design anything from diamonds to zigzags — whatever suits your style. The pattern creates rhythm on the wall and draws the eye upward.
Even in smaller bedrooms, this DIY makes a dramatic difference. The mirrors pair beautifully with both modern and classic furnishings. Plus, you can always change the pattern or expand it later as your style evolves — a long-lasting upgrade with stunning results.
Conclusion
With these DIY bedroom wall art ideas, you can create a cozy and visually impressive space without spending much. Each project allows you to personalize your room while adding texture, color, and charm to every corner. Try a few designs, mix up trends, and keep updating your walls to match your evolving style. The best decor is the one that feels like you — and with DIY, your bedroom will always feel fresh, inviting, and uniquely yours.