24 DIY Room Decor Hacks for a Cozy Vibe
Transforming your bedroom doesn’t have to be expensive or complicated. With the right DIY room decor hacks, you can refresh your space, improve comfort, and express your personal style. These ideas are designed to be beginner-friendly and budget-conscious while still delivering that cozy, Pinterest-worthy aesthetic everyone loves. Each project includes a material list and easy bullet-point steps so you can recreate them without stress. Whether your bedroom is big or small, these DIY home decor upgrades will make it look inviting, stylish, and uniquely yours.
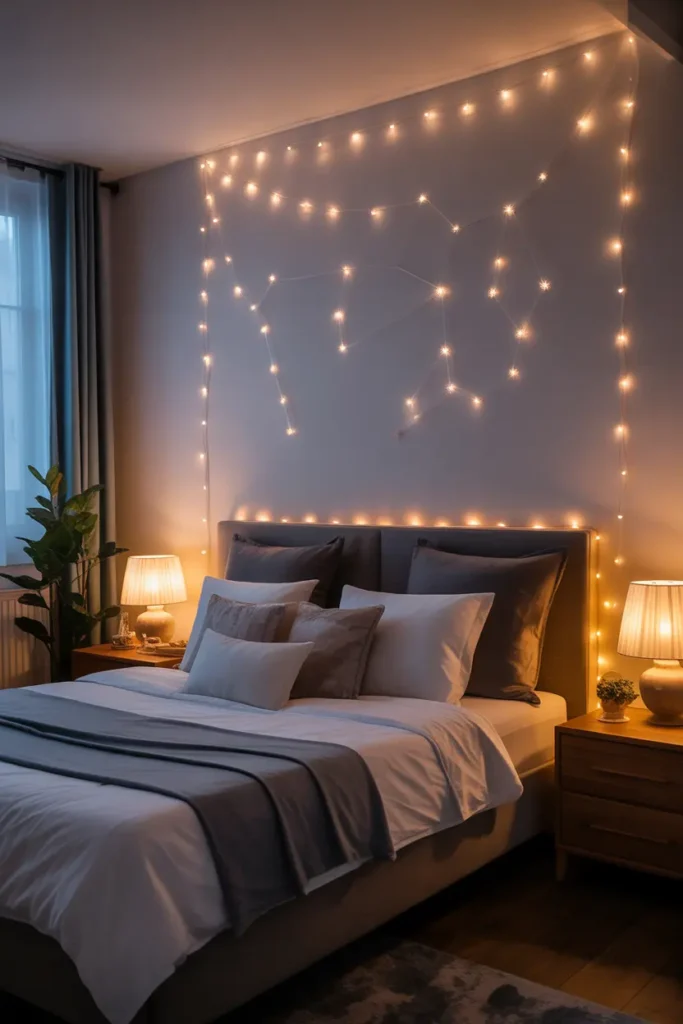
1. DIY LED Star Headboard
Materials Needed:
- LED string lights
- Plywood sheet
- White paint
- Drill
- Zip ties
Steps:
- Paint the plywood white and let it dry
- Drill small holes in star patterns
- Push LED lights through each hole
- Secure with zip ties at the back
- Mount behind the bed as a glowing headboard
This DIY headboard creates a magical feature wall behind your bed, perfect for anyone who loves a cozy nighttime feel. The LED light pattern adds soft illumination without harsh lamps, making the bedroom more relaxing. It’s especially great for smaller rooms because it visually expands the space and becomes the room’s focal point. This project can be customized with constellations you love—whether real star patterns or creative shapes that match your aesthetic. It also works amazingly for teens’ rooms, craft lovers, and anyone wanting a personal, handcrafted touch.
You can paint the board in different colors—pastel pink for a soft look, charcoal for a moody style, or a glossy finish for modern bedrooms. If you want extra texture, add thin molding around the edges to frame the “sky.” This DIY decor helps in creating a hotel-like bedroom ambiance without expensive fixtures. And because the lights consume very little energy, you can keep them glowing all night. With just a few tools and creativity, your bed area can turn into a relaxing escape filled with warm star vibes.
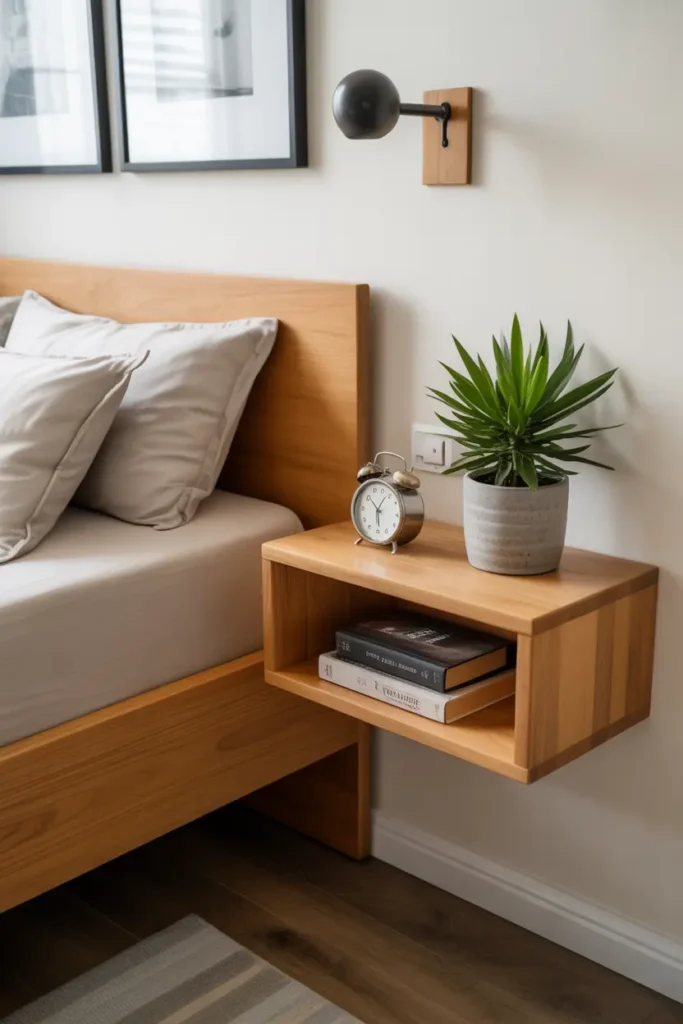
2. Floating Shelf Nightstand
Materials Needed:
- Wooden plank
- Wall brackets
- Screws + drill
- Sandpaper
- Stain or paint
Steps:
- Cut wood to size and sand smooth
- Stain or paint as desired
- Attach brackets to wall
- Fix shelf onto brackets
A floating nightstand is the smartest bedroom DIY for decluttering and giving the space a modern upgrade. It creates a cleaner visual flow because the furniture doesn’t touch the ground. This trick is especially useful in tiny bedrooms where every inch matters. The shelf provides just enough space for your nighttime essentials while keeping everything within reach. The best part is that you can install it at your desired height, making it perfect for low platform beds or taller mattresses.
Customization options are endless. Choose rustic wood for a farmhouse room, glossy white for minimalist decor, or bold colors for a creative vibe. You can even add under-shelf LED strips to create soft bedside lighting. The floating design also makes cleaning easier since there’s no bulky furniture blocking the floor. Whether you’re going for cozy, chic, or Scandinavian-style bedrooms, this simple shelf transforms your bedside area into a neat and inviting corner.
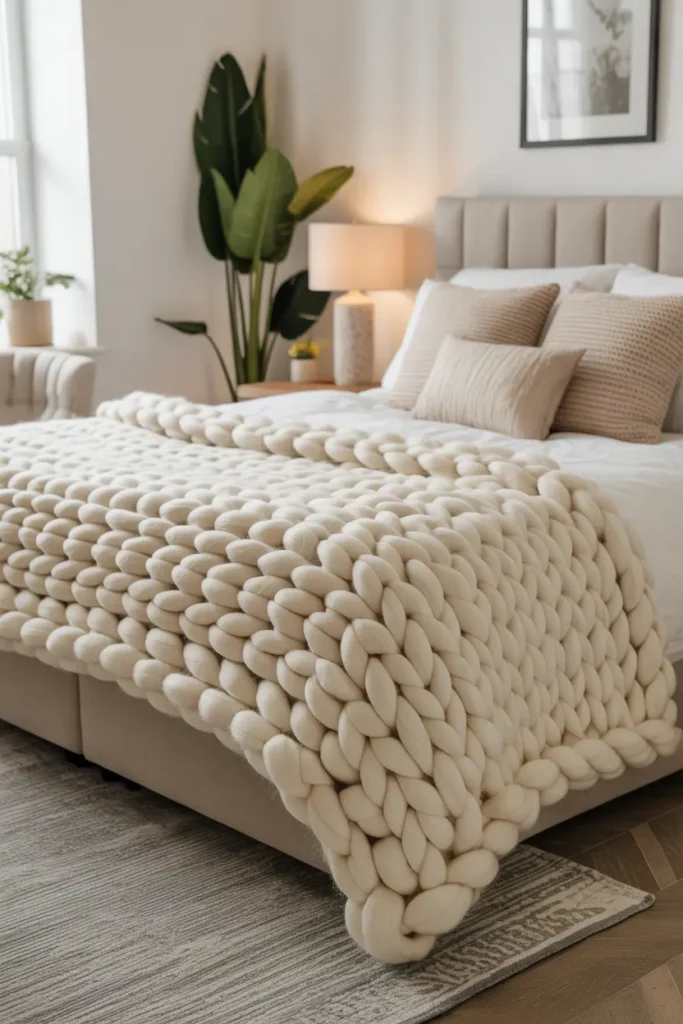
3. Cozy Chunky Knit Bed Throw
Materials Needed:
- Chunky yarn
- Large knitting needles or arm-knitting technique
Steps:
- Cast on stitches depending on blanket width
- Knit rows using arm or large needles
- Bind off and trim loose ends
Chunky knit blankets are a Pinterest-favorite for a reason—they elevate the entire room with minimal effort. Draping one over your bed adds a warm and layered feel instantly. If you choose neutral colors like cream, tan, or grey, the texture stands out beautifully and blends with nearly any decor style. This project also lets you control size and color, making it easy to personalize for your room. Arm-knitting is a fun, relaxing craft that requires no previous experience and can be completed in just an afternoon.
Beyond visual appeal, chunky throws serve a practical purpose. They add extra warmth during winter and make evenings in bed super comfy. When paired with pillows and layered bedding, they bring a high-end interior look similar to luxury hotels and décor magazines. You can even make mini versions for chairs or add matching pillow covers for a cohesive design. This DIY doesn’t just upgrade your bed—it transforms your whole room into a cozy retreat.
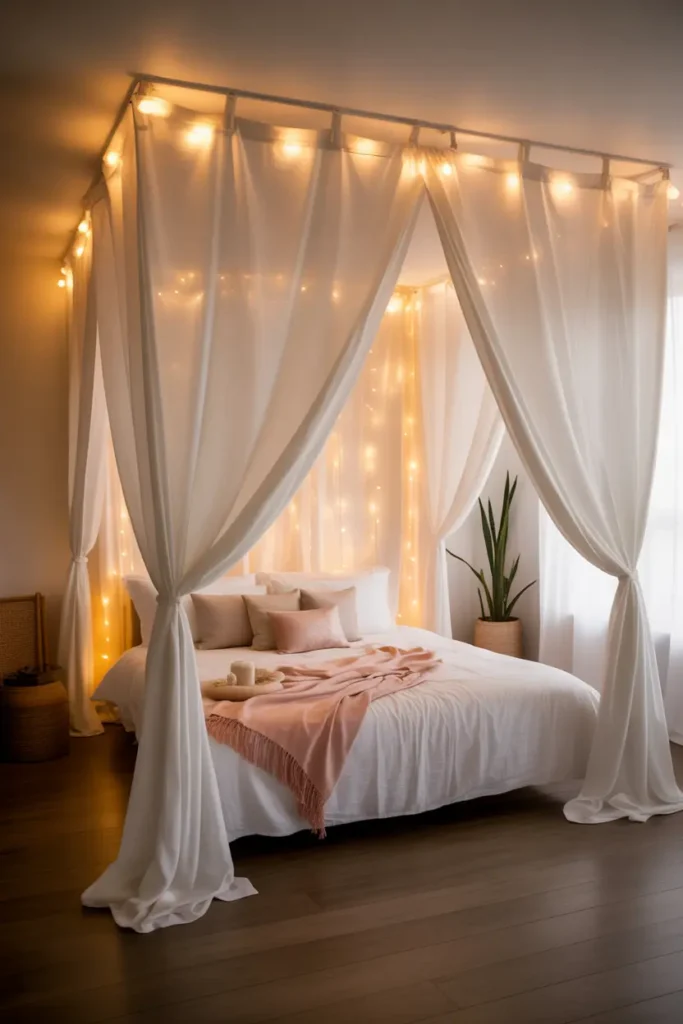
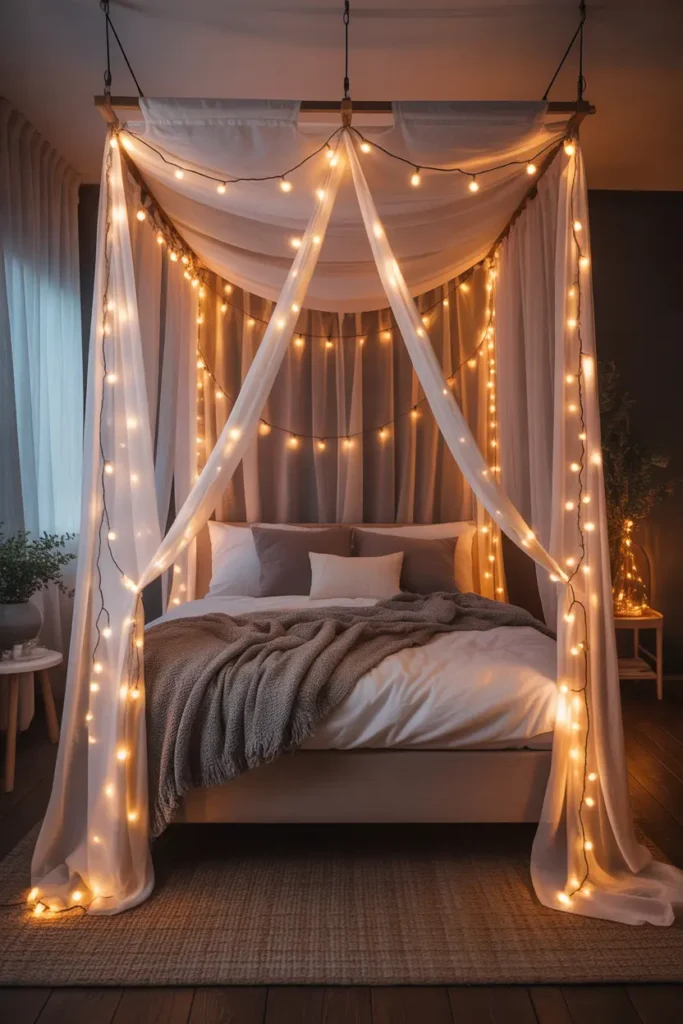
4. Fairy Light Canopy Drapes
Materials Needed:
- Sheer curtains
- Curtain rod or ceiling hooks
- Fairy lights
- Wall-safe clips
Steps:
- Install rods/hooks above the bed
- Hang sheer curtains
- Weave fairy lights through or behind fabric
- Secure neatly around bed
Fairy light canopies transform a plain bedroom into a calming sanctuary. The soft lighting reduces harsh shadows, creating a soothing space ideal for reading or relaxing before sleep. It’s one of the most affordable ways to make your bed feel special—like a floating cloud illuminated with stars. The layering of fabric and lights produces a warm and intimate effect, making even a simple mattress look like a cozy dream zone. This project is especially loved in teen rooms, apartments, and boho-style homes.
You can customize the layout depending on your bed frame. Extend the drapes all the way to the floor for a princess-style canopy or pin them only to the corners for a floating top frame. Using warmer lights creates a calmer environment, while cool lights add a modern, crisp look. This DIY also helps visually define the sleeping area in studio apartments. With minimal cost and effort, you can create a personal retreat that feels luxurious every night.
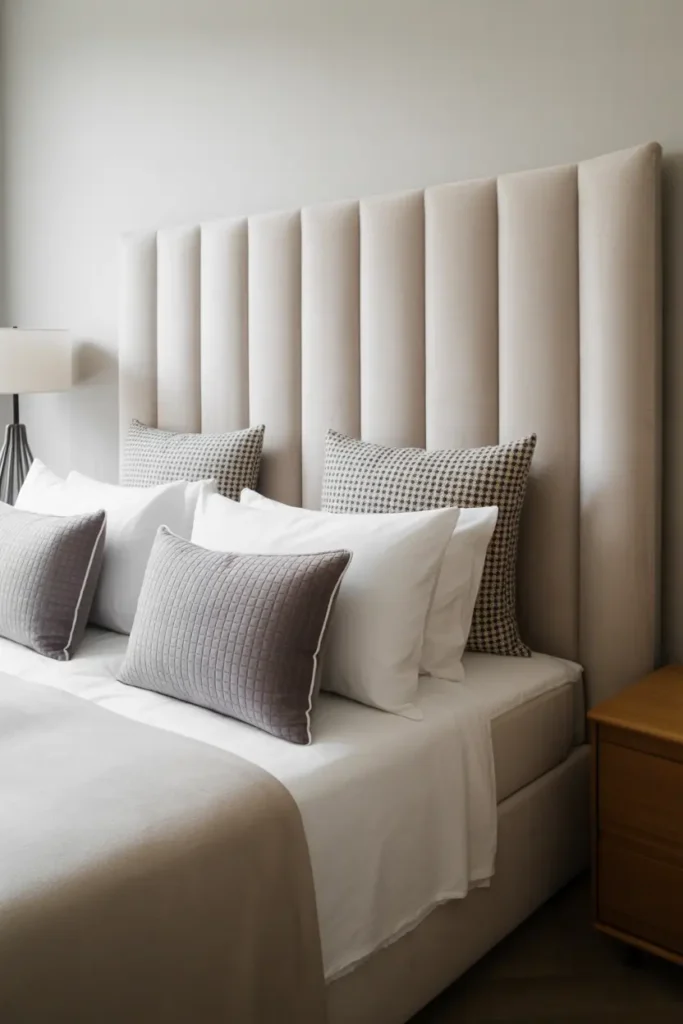
5. DIY Fabric-Covered Headboard
Materials Needed:
- Plywood
- Foam padding
- Staple gun
- Fabric of choice
- Mounting brackets
Steps:
- Cut plywood to size
- Attach foam on top
- Wrap with fabric and staple neatly
- Mount behind the bed
A fabric headboard instantly elevates your bedroom by adding texture and softness. It serves both comfort and style—you can lean back comfortably while reading, and it becomes a beautiful statement piece in the room. Velvet gives a luxe hotel feel, linen feels natural and calming, while printed fabric adds playful personality. Even if the rest of the room is simple, a well-designed headboard is enough to make the bed look expensive and thoughtfully styled.
You can play with shapes too—arched, winged, or even panel-style headboards are becoming popular. Upholstered pieces are usually pricey in stores, but this DIY saves a lot while giving you full control over the look. Add brass nailheads, tufting buttons, or trims to level up the design. This project is a great beginner-friendly way to completely update your room without changing any major furniture.
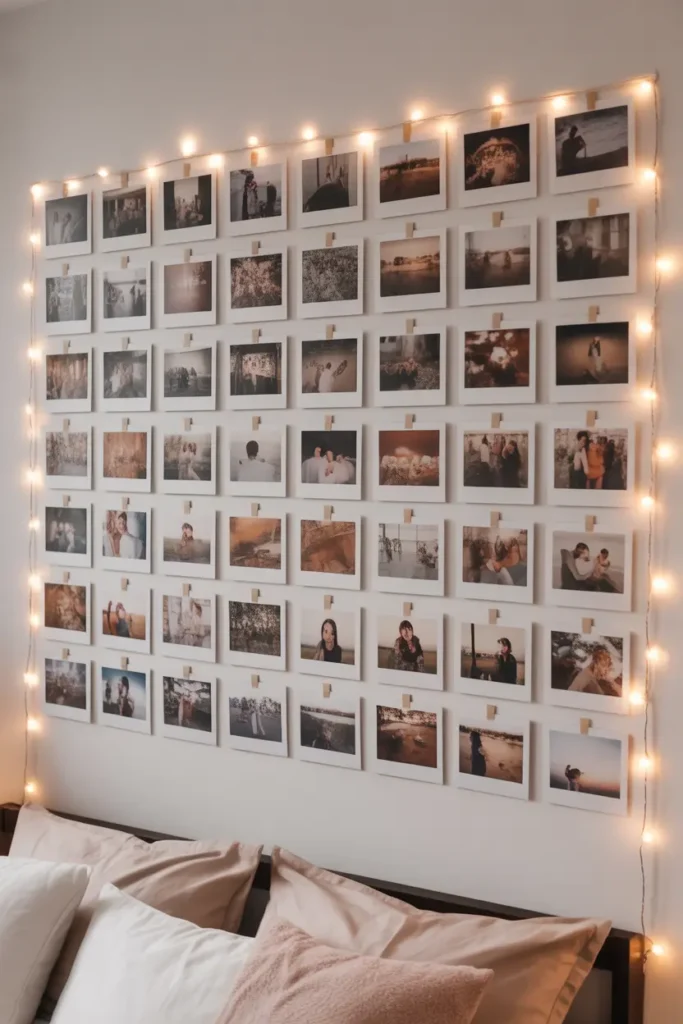
6. Polaroid Photo Wall Grid
Materials Needed:
- Polaroid or printed photos
- Washi tape or mini clips
- Grid template or ruler
- String lights (optional)
Steps:
- Print and trim aesthetic photos
- Plan a grid using tape or pencil marks
- Mount photos neatly in rows
- Add lights if desired
A photo grid is a sentimental way to decorate your bedroom without spending much. Instead of random photo placement, the grid keeps the wall clean and polished while still feeling personal. You can feature memories, travel photos, favorite quotes, or aesthetic prints that inspire you daily. The shape can be square, heart-shaped, or framed above the bed for more structure. This DIY turns your wall into a story that grows with you.
Wall-safe tapes ensure your decor won’t damage paint, making this project great for renters or teens. You can easily update photos anytime, switching them out seasonally or whenever you want a fresh look. Adding a slim LED strip or fairy lights around the grid enhances the cozy aesthetic, especially at night. This decorating approach blends creativity with emotional connection—perfect for making your bedroom feel truly your own.
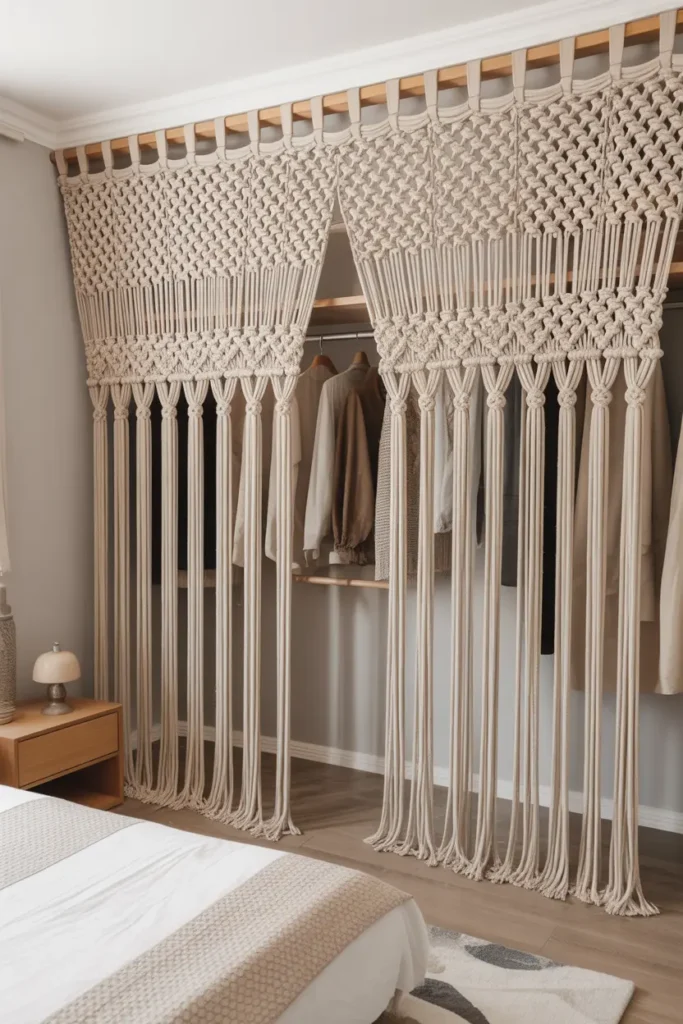
7. DIY Macramé Closet Door Hanging
Materials Needed:
- Macramé cord
- Wooden dowel
- Scissors
- Ceiling hooks
Steps:
- Tie cords onto dowel
- Create square knots or patterns
- Trim ends evenly
- Hang using hooks above closet
Replacing a heavy closet door with macramé instantly makes the room feel more open and stylish. It allows you to hide clutter without creating a bulky visual barrier. This soft, airy accessory enhances the room’s texture and brings artisan charm to the decor. The neutral color blends perfectly with boho, minimalist, or Scandinavian styles. If you’re new to macramé, you can start with simple knots and gradually add more intricate sections to customize the final look.
One of the best parts about this DIY is that you can adjust the width and length based on your closet size. Add beads or dip-dye the lower ends to match your color palette. The curtain-style hanging also makes it easier to access your closet without dealing with squeaky doors. It’s an affordable way to transform a functional area into a decorative art feature that contributes to a cozy atmosphere.
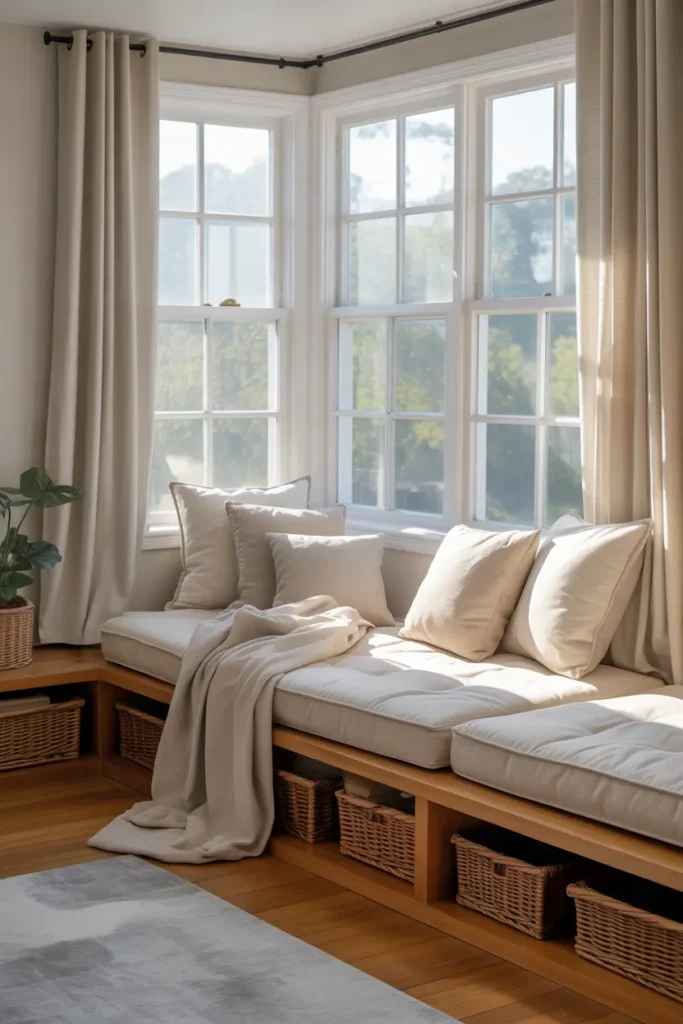
8. DIY Window Seat Cushion
Materials Needed:
- Foam cushion
- Plywood or existing bench
- Fabric
- Staple gun
- Decorative pillows
Steps:
- Cut foam to fit bench size
- Wrap with fabric and staple underneath
- Place cushion on bench and add pillows
Window seats give unused corners new purpose, turning them into personal comfort zones. A cushioned bench by the window becomes an ideal place for reading, studying, or just enjoying sunlight. This DIY brings softness to your bedroom while maximizing usable space. It enhances the room’s layout by making the window the focal point. If your bedroom lacks space for a chair or lounge area, this solution provides seating without occupying extra floor area.
You can make the cushion colorful for a lively feel or neutral for a calm vibe. Add storage bins or drawers under the bench to keep blankets and books neatly hidden. Layering pillows increases the cozy look and offers good back support. This DIY is perfect for adding personality and quiet relaxation to the bedroom—making mornings brighter and evenings more peaceful.
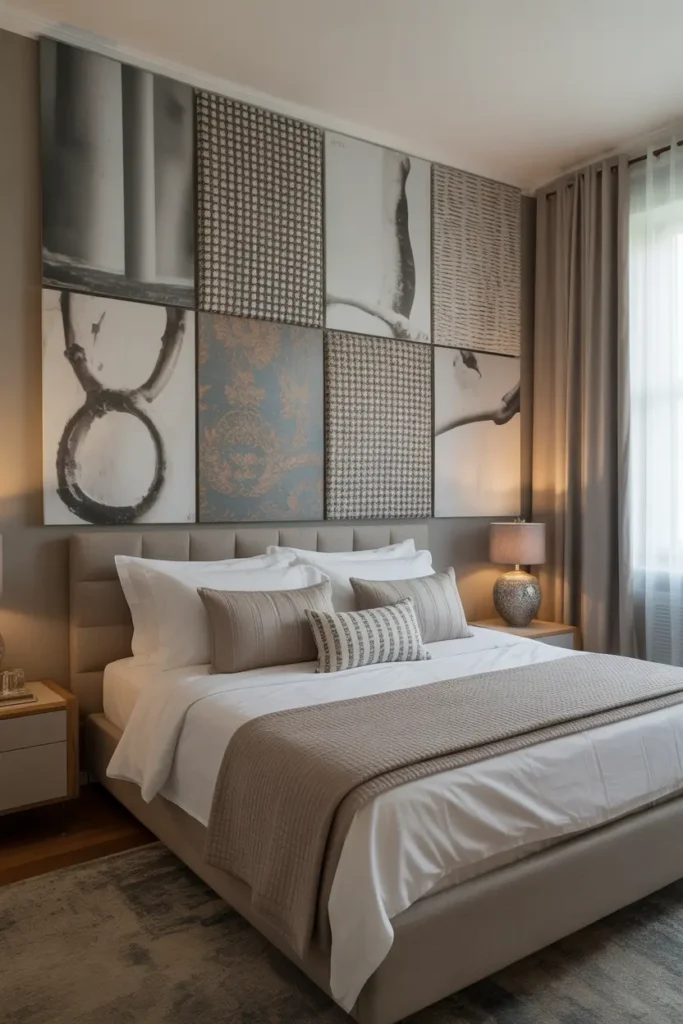
9. DIY Framed Fabric Wall Panels
Materials Needed:
- Fabric pieces
- Foam boards
- Wood trims (optional)
- Staple gun
- Mounting tape
Steps:
- Wrap boards with fabric
- Staple securely
- Add trim frames if desired
- Mount in grid pattern
Fabric wall panels add color, patterns, and softness to the bedroom without painting or wallpapering. This DIY is especially useful for renters, because it updates the room while staying fully removable. You can design your own arrangements: two tall panels behind each side of the bed, or three equal squares as a gallery look. The texture reduces echo, making the room quieter and more restful — a huge bonus in apartments and dorms.
Choose fabrics that reflect your personality: velvet for elegance, linen for simplicity, bold prints for artistic flair. Switching fabrics seasonally keeps your room always in style without major cost. The panels make even plain furniture appear more stylish and high-end. It’s a perfect DIY when you want your wall decor to feel luxurious while remaining budget-friendly and easy to create.
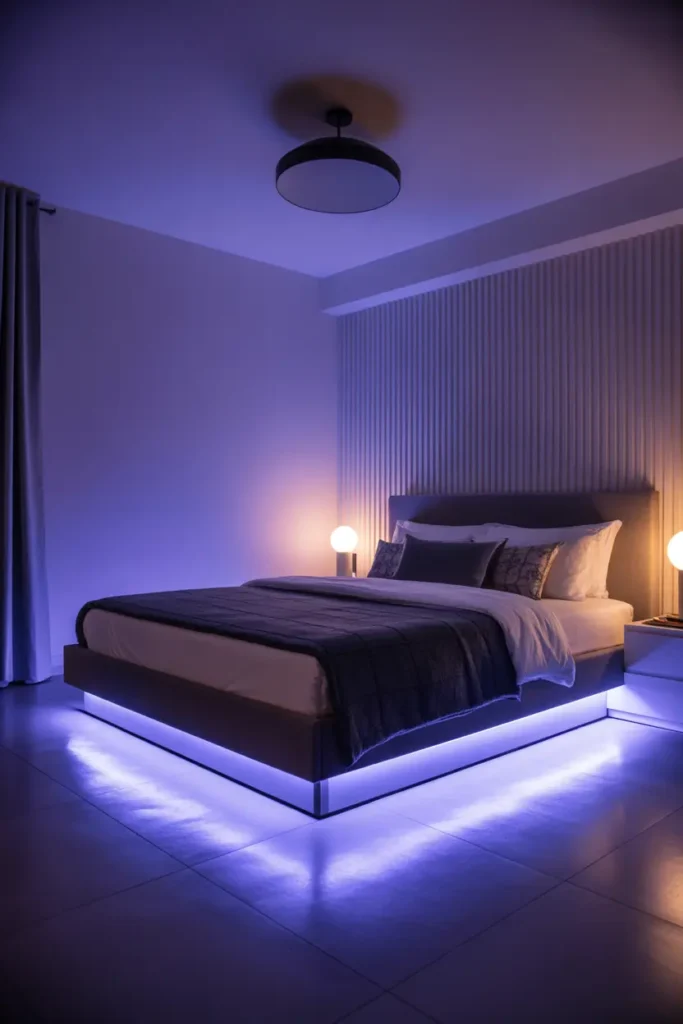
10. DIY Under-Bed Mood Lighting
Materials Needed:
- LED strip lights
- Adhesive clips or tape
- Scissors
- Remote controller
Steps:
- Clean surface under bed
- Stick LED lights around edges
- Plug in and hide cables
- Control light with remote
Under-bed lighting is a simple upgrade that instantly makes your bedroom look more premium. It creates a futuristic floating illusion and replaces bright overhead lighting at night. You can choose warm white for cozy comfort or color-changing lights for fun mood effects. This lighting hack is useful for late-night movement — no more bumping into furniture when you wake up in the dark!
Since the LED strips are energy-efficient, you can leave them on while relaxing, reading, or watching videos on your phone. Stick-on light strips are renter-friendly and removable, making them ideal for any bedroom setup. Pair them with a clean, minimal bedroom style for a sleek look that feels right out of a designer home.
11. DIY Branch Curtain Rod

Materials Needed:
- Sturdy tree branch
- Sandpaper
- Wall brackets
- Screws + drill
- Curtains
Steps:
- Clean and sand branch smooth
- Cut to fit window width
- Attach brackets securely
- Hang curtains from branch
A branch curtain rod is a free and creative way to add natural beauty to your bedroom. The organic shape introduces earthy decor without buying expensive hardware. It works great with boho, farmhouse, and nature-inspired themes. Pair it with sheer curtains for a soft flow or textured fabric for a stronger statement. This DIY balances unique design with practicality while making windows more interesting and inviting.
You can also decorate the branch with fairy lights or mini plant hangers for added charm. Painting it white or gold creates a more polished look if you prefer modern decor. This project connects outdoor elements with your bedroom environment, boosting that cozy, grounded feeling. It’s an easy upgrade with a huge visual payoff — and totally one-of-a-kind.
12. DIY Drawer Under-Bed Storage Boxes

Materials Needed:
- Old drawers or wood boards
- Wheels
- Handles
- Paint or stain
Steps:
- Attach wheels to drawer bottom
- Add handle for easy pull
- Paint or stain drawers
- Slide under bed for storage
Hidden storage is one of the best ways to maintain a clean and peaceful bedroom. Under-bed drawers take advantage of unused space and reduce clutter that usually ends up in corners or inside overflowing closets. These sliding bins are perfect for seasonal items, extra bedding, and personal belongings you want close but not visible. It’s a practical DIY that keeps your room looking neat and airy.
You can customize each drawer to match your decor — rustic wood for farmhouse style, colorful paint for kids’ rooms, or sleek white for a minimalist design. Adding labels helps keep everything organized. Even in very small bedrooms, this hack maximizes storage while preserving style. You’ll love how clean and spacious your room feels once everything is smartly tucked away.
13. DIY Wall-Mounted Nightstand Shelf

Materials Needed:
- Wood board
- Wall brackets or L-hooks
- Screws + drill
- Sandpaper
- Paint or stain
Steps:
- Sand wood board for smooth finish
- Paint or stain to match room
- Mount shelf beside bed
- Style with small essentials
This DIY shelf helps control bedside clutter while enhancing the room layout. Floating furniture visually expands floor space, making the bedroom feel bigger and cleaner. It’s especially useful in smaller rooms where traditional nightstands take up too much room. You can build it to any size — wide enough for a lamp, or just small enough to hold your phone and glasses. The design is customizable, so you can choose modern straight edges or rounded corners for a softer look.
To complement the decor, you can hang a framed photo or wall sconce above the shelf for a cozy bedtime corner. Since it attaches firmly to the wall, it keeps items safe and stable. Many people also add cable clips underneath to hide charging wires for a tidy finish. This functional DIY proves that beautiful decor can also be practical and space-saving.
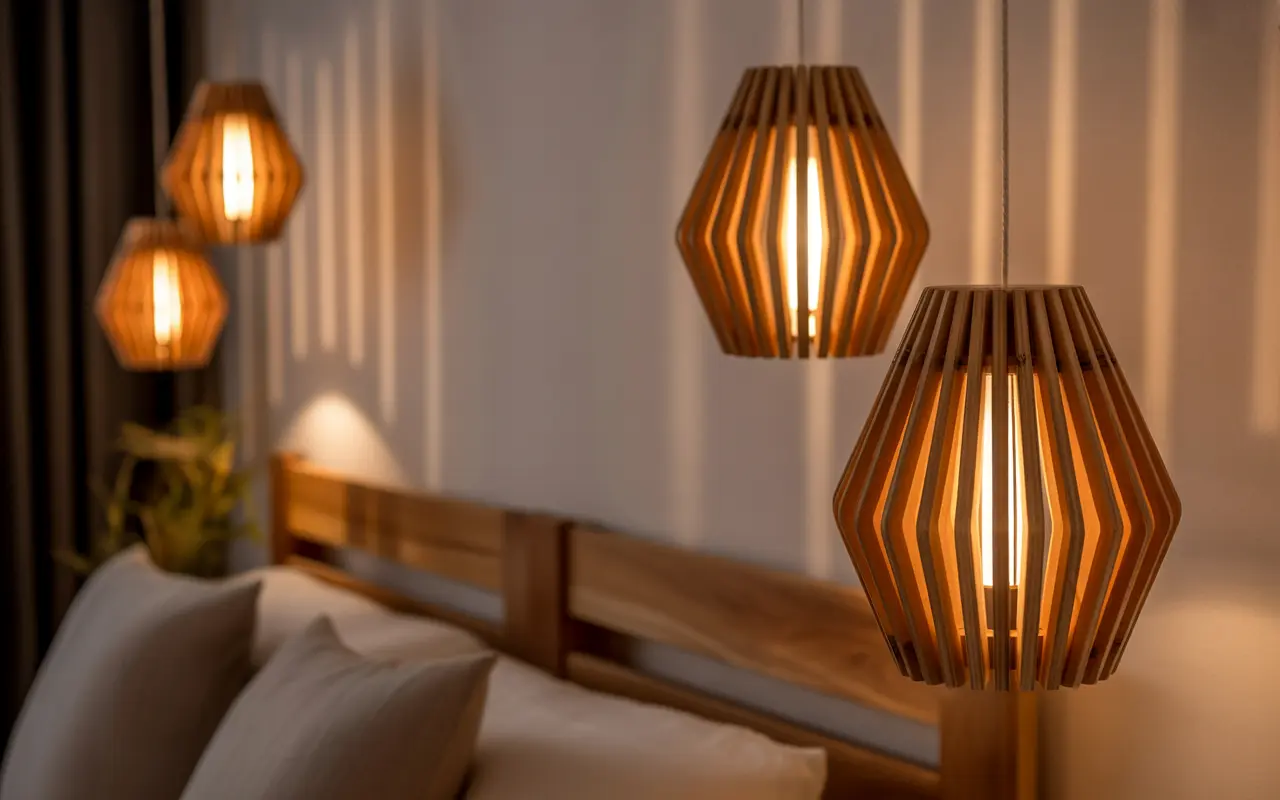
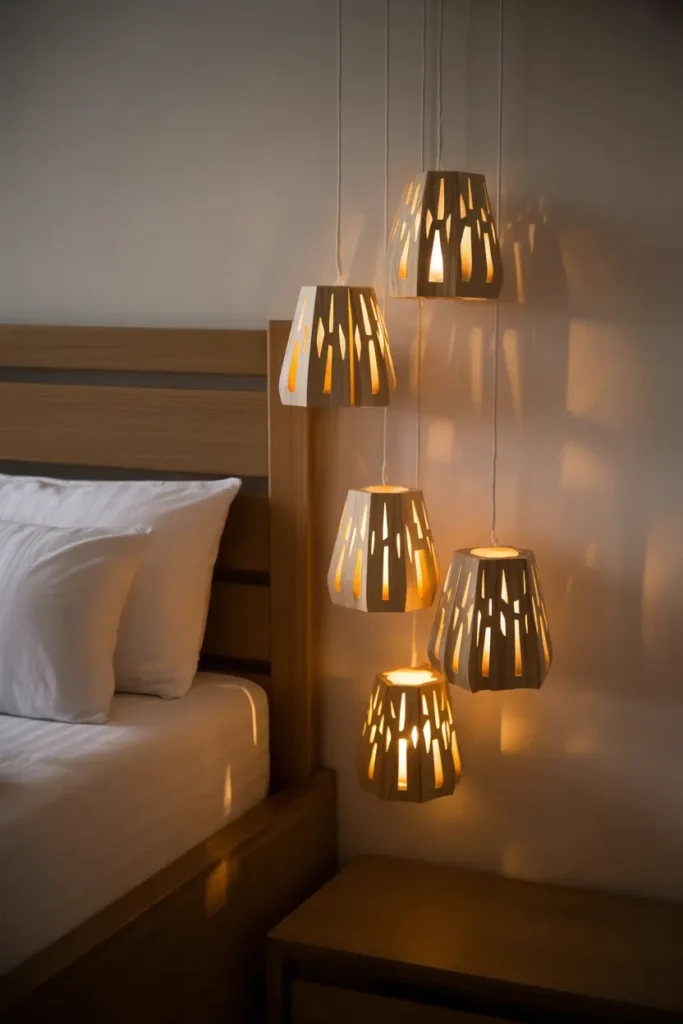
14. DIY Hanging Wooden Lantern Lights
Materials Needed:
- Wooden craft sticks
- Wood glue
- LED tea lights
- Twine/cord
- Ceiling hooks
Steps:
- Glue sticks to form lantern frames
- Create open patterns on each side
- Insert LED light inside
- Hang beside bed at various heights
DIY lantern lights add mood and softness to the bedroom without the need for large lamps. The warm glow of LEDs creates comfort while the handmade wooden design adds artistic detail. Hanging them at staggered levels gives a dynamic, layered look. This project is beginner-friendly and uses inexpensive craft supplies. You can make them square, hexagon-shaped, or even open-cage style depending on your creativity.
Choose natural wood for boho style or paint them black for industrial accents. Some people add frosted paper inside for softer lighting. Because LEDs don’t heat up, they’re safe for hanging close to fabrics. This DIY instantly turns bedtime into a peaceful, dreamy moment while showcasing your creative lighting skills.
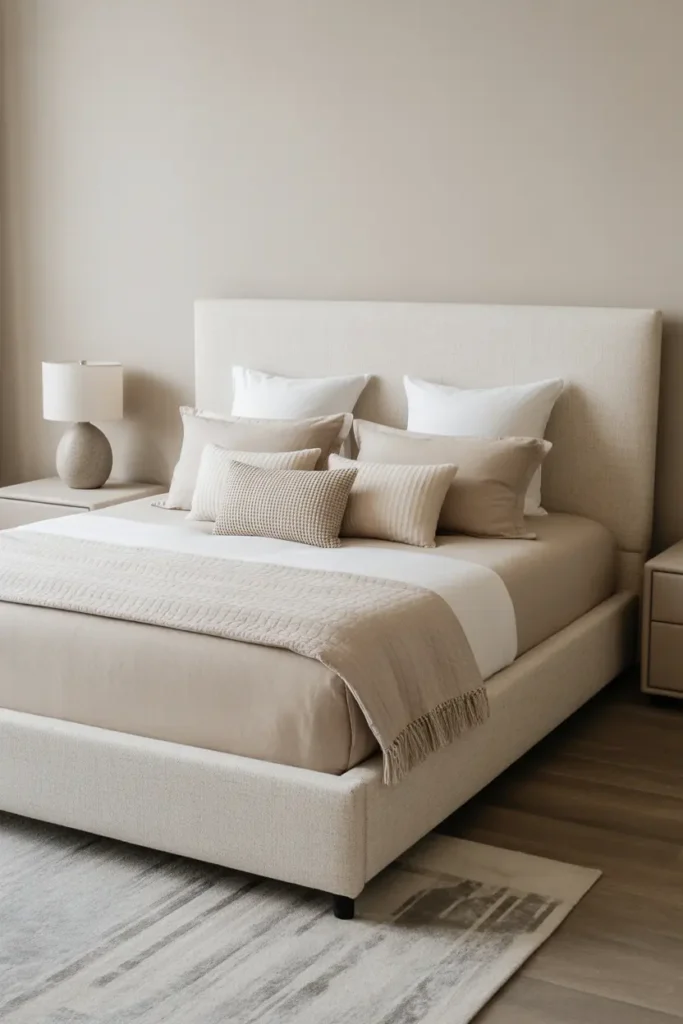
15. DIY Fabric-Wrapped Bed Frame
Materials Needed:
- Upholstery fabric
- Staple gun
- Foam padding (optional)
- Scissors
Steps:
- Measure frame sides
- Wrap and staple fabric neatly
- Add foam for extra softness
- Trim and smooth corners
A fabric-wrapped bed frame adds elegance and comfort without replacing the entire bed. The upholstery softens sharp edges and protects from bumps, especially helpful in smaller rooms. This DIY is perfect for updating older furniture with a modern feel. You can choose suede, linen, or velvet for a premium bedroom aesthetic. Neutral colors create a calming atmosphere, while bold shades add personality and style.
To complete the look, pair the wrapped frame with matching pillows or a contrasting headboard. The transformation takes only a few hours and instantly elevates your room design. It’s a low-cost hack compared to buying a new bed and fully customizable to match seasonal decor changes. This upgrade brings hotel-inspired style right into your own cozy bedroom.
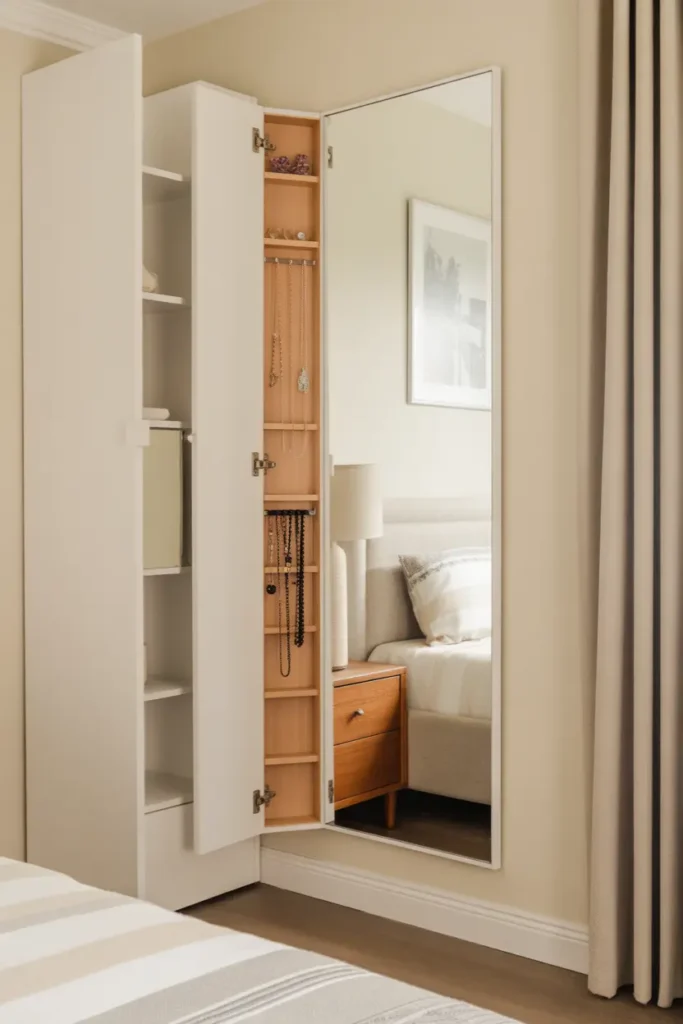
16. DIY Hidden Jewelry Mirror Cabinet
Materials Needed:
- Slim wood boards
- Hinges
- Mirror
- Hooks + small rods
- Drill + screws
Steps:
- Build shallow cabinet box
- Attach hooks and rods inside
- Fix mirror as the front door
- Mount securely on wall
This hidden storage solution keeps jewelry safe, organized, and dust-free while doubling as a stylish full-length mirror. It removes the need for bulky dressers or exposed racks that make the room feel cluttered. A wall-mounted design gives the illusion of extra space and creates a clean hotel-room feel. You can customize the cabinet interior to hold rings, necklaces, beauty items, and perfumes too.
Adding LED strips inside the cabinet elevates the experience and makes choosing accessories easier. Paint the outer frame to blend with the wall or leave wood natural for a warm design. This DIY keeps beauty essentials hidden but easily accessible — a perfect mix of style and practicality for streamlined bedroom decor.
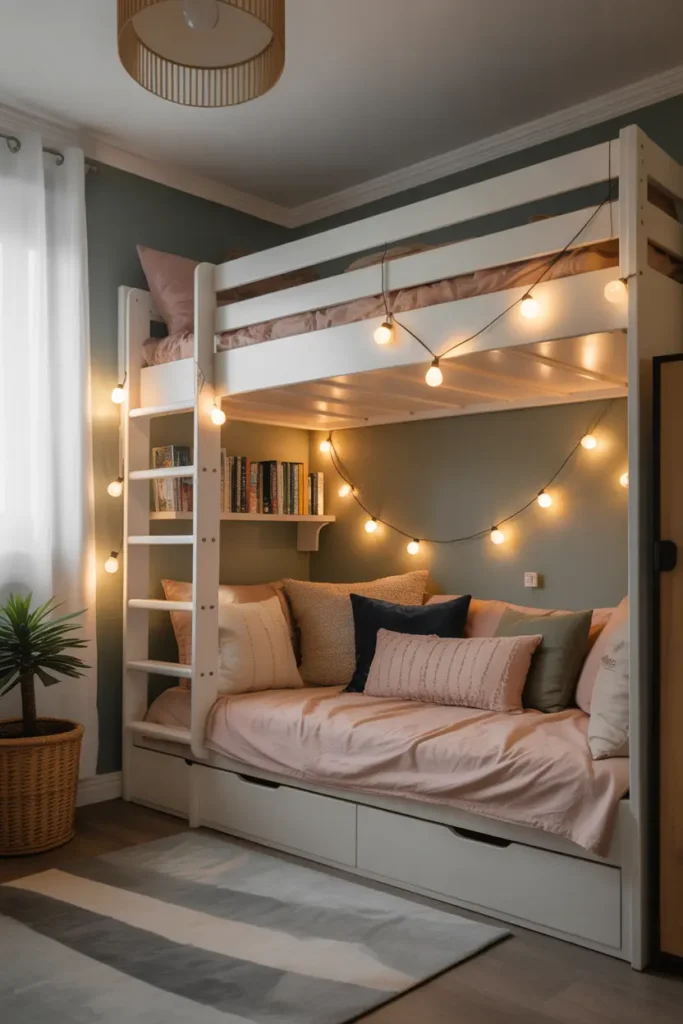
17. DIY Cozy Under-Bed Reading Fort
Materials Needed:
- Curtains or canopy fabric
- Cushions + throw blanket
- Small shelf or crate
- LED fairy lights
Steps:
- Hang curtain around lower bed space
- Add pillows and blanket for comfort
- Install small shelf or book organizer
- Decorate with soft lights
This DIY idea is ideal for loft beds or kids’ rooms where creativity and comfort matter most. It converts the under-bed area into a relaxing retreat that feels special and private. Fairy lights add a dreamy ambiance that encourages reading and imagination. It’s a cozy upgrade that keeps the rest of the room tidy while making bedtime something to look forward to.
You can personalize the fort using posters, plush toys, or even removable wallpaper. The cocoon-like setting brings comfort and security — especially helpful for children who love cozy spaces. It’s a fun DIY that students and young adults also enjoy, offering a stress-free zone separate from study areas.
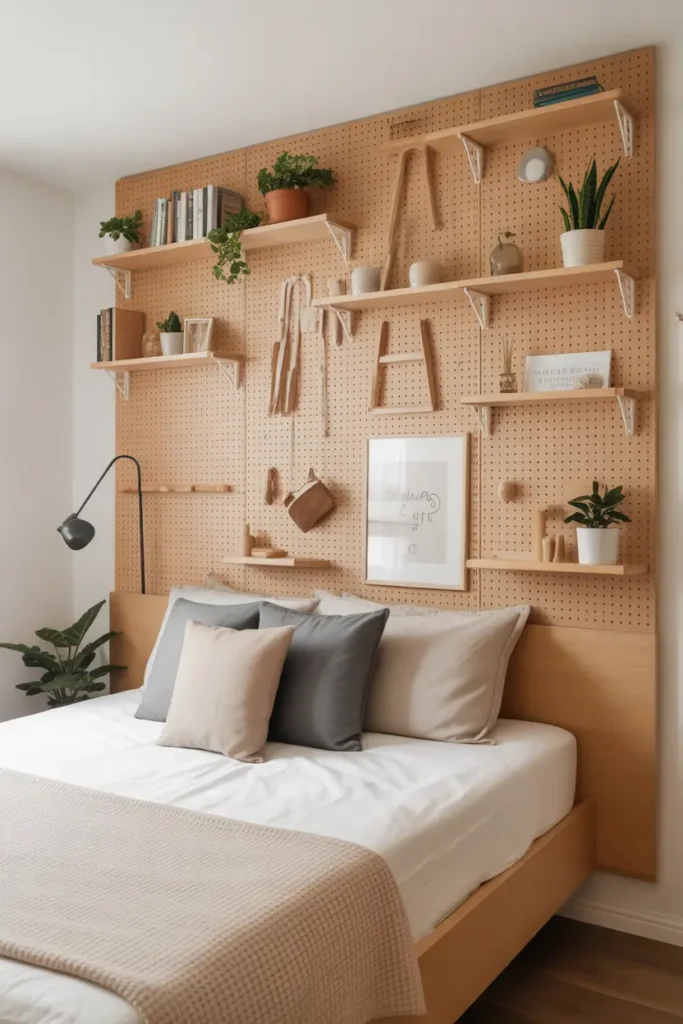
18. DIY Pegboard Headboard Organizer
Materials Needed:
- Large pegboard sheet
- Screws + drill
- Hooks and pegs
- Mini shelves / baskets
Steps:
- Secure pegboard behind bed
- Add shelves and hooks
- Arrange decor and essentials
- Reorganize anytime you want
A pegboard headboard is a brilliant space-saving DIY for bedrooms that need extra storage but still want a modern aesthetic. Because everything is displayed upright, it frees nightstands from clutter and keeps essential items within easy reach. You can design it in any style — minimal black, warm wood tone, or painted to match your wall theme. The structure also works as a statement feature that fills the vertical space beautifully.
The best part is its flexibility: you can rearrange each piece when you want a fresh look or new layout. Add decorative plants, framed photos, string lights, or small containers for accessories. This DIY makes your wall not just functional but visually expressive — perfect for renters, students, and decoration lovers.
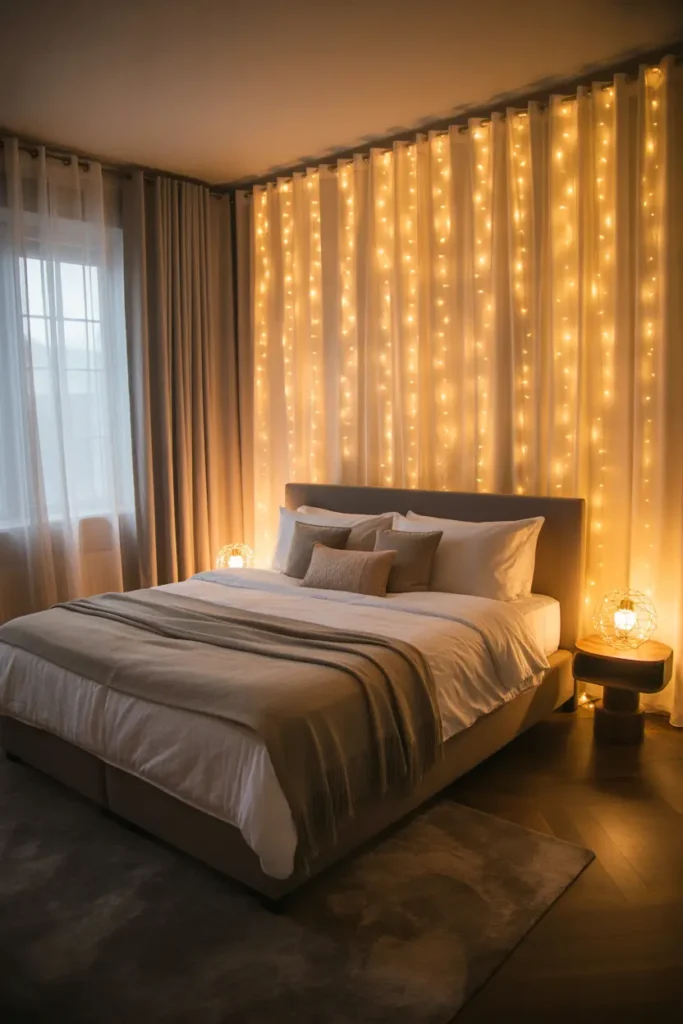
19. DIY Curtain Fairy Light Wall
Materials Needed:
- Sheer curtains
- Curtain rod
- LED curtain lights
- Wall hooks
Steps:
- Hang curtain rod
- Drape LED lights across wall
- Cover with sheer fabric
- Turn on lights for soft glow
This idea is perfect for bedrooms that need warmth and ambiance. The soft glow creates a romantic, calming atmosphere for relaxing or winding down before sleep. It’s popular in Pinterest-style bedrooms because it instantly transforms a plain wall into a magical backdrop without major construction. The upgrade looks beautiful in photos too, making the room more Instagram-worthy.
Use neutral curtains for a classic look or colored lights for a fun, youthful vibe. Because LEDs are safe and low heat, they can stay on while you relax. The layered effect of fabric and light elevates any small bedroom into a luxe retreat — affordable and easy!
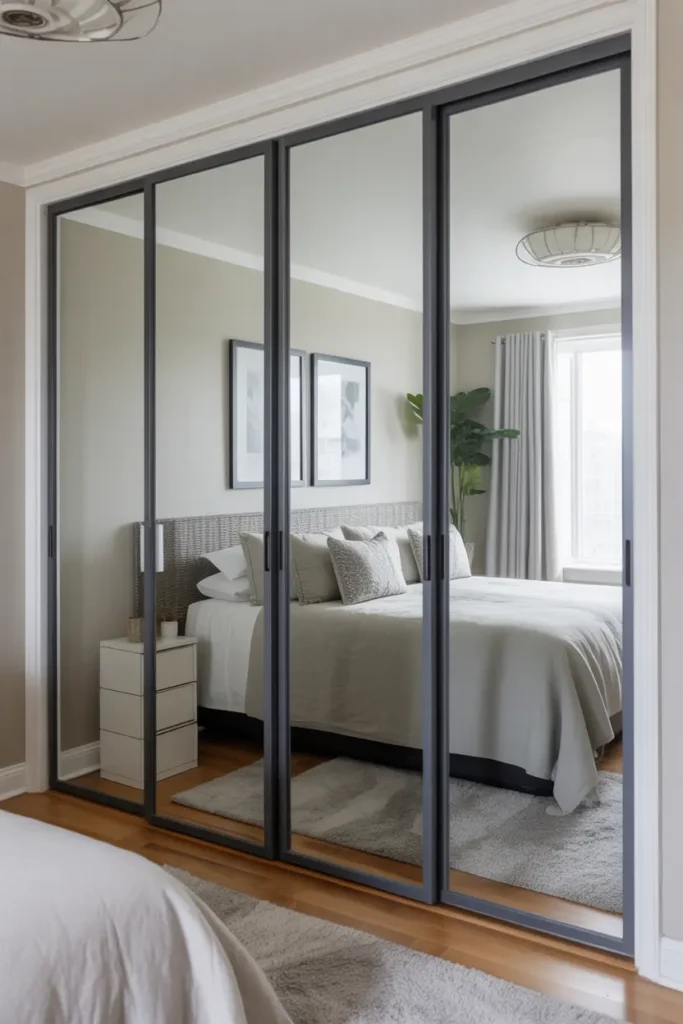
20. DIY Mirrored Closet Door Makeover
Materials Needed:
- Stick-on mirror panels
- Measuring tape
- Ruler + spacing tools
- Frame trim (optional)
Steps:
- Measure and align mirror tiles
- Stick panels onto door surface
- Add trim for a polished border
- Clean and enjoy the expanded view
Mirrored closet doors are a common designer trick to make small bedrooms look twice as big. This DIY brightens dark rooms by reflecting natural light and giving visual depth. It also provides a convenient full-length mirror for dressing. The upgrade is extremely budget-friendly — peel-and-stick mirrors allow anyone to achieve stylish results.
Add black or gold trim for a modern, luxurious look. The finish blends perfectly with minimalist, glam, or contemporary interiors. It’s a fast makeover with zero mess and huge visual impact. When storage blends with decor, your whole room feels more intentional and fresh.
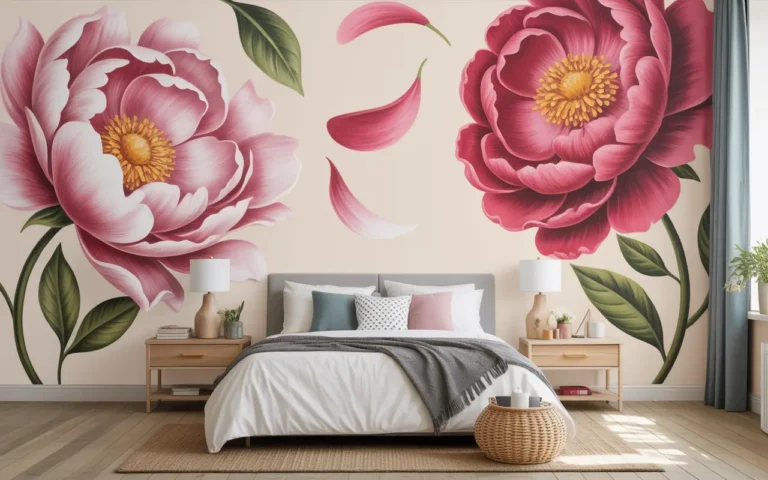
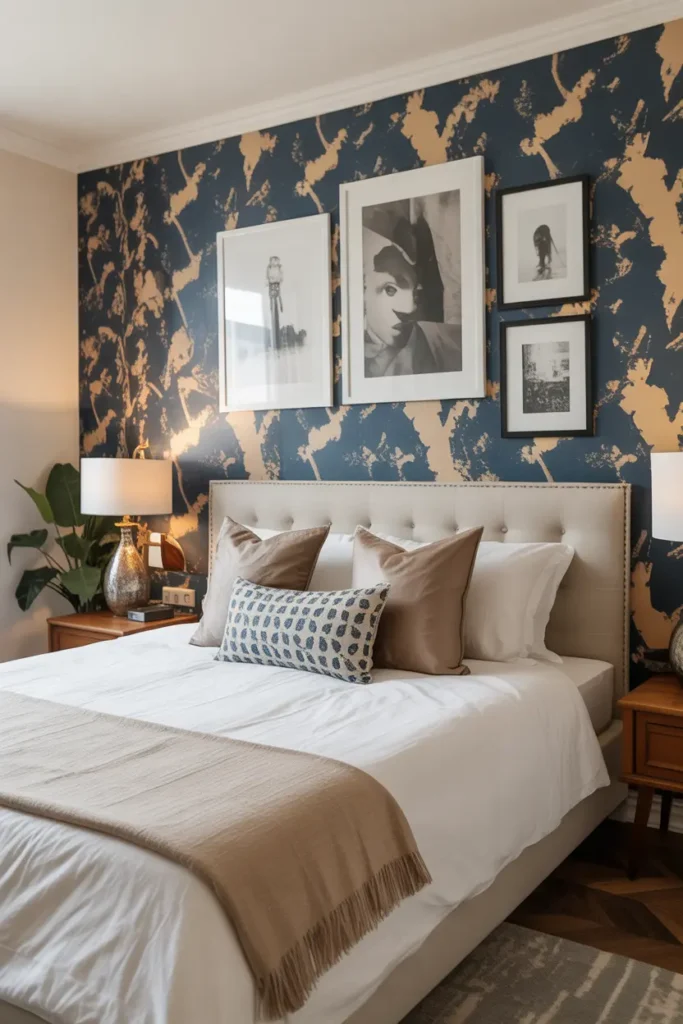
21. DIY Framed Wallpaper Art Above Bed
Materials Needed:
- Wallpaper swatches
- Poster frames or wood trims
- Scissors
- Mounting tape
Steps:
- Cut wallpaper to frame size
- Insert into frames
- Hang in neat layout
- Replace designs anytime
Wallpaper art is perfect for anyone who loves bold patterns but doesn’t want to commit to a full wallpaper installation. You can test designs, swap styles seasonally, and avoid rental restrictions. It turns the headboard wall into a stylish gallery display, giving impact with minimal effort.
The frames offer a polished finish that elevates the entire space. Choose calming tones for a restful bedroom or fun prints for youthful rooms. This DIY gives endless design freedom — a full upgrade without long-term commitment.
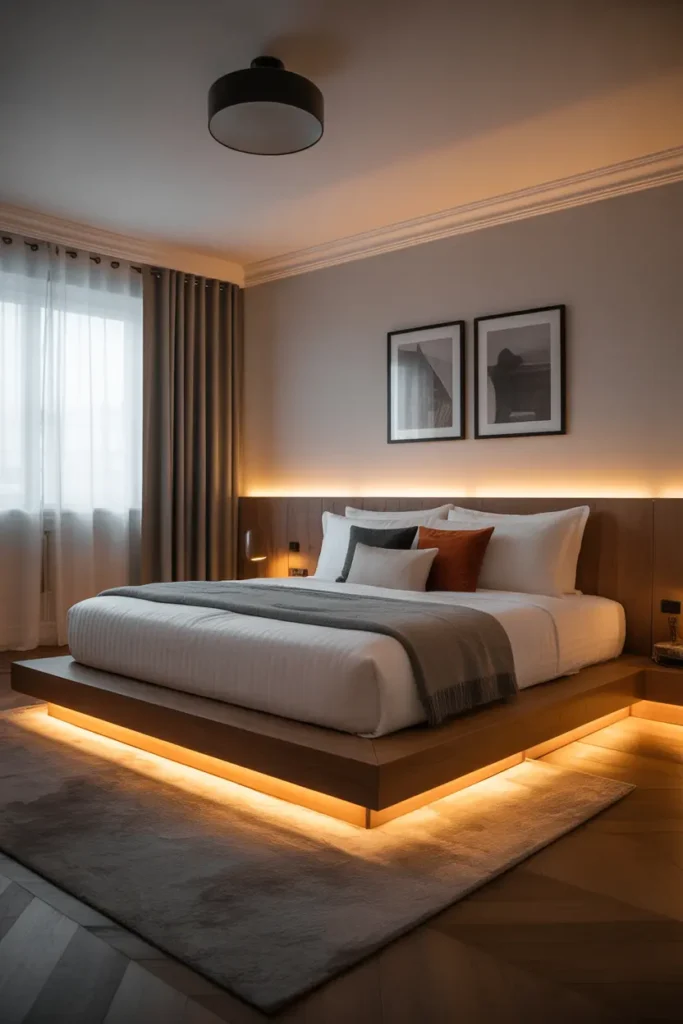
22. DIY Platform Bed With Hidden LED Base
Materials Needed:
- Wood boards
- Screws + drill
- Foam tape
- LED push lights
Steps:
- Build platform base around bed frame
- Hide lighting inside base edge
- Paint or finish wood
- Turn lights on for floating look
This project upgrades your bedroom centerpiece into a luxury focal point. The floating illusion feels futuristic and enhances depth, especially in smaller rooms. A solid platform base also eliminates bed risers and under-bed clutter, making everything look more intentional and high-end.
You can choose warm lighting for a cozy feel or colorful LEDs for playful weekend vibes. The platform design also provides extra support for the mattress, improving comfort. With careful work, you’ll have a stunning bed that looks professionally designed for a fraction of the price.
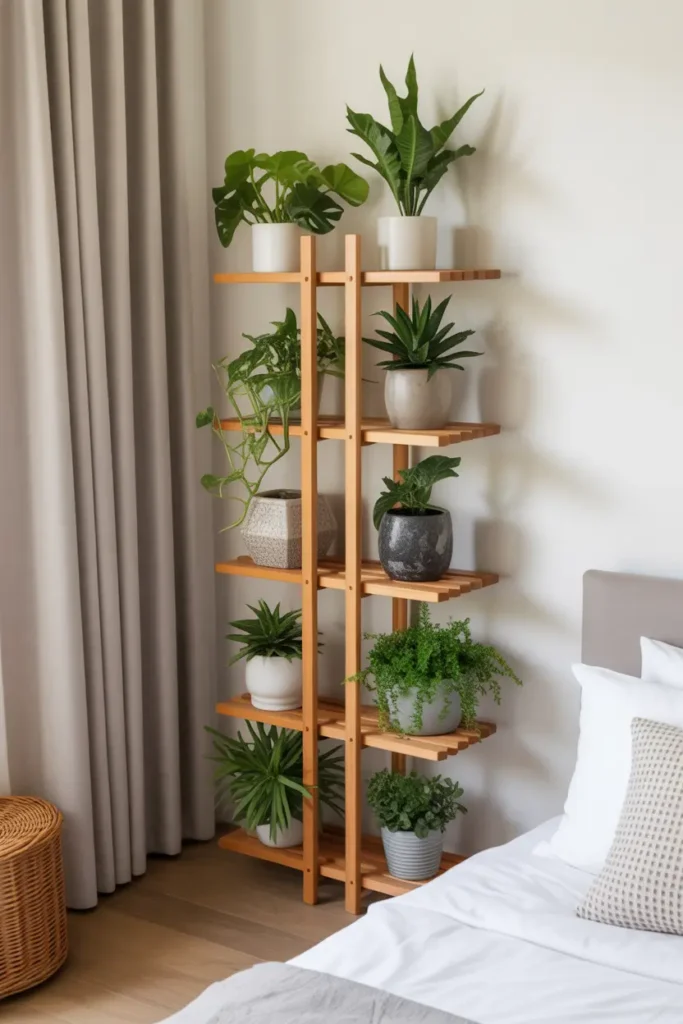
23. DIY Multi-Level Plant Stand for Bedroom Corners
Materials Needed:
- Wood boards
- Screws
- Sander
- Paint or stain
Steps:
- Build multi-tier stand
- Sand and paint for clean look
- Place in corner
- Decorate with plants of varying height
Adding greenery breathes life into a bedroom, improves air quality, and boosts mood. This space-saving plant stand lets you include multiple plants using only one corner. The vertical layout shows off leaves beautifully and creates a natural wall effect that softens the room’s structure.
Use low-light plants like snake plants and pothos if your room doesn’t get much sun. You can also switch pots seasonally to refresh the styling. It’s a perfect DIY to bring nature’s calm energy into your relaxing space.
24. DIY Ceiling Canopy With Fairy Lights
Materials Needed:
• Sheer curtain panels (2–4)
• Warm fairy lights (battery or plug-in)
• Curtain rods or ceiling hooks
• Zip ties or small clips
• Adhesive hooks or nails
Steps:
• Attach curtain rods or hooks securely to the ceiling above the bed
• Drape the sheer curtains loosely to form a canopy effect
• Layer fairy lights on top of the fabric or weave them through
• Use clips/zip ties to keep lights and fabric in place
• Adjust for even draping and turn lights on to test the glow
• Add more panels or lights if you want a fuller, dreamy look
A fairy light canopy is the perfect DIY home decor idea to instantly enhance the cozy feel of your bedroom. It adds height and style to the bed area while boosting relaxation and sleep ambiance. The soft fabric frames the space beautifully without blocking airflow, making it ideal for both small and large rooms. You can choose warm yellow lights for a romantic vibe or cool white for a modern look. This project is renter-friendly too, since the canopy can be removed easily whenever you want to update your style.
This upgrade is not only visually stunning but also cost-effective — you can complete the entire design using affordable materials. Customize it with colored curtains, extra fairy lights, or even hanging paper lanterns to match your aesthetic. The canopy acts like a centerpiece that makes the entire bedroom feel more intentional and designed. From reading before bed to relaxing weekends, the atmosphere it creates elevates your comfort level. A quick DIY like this can freshen your bedroom decor in just a few steps and make it feel like a calming escape you’ll love coming back to.
Conclusion
A cozy bedroom is all about creativity, comfort, and personal touches. These DIY ideas prove that even small decor changes can make a big difference in your everyday mood and space. From lighting upgrades to smart organization and handmade art, every project enhances the vibe of your room. Pick a few favorites and start decorating at your own pace — your dream bedroom is now just a few DIY steps away.