23 DIY Home Decor Ideas to Refresh Your Space
Transforming your home doesn’t have to be expensive or complicated. With a little creativity and a few easy materials, you can update every room with stylish DIY home decor ideas that reflect your personality. From mason jar lanterns to stylish rope shelves and stenciled accent walls, these budget-friendly projects help refresh your space in modern, unique ways. Whether you love rustic, minimalist, boho, or colorful designs, you’ll find inspiring ideas here to make your home look thoughtfully decorated and beautifully designed—without spending too much.
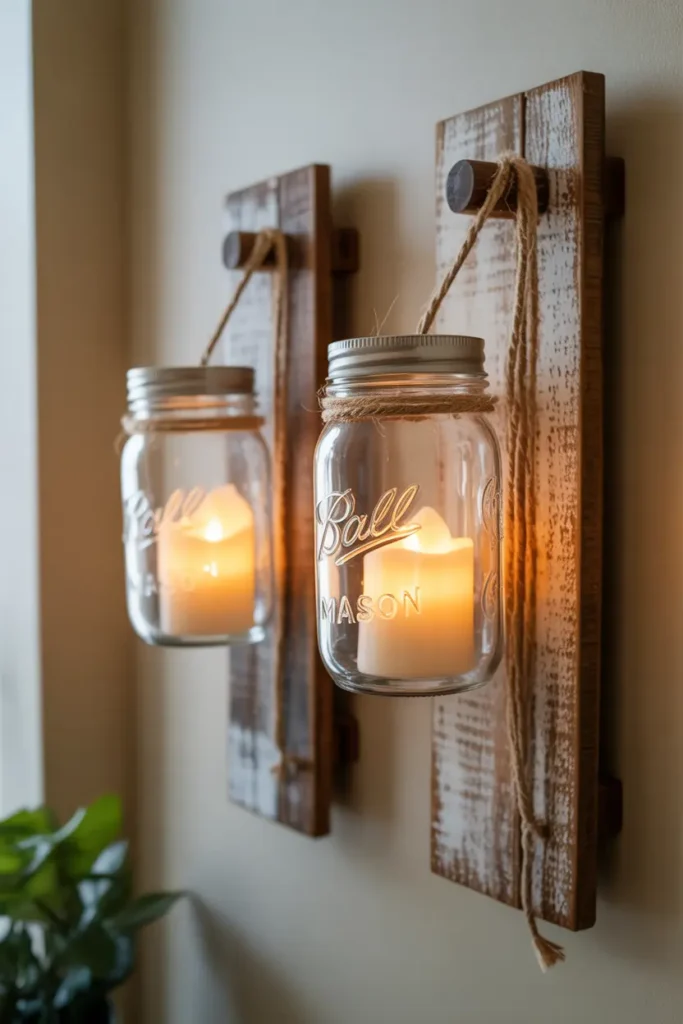
1. Mason Jar Wall Lanterns
Materials Needed:
- Mason jars
- Reclaimed wood boards
- Twine or metal hooks
- Battery LED candles
- Hot glue or screws
- Faux greenery (optional)
Steps:
- Sand and stain wood boards for a clean finish
- Attach hooks or twine holders near the top
- Wrap twine around jars and secure tightly
- Add LED candles inside jars
- Mount the board on the wall using screws
- Decorate with greenery for extra style
This DIY home decor idea adds soft lighting and a welcoming feel to any room. You can customize the finish of the wood to match other furniture pieces, making it look store-bought but still handmade. Mason jars are versatile and budget-friendly, allowing anyone to create elegant decor without advanced crafting skills. Mounting these lanterns in darker corners brightens the space and highlights natural textures beautifully. Whether used as mood lighting in bedrooms or statement accents in living rooms, these lanterns add warmth instantly.
One of the best things about this project is its adaptability. You can use colored jars for themed decor, wrap lace with the twine for a shabby-chic finish, or insert fairy lights for twinkling ambiance. This craft also works well for renters because only minimal holes are needed. It’s a simple DIY home decor solution that transforms plain walls into something memorable. Handmade lighting pieces like these also make heartfelt gifts, especially for those who love rustic or farmhouse-inspired designs.
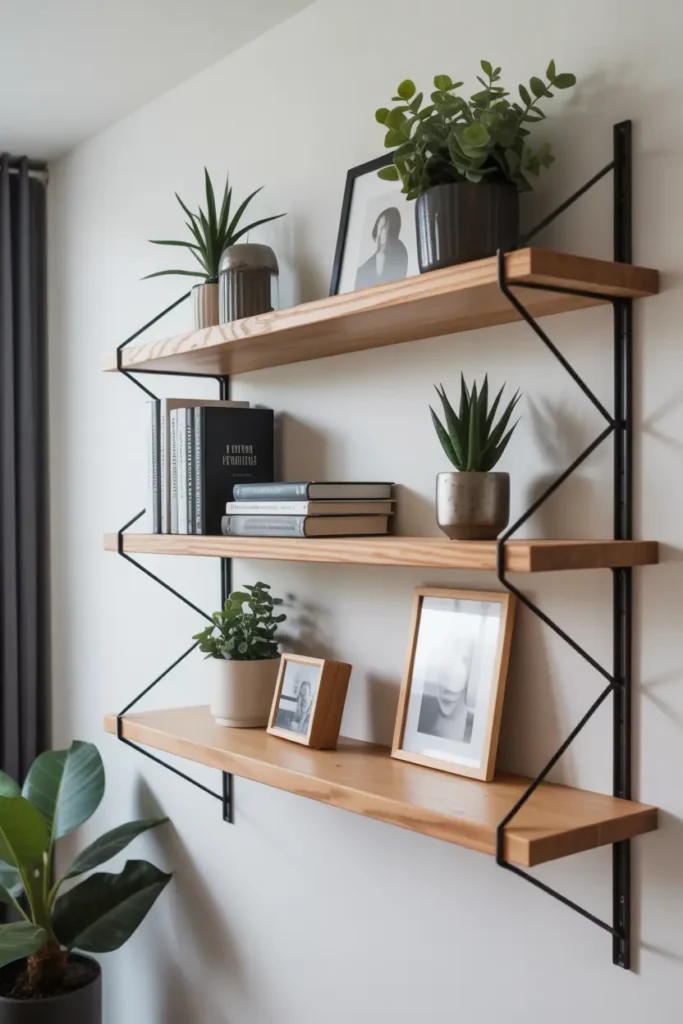
2. Floating Wood Shelves
Materials Needed:
- Wooden boards
- Invisible shelf brackets
- Screws + drill
- Sandpaper
- Wood stain or paint
Steps:
- Measure and cut boards to desired size
- Sand and stain/paint for smooth finish
- Install invisible brackets into the wall
- Slide boards onto brackets
- Style shelves with decorative items
Floating shelves are an excellent storage and display solution for DIY home decor lovers. They keep things organized while still looking stylish and modern. These shelves fit perfectly in small spaces, like above a desk, near a TV, or inside bathrooms. The invisible bracket design gives a clean, high-end look that’s surprisingly cheap to achieve. Use natural wood tones for a cozy vibe or bright white for minimalist style. Once installed, decorate them with your favorite artwork and greenery to add personality.
The beauty of floating shelves lies in their versatility. They help create a vertical display area where walls once felt empty and boring. You can create a symmetrical look with evenly spaced shelves or go for a more playful, staggered arrangement. This DIY home decor project allows you to refresh your space every time you change what’s displayed. It’s a fun blend of practicality and creativity, making your room feel more curated and personal without a huge makeover.
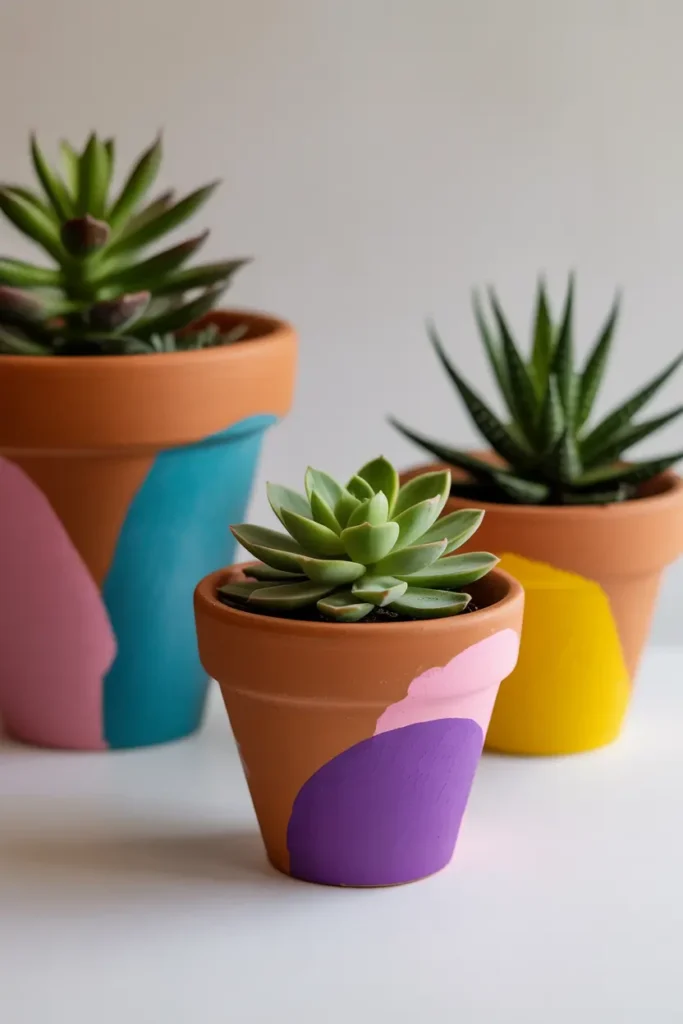
3. Painted Terracotta Plant Pots
Materials Needed:
- Terracotta pots
- Acrylic paint
- Painter’s tape
- Paintbrushes
- Clear sealant spray
Steps:
- Clean dust from pots
- Use tape to create design patterns
- Paint each section with acrylic colors
- Remove tape once dry
- Seal pots to protect designs
Painted terracotta pots are a beginner-friendly DIY home decor project that instantly upgrades indoor plants. You can match pot designs with your home’s color palette using boho, minimal, or abstract prints. Painter’s tape helps create clean lines and shapes with very little effort. Whether you’re adding one pot to a bookshelf or styling a full windowsill garden, this craft promotes creativity while bringing greenery into your home.
These pots also make thoughtful handmade gifts. Customize them for birthdays, housewarmings, or seasonal decor, like pastel tones for spring or deep greens for winter. With so many ways to personalize the look, each design feels unique to your style. This DIY home decor project is affordable and relaxing, making it perfect for weekend crafting sessions with family or friends. The end result is a set of eye-catching plant displays that look boutique-quality but cost very little.
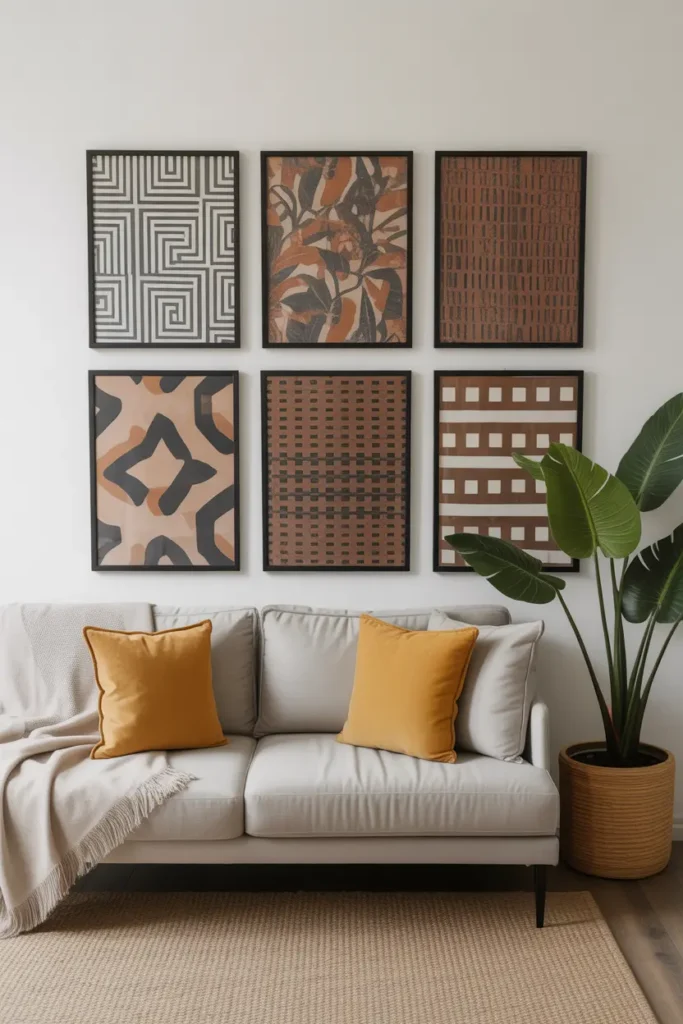
4. Fabric Accent Wall Art
Materials Needed:
- Picture frames
- Fabric squares or scraps
- Scissors
- Adhesive or frame backing pins
Steps:
- Cut fabric pieces to fit frame size
- Stretch fabric smoothly over backing
- Secure with pins or adhesive
- Arrange frames in a design on the wall
- Swap fabrics anytime you want a new look
Fabric wall art is an amazingly simple way to turn plain walls into stunning focal points. You can experiment with textures like linen, velvet, or patterned upholstery fabric to match your decor style. Whether bold prints or subtle neutrals, the possibilities are endless. This DIY home decor project costs far less than buying ready-made art and is perfect for filling large spaces like behind a sofa or above a bed.
This idea is especially ideal for renters because it’s completely reversible with no damage to the walls. You can update your wall with seasonal colors—brights for summer and deeper tones for cozy winter vibes. Arrange the frames symmetrically for a modern look or mix shapes for playful gallery style. It’s a creative way to introduce color, depth, and personality into your home without any complicated crafting skills.
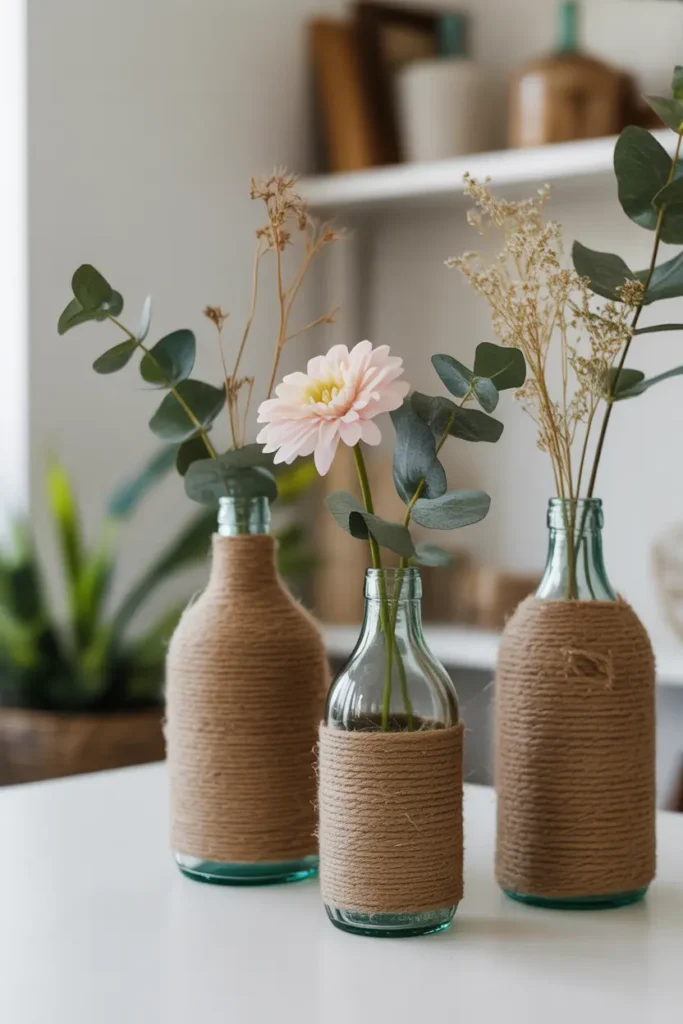
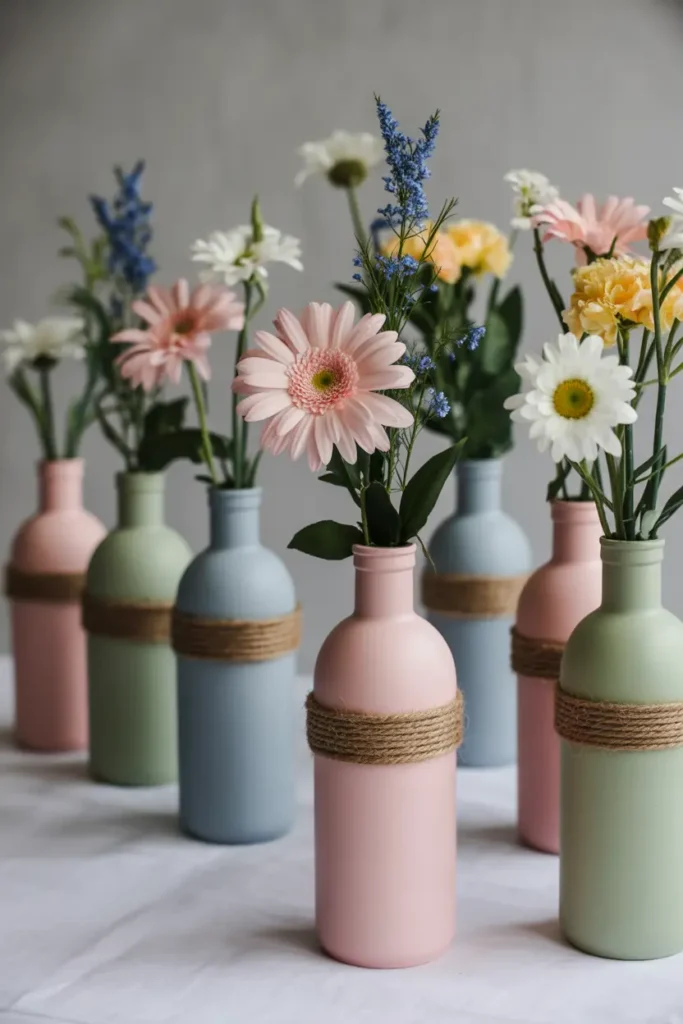
5. Twine Wrapped Vases
Materials Needed:
- Glass bottles or jars
- Jute twine
- Hot glue gun
- Scissors
- Decorative accents (optional)
Steps:
- Clean and dry bottles
- Add glue at the base
- Wrap twine tightly upward
- Continue gluing as you wrap
- Style with flowers or greenery
Twine-wrapped vases are perfect for rustic, boho, or farmhouse interior styles. They add warm texture and look great as everyday decor or as event centerpieces. Using recycled jars keeps the craft cost-effective while reducing waste. You can display these vases on coffee tables, bathroom shelves, or console tables to instantly elevate your DIY home decor style. The finishes don’t need to be perfect—handmade character is part of the charm.
You can personalize the design by mixing twine with lace ribbons, charms, or painted sections. Create sets with different heights to add dimension to your decor arrangement. These vases also make beautiful handcrafted gifts when paired with fresh or faux florals. The simplicity of the project means anyone can try it and achieve stunning results. It’s a fun way to express creativity and bring warm, natural elements into your home effortlessly.
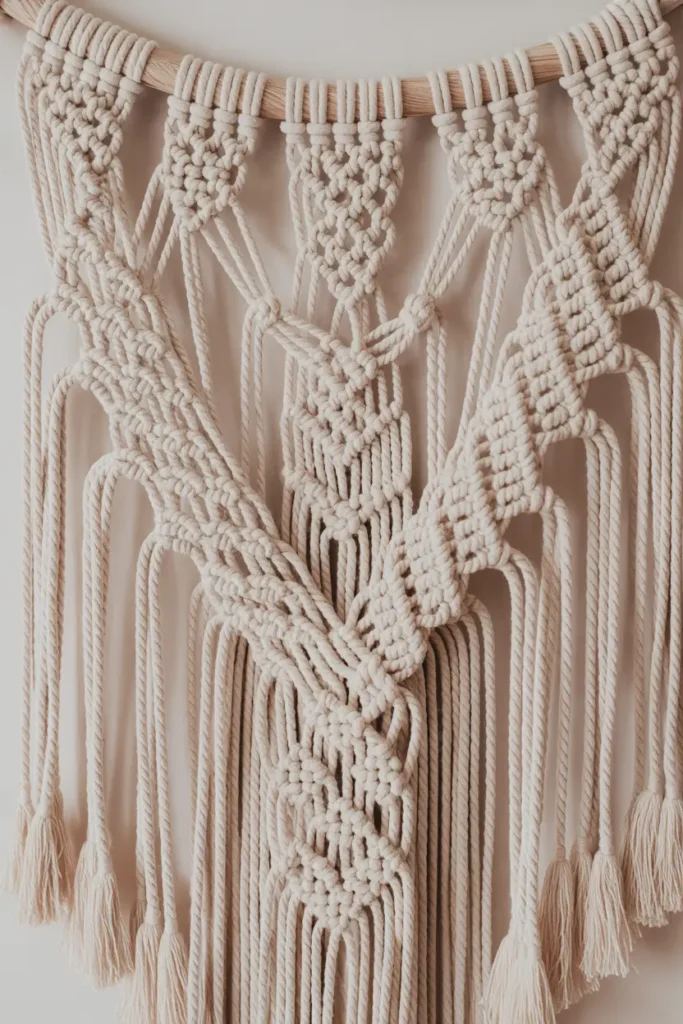
6. DIY Macramé Wall Hanging
Materials Needed:
- Cotton macramé cord
- Wooden dowel or driftwood
- Scissors
- Measuring tape
Steps:
- Cut multiple equal-length cords
- Fold cords and loop onto dowel
- Tie simple macramé knots like square knots
- Continue pattern to desired length
- Trim ends evenly and hang on wall
Macramé wall hangings are a trending option in DIY home decor, especially in spaces inspired by bohemian and natural aesthetics. Even simple knot patterns can create a high-end handmade look that feels cozy and artistic. You don’t need complicated skills—just patience and the right cord material. This craft allows you to bring softness to blank walls while adding a personal, warm touch. You can choose neutral cream tones or introduce colors that match your theme.
Because macramé is customizable, you can make large statement pieces for behind the couch or smaller ones for hallway decor. Adding beads or feathers gives extra texture and style. It’s a perfect weekend project that you can complete while watching TV. The final result looks like boutique décor but costs much less. Whether you’re decorating a new space or refreshing your room, macramé brings artisanal style that shows off your creativity.
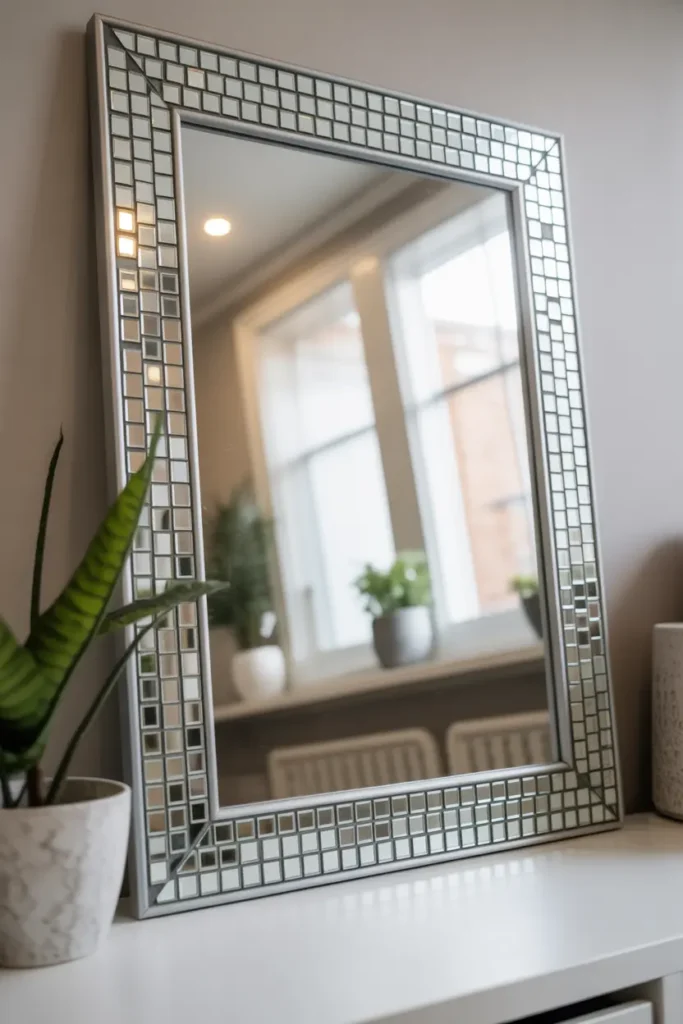
7. DIY Framed Mirror Mosaic
Materials Needed:
- Old mirror with frame
- Broken mirror tiles / craft mosaic pieces
- Strong adhesive
- Gloves + protective eyewear
Steps:
- Clean frame surface
- Arrange mirror pieces around the edge
- Apply adhesive piece by piece
- Press firmly and allow to dry
- Hang or place the mirror
A mirror mosaic frame adds instant glamour and sparkle to your space. Using broken mirror pieces is a smart and sustainable DIY home decor idea that transforms an old, plain mirror into modern statement art. The reflections help brighten dark spaces and add depth to small rooms such as bathrooms and entryways. It’s a beginner-friendly craft with dramatic results, especially if you love a little shine in your decor style.
You can play with different shapes—square tiles create a clean pattern, while irregular pieces give a trendy abstract look. Choose a silver metallic frame for classy vibes or paint the frame gold for luxury styling. This piece pairs well with indoor plants and other metallic accents, making the whole room feel more designed. It’s an affordable and fun way to give old home items a second life while boosting your DIY home decor creativity.
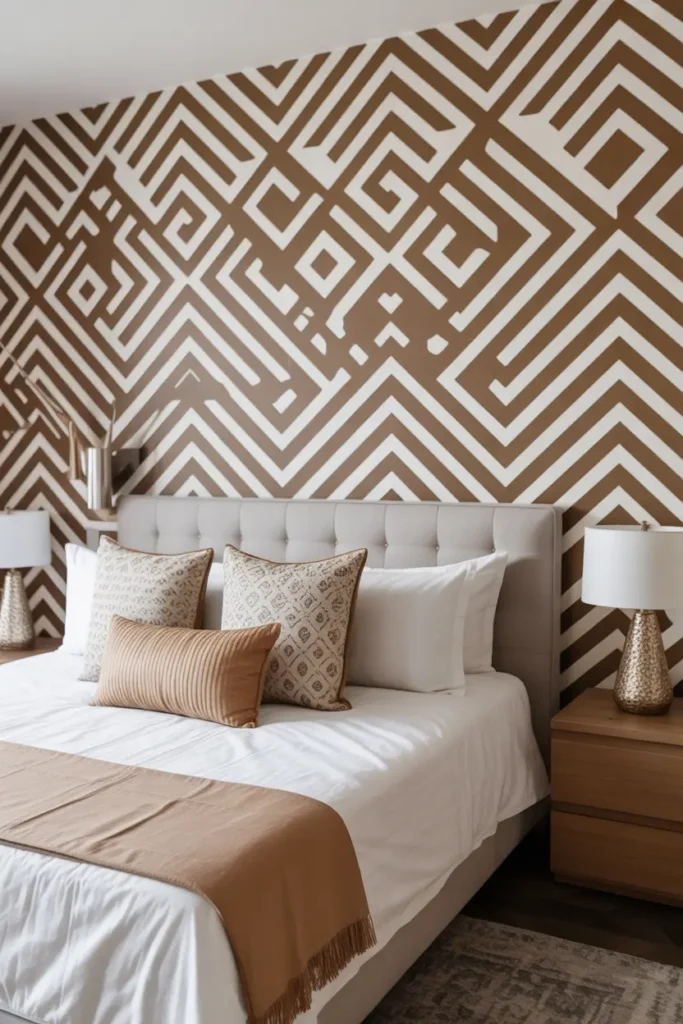
8. Stenciled Accent Wall
Materials Needed:
- Wall stencil
- Painter’s tape
- Foam roller or stencil brush
- Acrylic wall paint
- Drop cloth
Steps:
- Secure stencil to the wall with tape
- Load roller lightly with paint
- Dab paint gently through stencil
- Move stencil carefully and repeat pattern
- Allow drying before placing furniture back
A stenciled accent wall is an amazing way to refresh a room without fully painting the space. This DIY home decor project lets you achieve designer-style results using any pattern—boho diamonds, Moroccan tiles, floral prints, or modern geometric shapes. It adds visual depth and personality while still being renter-friendly if you choose removable paint. It’s perfect behind a sofa, bed, or dining table where you want a strong focal point.
Stenciling allows you to reflect your personal taste and update the look anytime. You can opt for bold contrasting colors or soft tone-on-tone designs for subtle elegance. It’s more affordable than wallpaper and can be easily changed when your style evolves. As a weekend makeover idea, it instantly transforms a plain wall into a unique and photo-worthy display. With careful taping and patient application, your finished design will look professionally created and Instagram-ready.
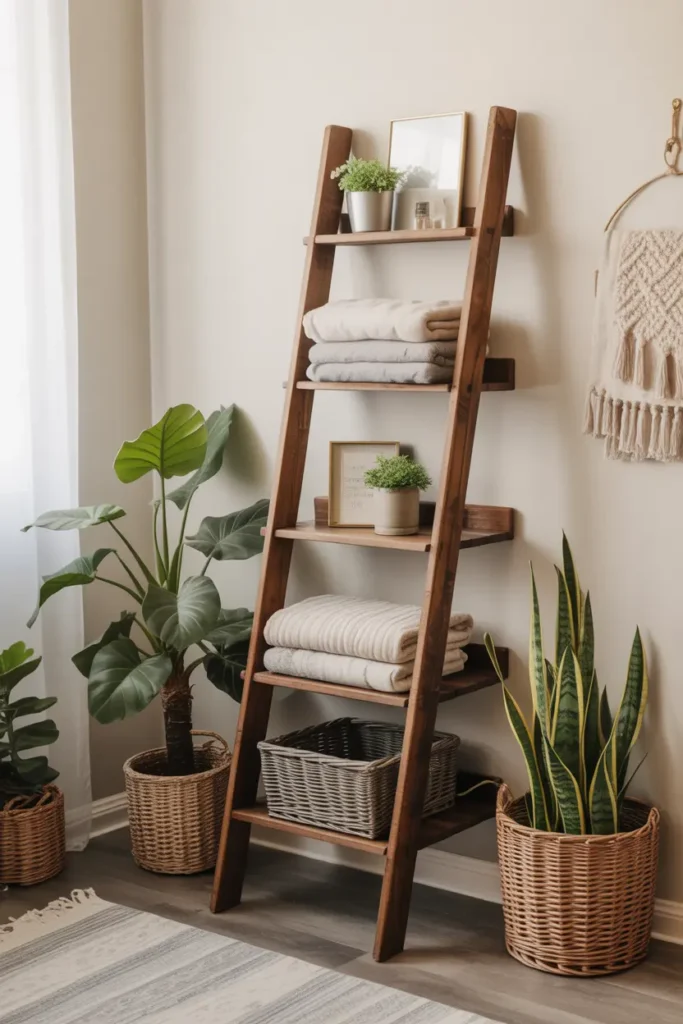
9. Decorative Ladder Shelf
Materials Needed:
- Old wooden ladder
- Sandpaper
- Wood stain or paint
- Shelving planks (optional)
- Nails or strong adhesive
Steps:
- Clean and sand ladder for smooth surface
- Stain or paint for fresh look
- Attach shelves across rungs if desired
- Lean ladder securely against wall
- Style with blankets and decor
Transforming an old ladder into storage decor is a smart and stylish DIY home decor solution. It adds height and dimension to a space while keeping everyday items looking organized. In living rooms, it’s perfect for showcasing throw blankets and books. In bathrooms, it can hold towels and baskets. This rustic element brings texture and interest to empty corners without drilling holes for shelving.
You can enhance the design by adding small planks to create shelves, giving more space for plants and picture frames. Choose natural stains for farmhouse vibes or bold paint to match modern interiors. This project allows you to recycle instead of buying expensive furniture. Simply leaning it against a wall makes it renter-friendly and easily movable for seasonal decor changes. It’s an attractive way to refresh a room and highlight your DIY home decor skills.
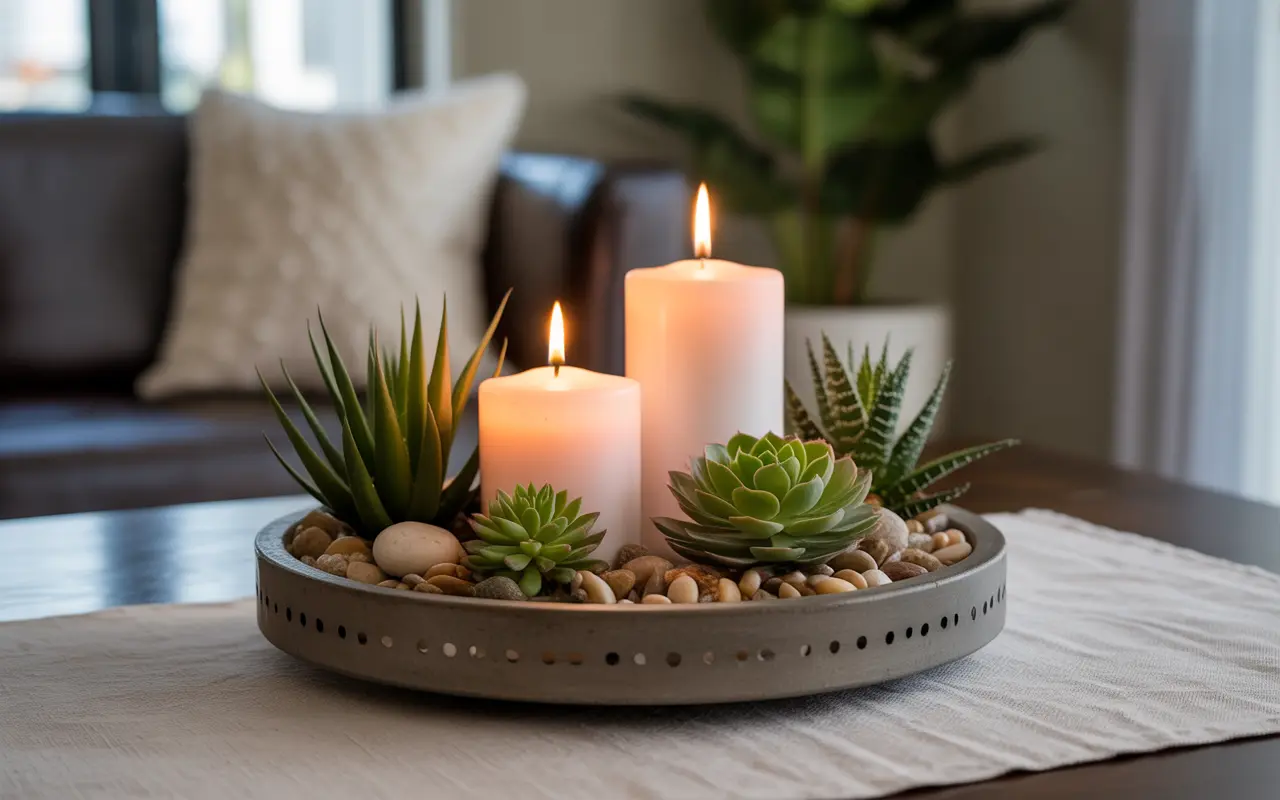
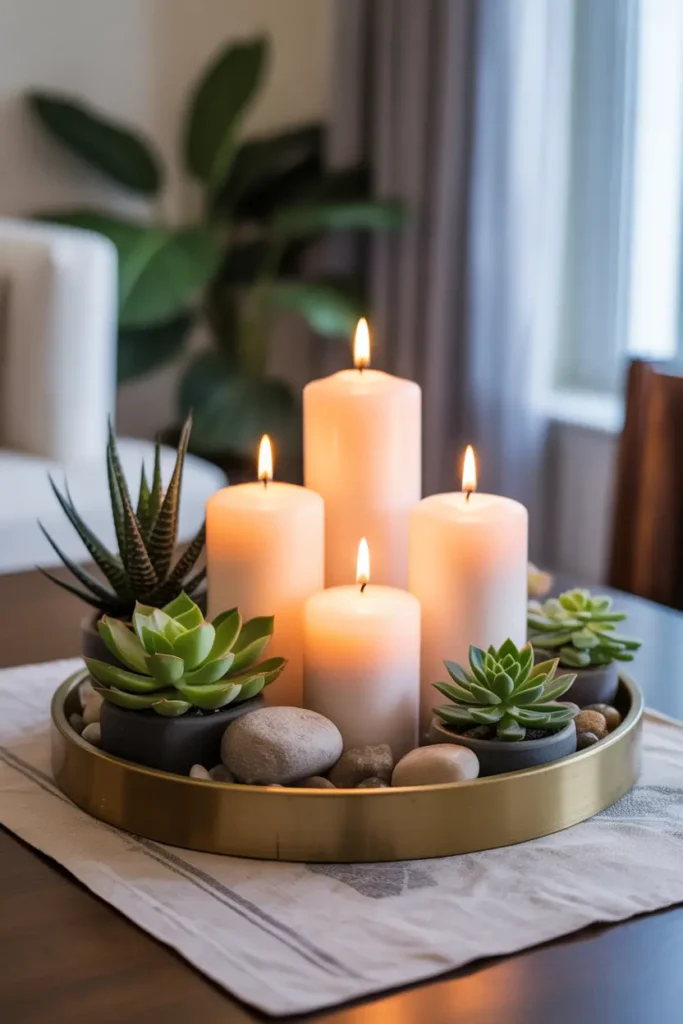
10. Candle Tray Centerpiece
Materials Needed:
- Decorative tray or wooden board
- Candles in different sizes
- Faux greenery or succulents
- Stones or beads for filling
- Optional: Ribbon or lace
Steps:
- Place candles at center of tray
- Fill extra space with stones and greenery
- Adjust height balance for visual appeal
- Set tray on table as a focal piece
- Replace decor with seasonal options
A candle tray centerpiece is a simple yet elegant DIY home decor addition to tablescapes. With only a few pieces, you can create stunning arrangements that elevate meals and cozy evenings. Mixing candle heights and adding natural fillers like pebbles or faux plants creates texture and balance. Whether you prefer a rustic wooden base or a sleek mirrored tray, you can easily match your current decor style.
The best part is how versatile this decor item is. Swap greenery for pinecones in winter or seashells in summer to instantly refresh the theme. This project doesn’t require glue or crafting skills, making it perfect for absolute beginners. It’s also a budget-friendly way to style your table for holidays, parties, or everyday comfort. With endless mix-and-match options, your candle tray can always stay fresh and stylish as part of your DIY home decor rotation.
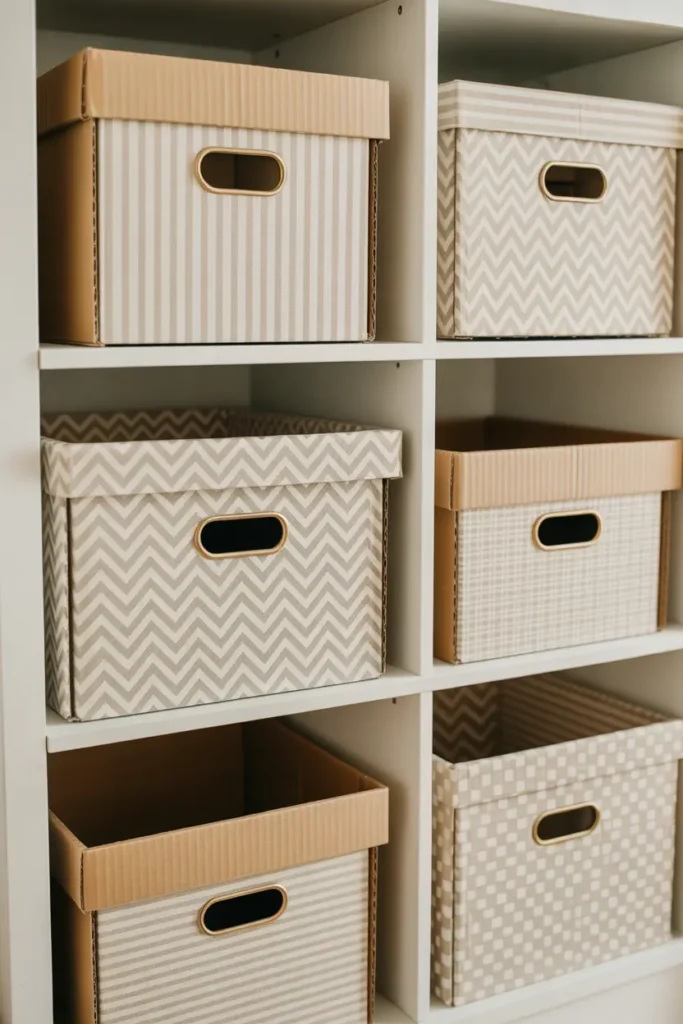
11. Fabric-Covered Storage Boxes
Materials Needed:
- Cardboard boxes
- Fabric pieces
- Hot glue gun
- Scissors
- Ribbon handles (optional)
Steps:
- Cut fabric slightly larger than box sides
- Wrap and glue neatly around the box
- Fold fabric inside edges
- Add ribbon handles if needed
- Place on shelves for organization
Fabric-covered storage boxes are a great way to add coordinated organization to your home without spending much. They turn ordinary cardboard boxes into stylish containers that look like boutique storage products. You can match the colors with your room theme, whether soft neutrals for a calm look or bright patterns for a playful feel. These boxes work perfectly in living rooms, bedrooms, and craft spaces to keep everyday items hidden but easily accessible. This DIY project is also a clever eco-friendly solution to reuse packaging materials.
You can customize the size and design based on your needs, making them ideal for toys, documents, blankets, or even seasonal clothing. Adding labels or ribbon handles helps identify contents and improves convenience. If you have leftover fabric scraps from curtains or cushions, this is a perfect way to tie the entire room together visually. These boxes help you maintain a clutter-free space while still keeping your décor stylish and neat. They cost very little to make and provide long-lasting storage that complements your home perfectly.
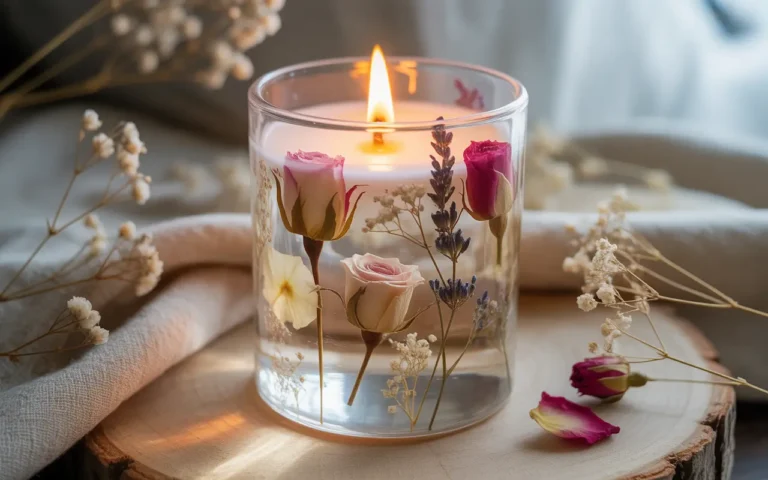
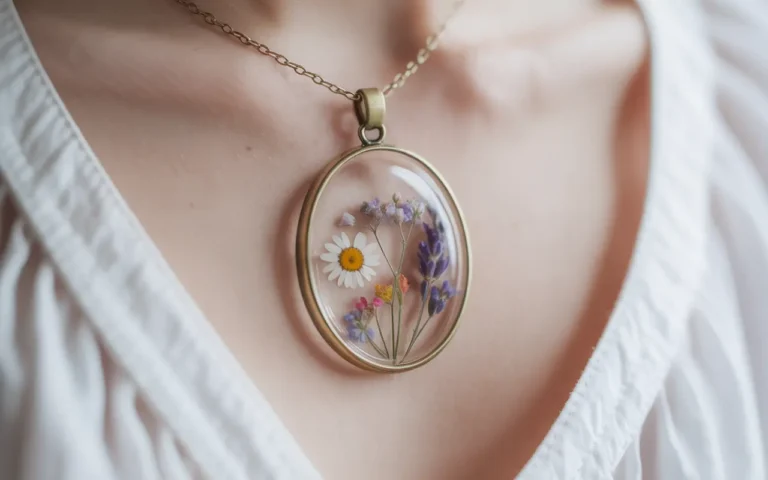
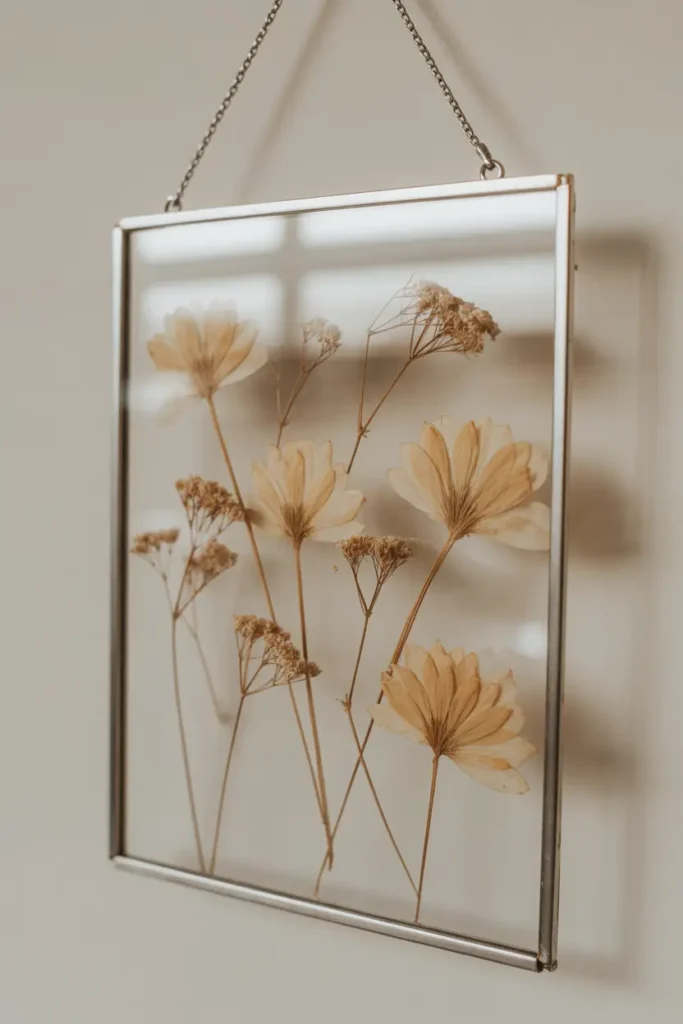
12. Pressed Flower Frame Art
Materials Needed:
- Dried/pressed flowers
- Glass frame
- Tweezers
- Glue dots or double-sided tape
Steps:
- Arrange flowers inside the frame
- Secure gently using tape or glue
- Close frame tightly
- Hang on wall or place on shelf
Pressed flower framed art is a simple, elegant way to bring nature indoors. By preserving real flowers, you add a personal touch—maybe from a memorable bouquet or your garden. The transparency of glass frames creates a floating effect that blends seamlessly into modern or minimalist interiors. This DIY home décor project is beginner-friendly and works beautifully as wall art in bedrooms, offices, and hallways. It brings soft, fresh visual appeal without overwhelming other décor pieces.
You can experiment with different flower colors and arrangements to match the seasons or your room theme. Pairing multiple small frames in a grid layout gives a gallery-wall look that appears professional. This craft doesn’t require expensive materials—just creativity and patience while pressing flowers. The result is a meaningful decorative piece that reflects your connection with nature. It also makes a thoughtful handmade gift for birthdays, housewarmings, or anniversaries.
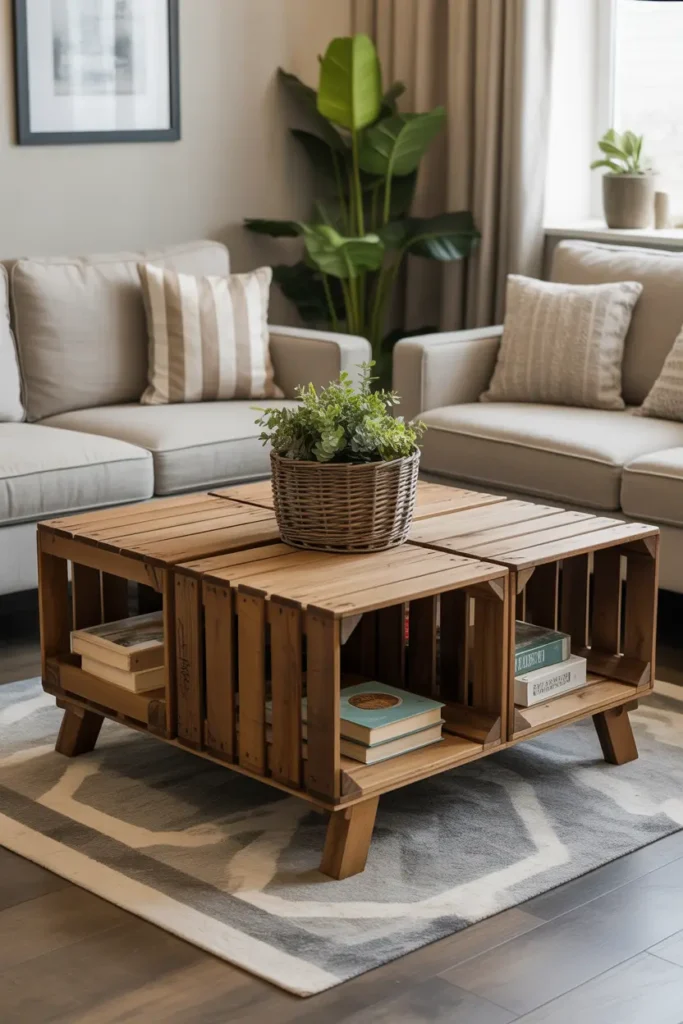
13. DIY Wooden Crate Coffee Table
Materials Needed:
- Four wooden crates
- Sandpaper and wood stain or paint
- Screws and drill
- Wooden board for base
- Wheels (optional)
Steps:
- Sand and stain/paint all crates
- Attach crates to the wooden base forming a square
- Secure crates with screws and add wheels if desired
A wooden crate coffee table is an excellent DIY home decor project that combines style with smart storage. The open crate sections are perfect for storing blankets, books, magazines, or decorative baskets, making your living room both organized and visually charming. This project is especially great for farmhouse or rustic interiors where warm wood tones enhance the cozy feel of the space. Even beginners can build this table in a short time without advanced tools, making it a practical weekend craft.
You can play with finishes—dark walnut for a rich, rustic look or white paint for a modern farmhouse vibe. Adding wheels makes the table easy to move, especially in small apartments. You can decorate the center opening with a plant, fairy lights, or seasonal décor to refresh the look throughout the year. This stylish piece becomes a focal point in your living room and offers multifunctional use at a very low cost. It’s a rewarding way to customize your furniture and elevate your home decor affordably.
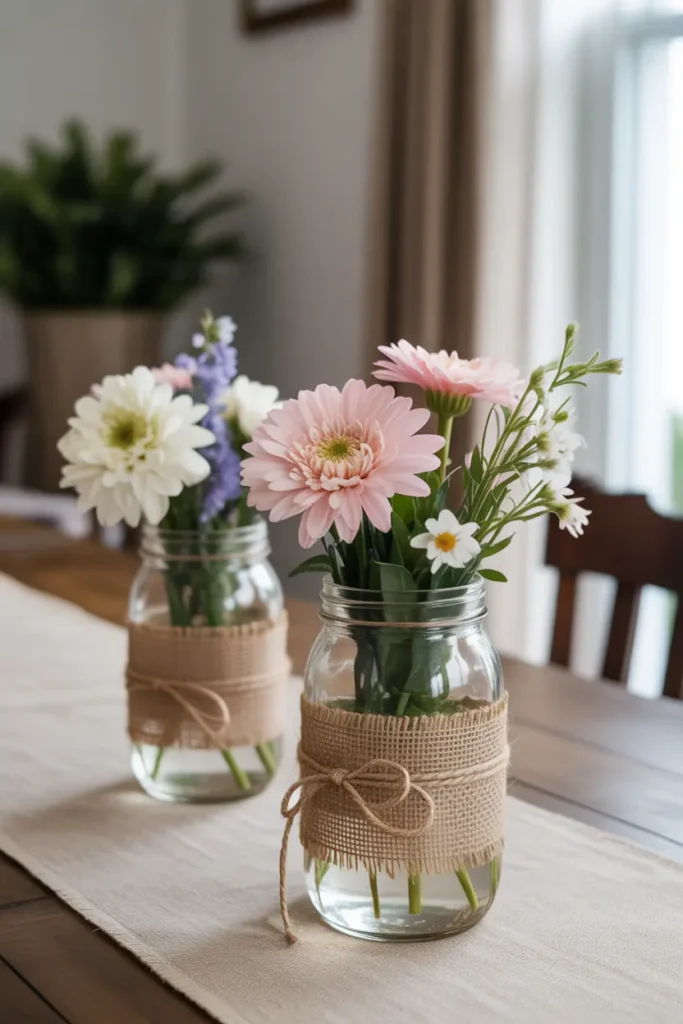
14. Burlap Mason Jar Vases
Materials Needed:
- Mason jars
- Burlap strips
- Twine or lace
- Hot glue gun
- Flowers (real or faux)
Steps:
- Wrap burlap around jar
- Glue ends neatly
- Add twine bow for detail
- Fill with flowers
- Display on tables or shelves
Burlap mason jar vases are a lovely way to add rustic charm to your space, especially if you enjoy farmhouse décor. The combination of jute texture and glass gives a warm, natural look that complements floral arrangements perfectly. These jars work well as centerpieces for everyday styling and special events like family dinners or seasonal gatherings. It’s an easy DIY home décor project that transforms simple jars into stylish accent pieces.
You can switch up the style by using lace, ribbons, or small wooden tags for personalization. They also serve multiple purposes—flower vases, candle holders, or utensil organizers at parties. This DIY is affordable and looks just as good as store-bought décor. Display them in groups of three for a balanced look. Whether decorating for guests or refreshing your table setup, these vases bring a handmade touch that feels thoughtful and inviting.
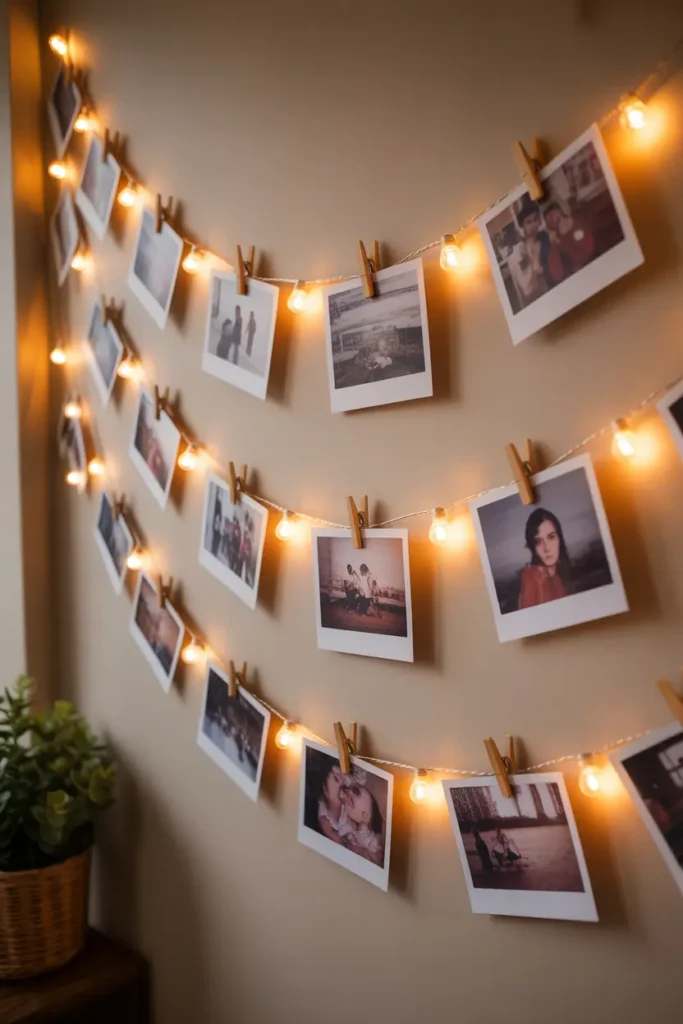
15. DIY Photo Clip String Lights
Materials Needed:
- String/fairy lights
- Mini clips
- Printed photos
- Hooks or adhesive strips
Steps:
- Hang string lights on wall
- Clip photos along the line
- Space evenly for visual balance
- Replace pictures anytime
- Turn on lights for ambiance
Photo clip string lights turn memories into a décor focal point. The soft lighting highlights photographs, making them feel more special and emotional. This idea suits bedrooms, dorm rooms, and creative corners where you want a warm and personal atmosphere. It’s quick to assemble and doesn’t require drilling or expensive frames. You can update photos anytime and keep meaningful moments always in view.
It’s also a versatile decoration for celebrations, parties, or seasonal makeovers. By printing different photo themes or adding small cards, you can refresh the look whenever you want. The lights add cozy hospitality during evenings, perfect for creating a relaxing environment. This DIY home décor idea is fun, expressive, and budget-friendly, making any wall more lively and story-filled.
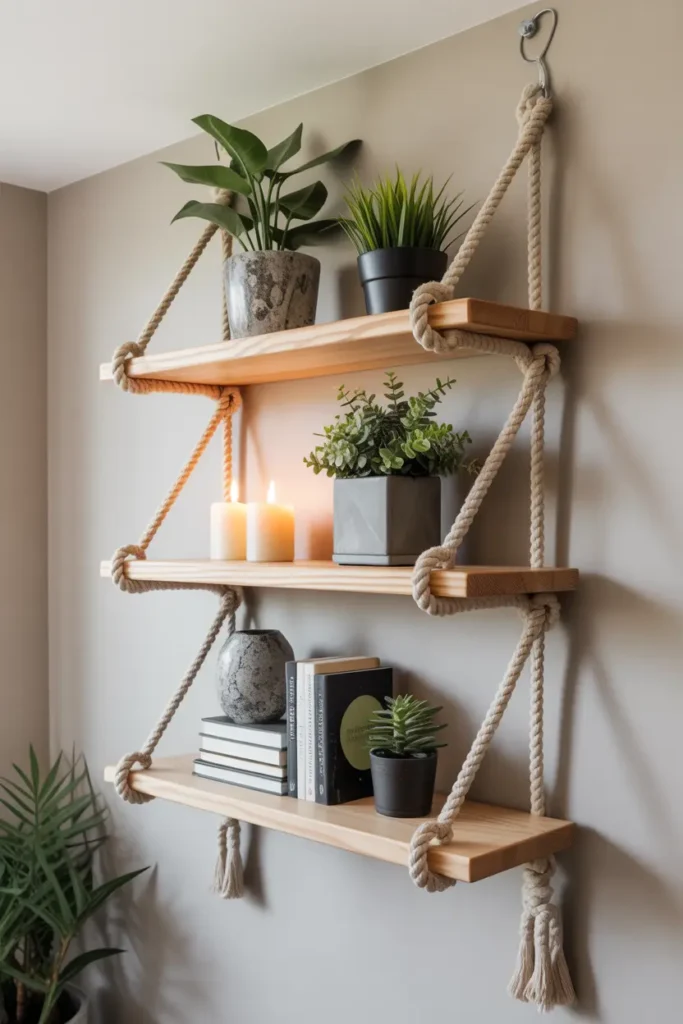
16. DIY Floating Rope Shelves
Materials Needed:
- Wooden boards
- Heavy-duty rope
- Drill
- Wall hooks
- Sandpaper
Steps:
- Drill holes on board corners
- Thread rope and tie secure knots
- Fix hooks into the wall
- Hang shelves and balance evenly
- Decorate with light items
Floating rope shelves are a creative way to add storage and visual interest at the same time. The rope instantly adds a rustic and coastal charm while the wood keeps the décor warm. These shelves help fill empty wall spaces without making a room feel crowded. They are perfect for displaying lightweight items like small plants, mini frames, or bathroom essentials. Since this project uses simple materials, it’s budget-friendly and achievable even for beginner DIY lovers.
You can customize the length, number of tiers, and wood finish to match your home style. A darker stain gives a modern industrial feel, while light wood works great for boho or Scandinavian spaces. Just make sure the wall hooks are strong enough to support the weight. These shelves look especially attractive when placed in pairs or groups to create a coordinated display. It’s a stylish DIY home decor project that improves function and aesthetics together.
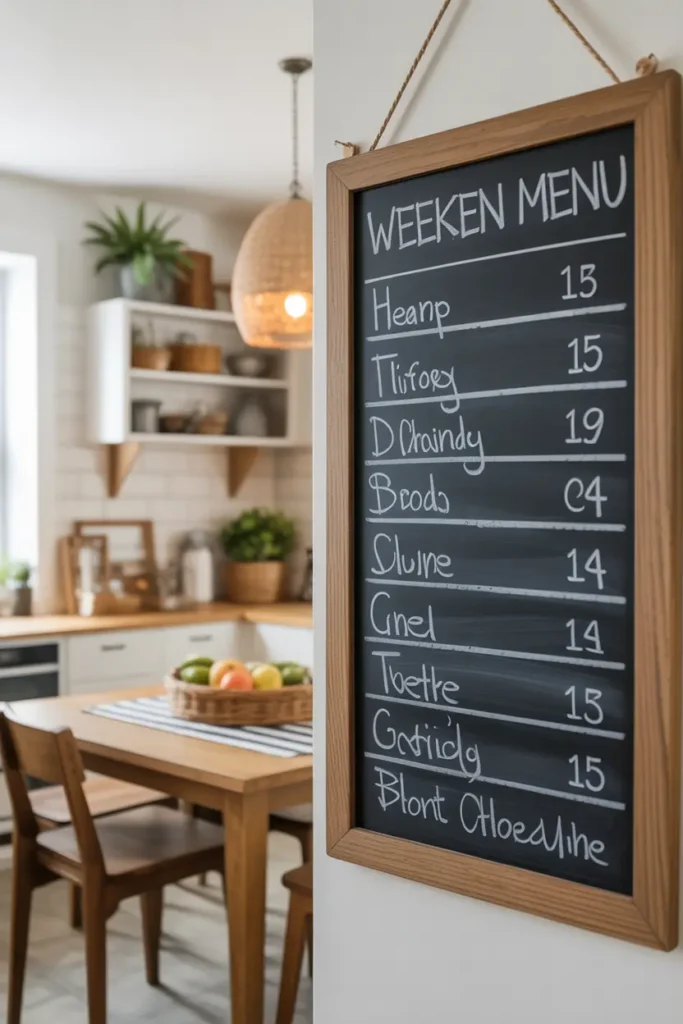
17. Chalkboard Kitchen Menu
Materials Needed:
- Chalkboard or chalkboard paint
- Wooden frame (optional)
- Chalk or chalk markers
- Hanging hardware
Steps:
- Paint a board or wall section
- Let dry completely
- Write weekly menu neatly
- Hang in kitchen dining space
A chalkboard kitchen menu adds personality and purpose to your cooking area. It gives a warm, café-like charm where you can plan meals for the week, write cute notes, or display a welcome message for guests. It’s a simple décor upgrade that turns a plain wall into a stylish feature. This project works wonderfully in kitchens with farmhouse, rustic, or modern décor themes, offering both practical function and visual interest.
You can customize the board size depending on the wall space available. Adding a frame or painted border creates a polished look. Chalk markers offer cleaner writing and can be changed easily whenever meal plans change. It’s a great habit booster for healthier eating and reducing food waste. This easy DIY home decor project turns daily routines into a decorative display that keeps the kitchen organized and charming.
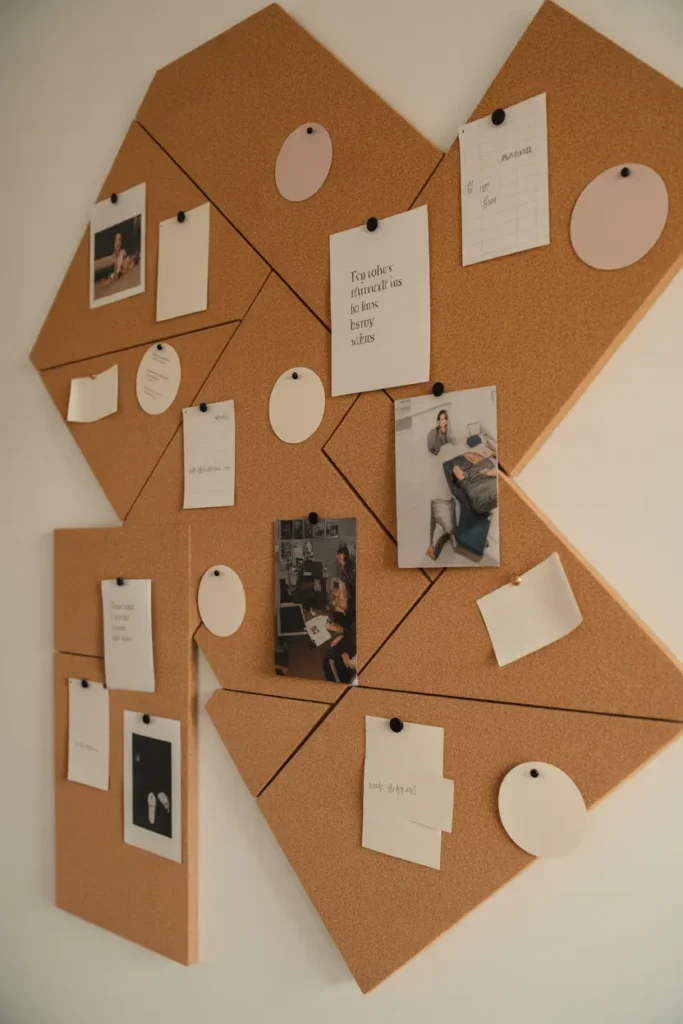
18. DIY Cork Board Wall Organizer
Materials Needed:
- Cork tiles or board
- Strong adhesive
- Push pins
- Ruler
Steps:
- Plan tile pattern on the wall
- Apply adhesive and press firmly
- Let set properly
- Pin notes, schedules, and photos
A cork board organizer wall makes your work or study place more productive and visually attractive. Instead of cluttering your desk with papers, you can pin to-do lists, reminders, or photos at eye level. The cork texture also brings a warm, organic feel to the room. This DIY home decor idea keeps things organized while doubling as a creative display for memories, travel tickets, or inspirational quotes.
Hexagon tiles are very trendy, letting you form honeycomb-style layouts that look modern and artistic. You can cover an entire wall or create a focused area above your desk. It’s also a renter-friendly solution when using removable adhesives. The customizable layout allows you to grow the board with your needs. Overall, this project gives you a functional décor upgrade that supports productivity and personalization.
19. Upcycled Bottle Vases
Materials Needed:
- Glass bottles
- Spray paint or acrylic paint
- Twine or lace
- Flowers
Steps:
- Wash and remove labels
- Paint bottles and let dry
- Decorate with twine if desired
- Arrange with flowers
Upcycling bottles into vases is one of the most affordable and eco-friendly DIY home decor ideas. It keeps glass out of the trash while turning it into something beautiful and valuable. Painted bottles make lovely table centerpieces or shelf accents in every season. Whether you choose solid colors for minimal vibes or patterns for a pop of fun, the bottles instantly look like high-end decorative pieces.
You can use different shapes and sizes to create an eye-catching group arrangement. Metallic finishes give a luxurious feel, while matte pastels work well for soft and calming décor. This project is beginner friendly and perfect for customizing party table settings or gifting. It also helps refresh your space frequently, since you can repaint the bottles to match new surroundings or festive themes. It’s stylish, sustainable, and highly versatile.
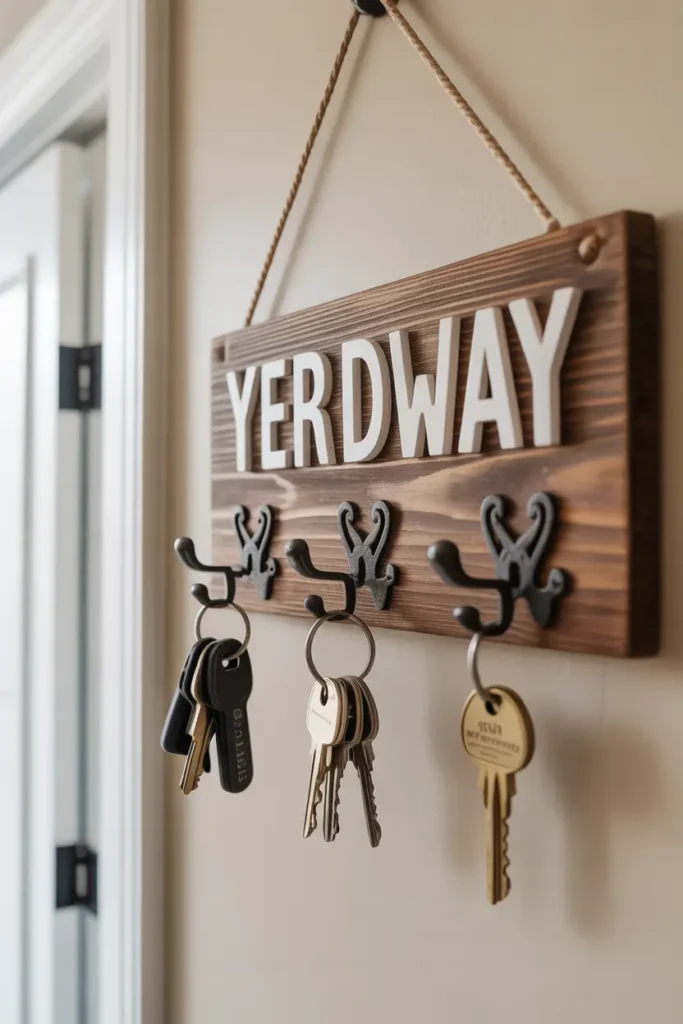
20. DIY Key Holder with Hooks
Materials Needed:
- Wooden board
- Paint or stain
- Screw-in hooks
- Hanging hardware
Steps:
- Finish board with paint or stain
- Attach hooks evenly
- Add hanging hardware on back
- Mount near entrance
- Hang keys and essentials
A key holder with hooks is a small home addition that makes daily life much more efficient. Instead of searching for keys every time you leave the house, they stay in one dedicated spot. The board can be decorated with stencils, lettering, or small shelves to create a functional and attractive entryway feature. It brings instant tidiness and adds style to an often overlooked area of your home.
This DIY home decor project works in small spaces too, making it valuable for apartments. You can expand the design to include hooks for masks, small bags, or dog leashes. Dark stains make it look modern and sleek, while farmhouse lettering creates a cozy welcome. It’s a quick build that gives practical benefits every day and helps set a positive mood right when you walk through the door.
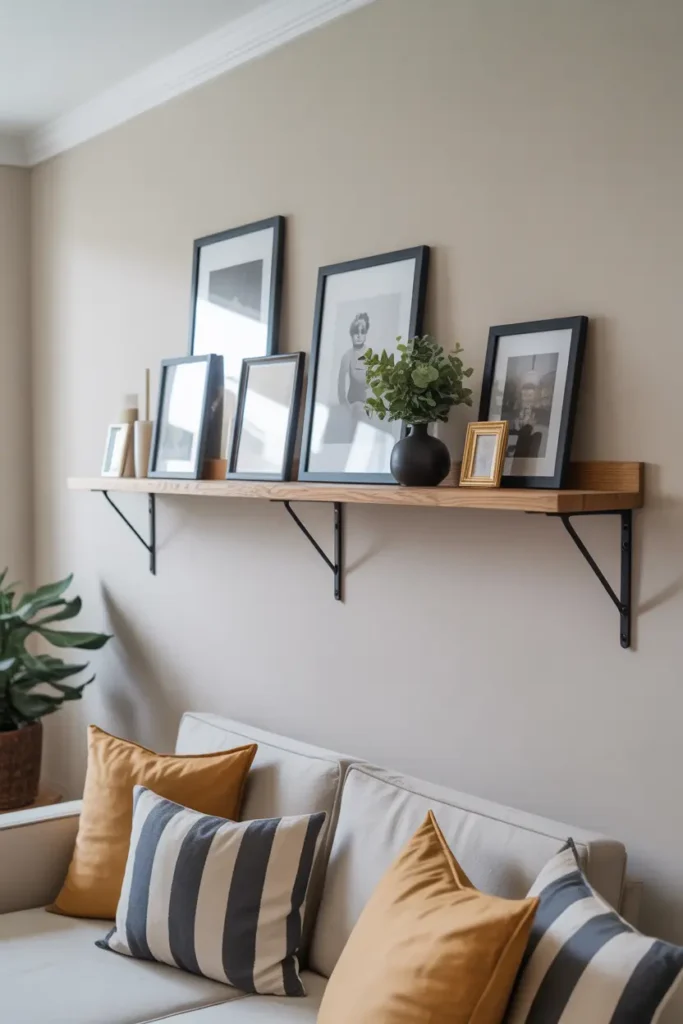
21. DIY Picture Ledge Shelf
Materials Needed:
- Wooden boards
- Wood glue
- Nails or screws
- Sandpaper
- Wall anchors
Steps:
- Attach a thin front lip to shelf board
- Glue and secure with nails
- Sand and paint or stain
- Mount shelf using anchors
- Display frames and art
A picture ledge shelf lets you create a dynamic gallery wall without committing to nails for every frame. You can easily switch photos, artwork, or seasonal décor whenever you want a fresh look. This shelving style works well in narrow spaces where standard shelves would take up too much room. It provides the perfect display spot for prints, quotes, and travel memories while keeping the wall design organized and stylish.
Customization options are endless since you can choose any length or finish to match your interior theme. Natural wood offers warmth while painted shelves provide a sleek and minimal look. A few ledges stacked vertically can turn a plain wall into a beautiful feature gallery. It’s a practical DIY home decor upgrade that blends creativity and storage, giving your home a polished yet personal atmosphere.
22. DIY Painted Ombre Dresser

Materials Needed:
- Old dresser
- 3–5 shades of paint from dark to light
- Sandpaper
- Paintbrush or foam roller
- Clear protective topcoat
Steps:
- Sand and prep the dresser surface
- Paint each drawer in a different shade for gradient effect
- Apply protective topcoat after drying
A painted ombre dresser brings personality, modern design, and fresh energy into any room. It’s the perfect DIY home decor idea for upcycling furniture that may look outdated or worn. The gradient paint technique turns something plain into a stylish focal point that looks like custom designer furniture. Whether you choose a bold color like teal or a soft palette like blush pink, the smooth gradient creates a visually stunning transformation that makes the dresser feel brand-new without replacing it.
This makeover works beautifully in bedrooms, nurseries, or hallways. You can replace drawer knobs with modern hardware to complete the look or keep the original ones for a vintage charm. The beauty of this project is that it allows full customization—choose colors that complement your existing décor or use the opportunity to introduce an accent color to the room. Not only is this project budget-friendly, but it also helps reduce waste by giving old furniture a second life. It’s a creative way to blend function with aesthetic appeal.
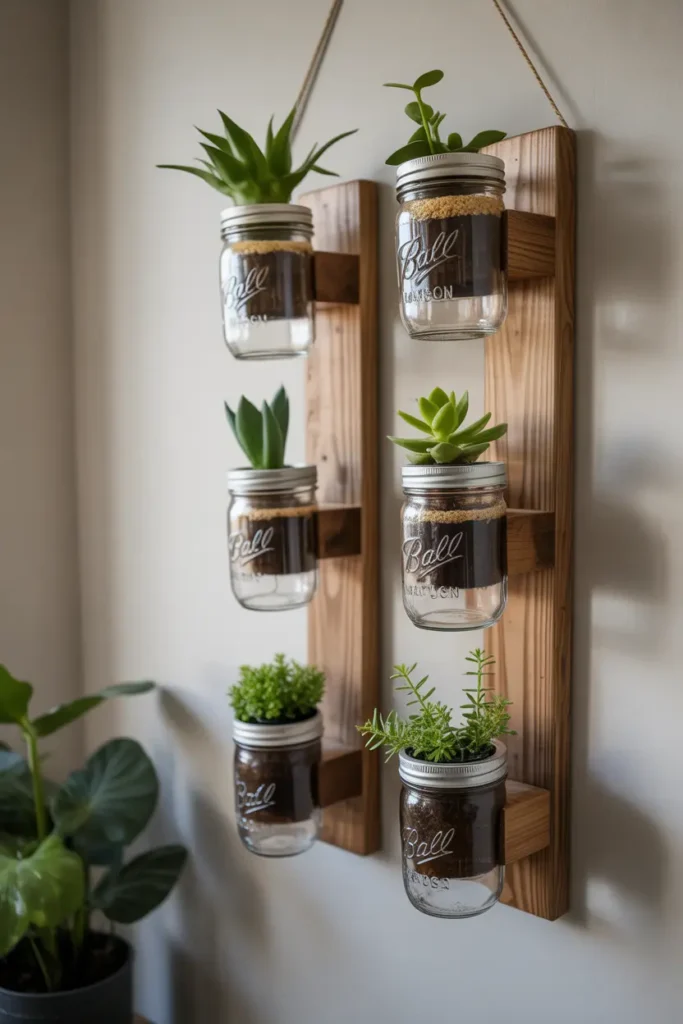
23. Houseplant Mason Jar Holders
Materials Needed:
- Mason jars
- Wooden boards
- Hose clamps
- Screws + drill
- Small plants or herbs
Steps:
- Fix hose clamps to board with screws
- Insert mason jars and tighten clamps
- Mount boards to the wall
- Add soil and plants inside jars
Houseplant mason jar holders are a charming way to introduce greenery into different parts of your home. Wall-mounted planters save space while keeping plants at eye level where they can be appreciated. They also create a fresh and organic vibe that promotes relaxation and cleaner air. This DIY home decor project is especially great for kitchens where you can grow herbs like mint, basil, and rosemary within easy reach.
You can stain or paint the wooden boards to match your style—rustic brown for farmhouse homes or white for modern interiors. These planters look lovely displayed in sets, forming a vertical garden that turns empty walls into living art. They’re versatile, easy to maintain, and perfect for renters since the boards can be removed without harm. With a bit of creativity, you can enjoy stylish greenery that brings your home decor to life.
Conclusion
With these DIY home decor ideas, you can transform blank walls, organize smartly, and bring your space to life using creativity and simple materials. Choose one or two projects to start with and enjoy watching your home become more personalized, welcoming, and stylish. Every small upgrade makes a difference, and your home will feel even more special knowing you made it yourself.