22 DIY Canvas Art Projects You’ll Love Making
Looking to add a personal touch to your walls? DIY canvas art is the perfect way to refresh any space with creativity and style. From abstract designs to textured masterpieces, these 22 projects cover a mix of modern, cozy, and artistic ideas suitable for bedrooms, living areas, or creative corners. Each project is easy to follow, budget-friendly, and beginner-friendly, providing step-by-step guidance with materials and methods. Get ready to transform plain walls into Pinterest-worthy focal points that showcase your personality and design flair.
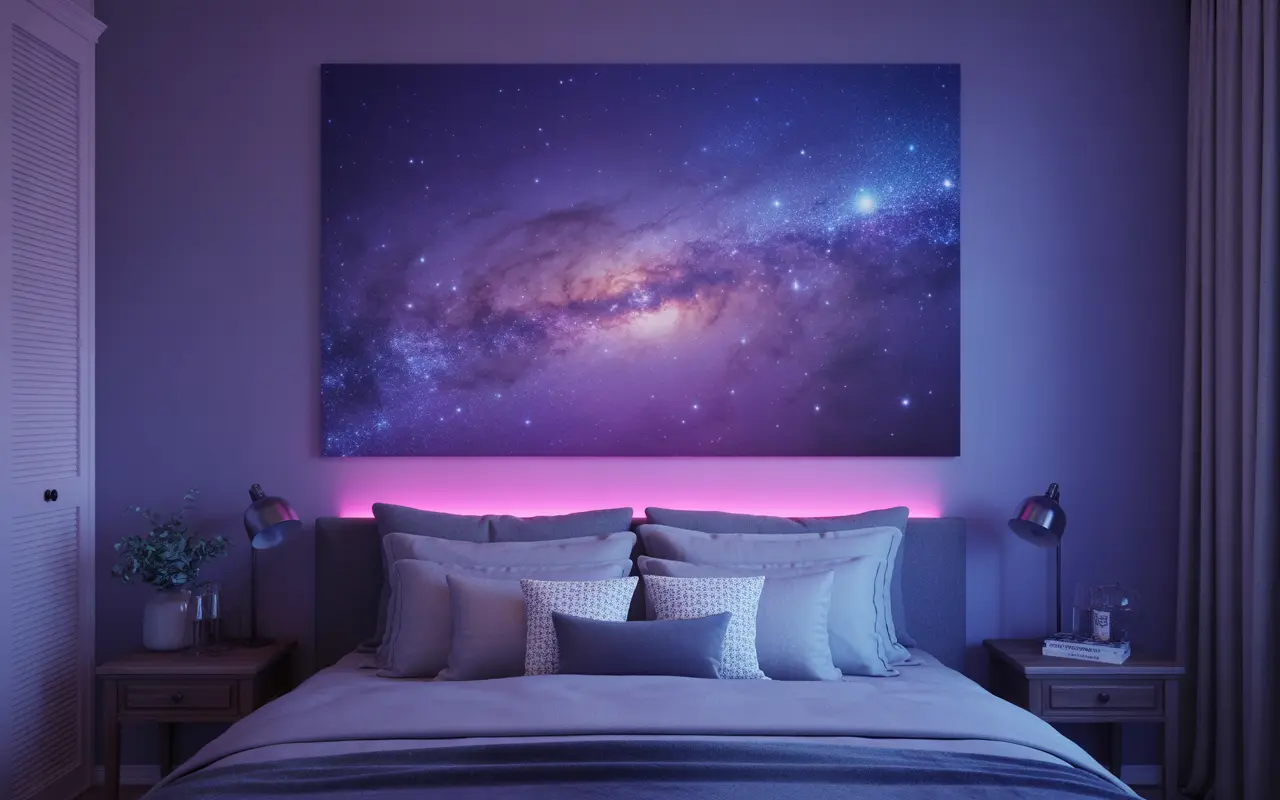
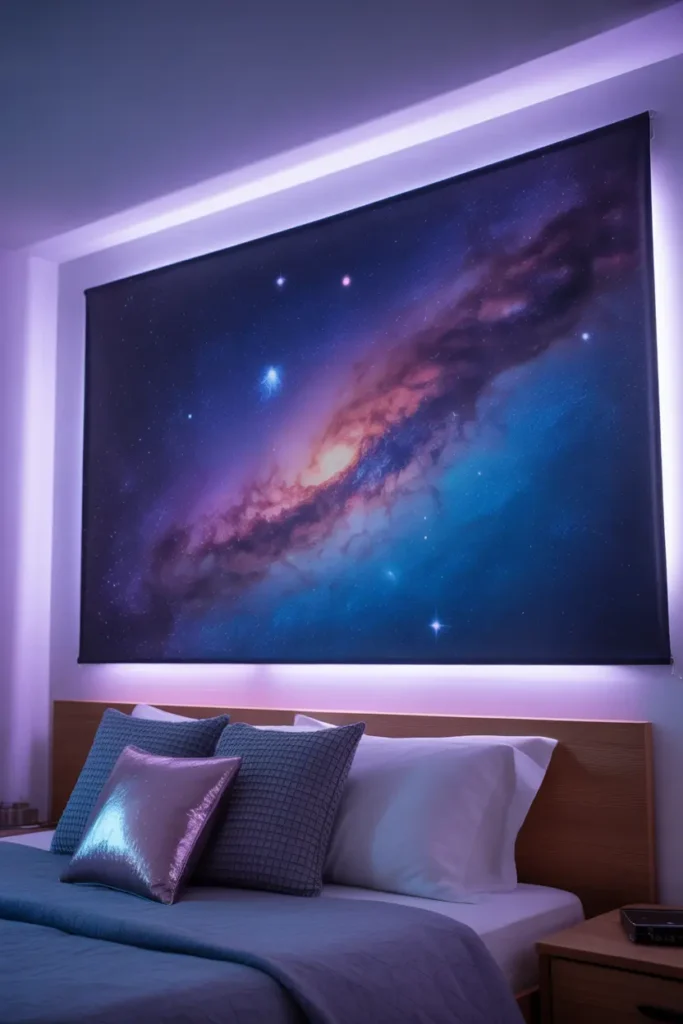
1. Galaxy Glow Canvas
Materials Needed
- Large canvas
- Acrylic paints: navy, purple, black, white
- Sponge + detail brush
- LED strip lights
Steps
- Blend dark colors as background using a sponge
- Dab lighter colors for nebula effect
- Flick white paint for stars
- Attach LED strips behind the canvas
- Hang above bed
Galaxy canvas art is a showstopper because it combines color, texture, and light into a single piece. Even beginners can achieve stunning effects using sponge techniques and simple flicks for stars. The LED strip behind the canvas adds a soft glow that instantly elevates the bedroom ambiance. This DIY project not only refreshes your wall but also creates a magical atmosphere that is both relaxing and visually striking, perfect for anyone looking to create a dreamy space that draws attention and inspires awe.
You can customize the colors to suit your room, choosing from deep blues, purples, or even subtle pinks for a romantic vibe. Multiple smaller canvases arranged in a starry gallery wall work just as well for wider spaces. Pairing this piece with minimal bedding and subtle accents allows the glow to remain the focal point. This project is ideal for Pinterest enthusiasts looking for DIY canvas art that looks high-end without spending a fortune, combining fun craft techniques with room-transforming results.
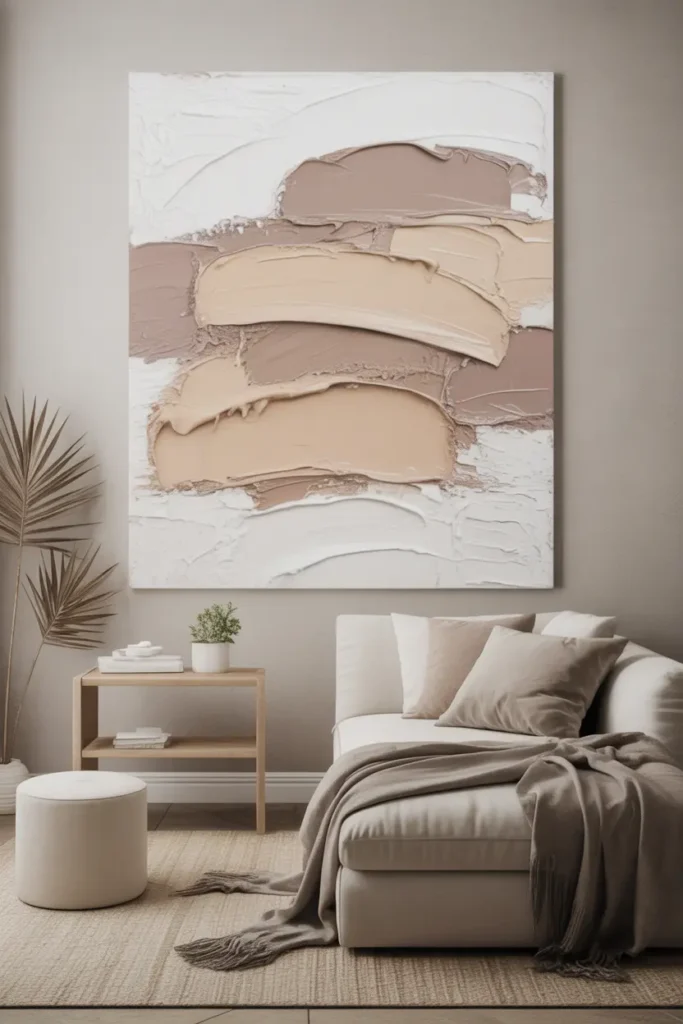
2. Neutral Textured Canvas
Materials Needed
- Canvas
- Acrylic paints: white, beige, taupe
- Palette knife or brush
- Sponge
Steps
- Apply base beige layer evenly
- Use palette knife to add layered texture
- Apply white highlights for depth
- Blend edges for soft transitions
- Let dry completely before hanging
Neutral textured canvases are timeless because they add dimension without overwhelming a space. The tactile brushwork creates subtle shadows that give the wall a dynamic, artistic feel. This project is ideal for anyone wanting a professional-looking piece with minimal effort. By combining muted tones, the canvas complements furniture and bedding while maintaining a soft, elegant aesthetic. It works beautifully in modern, Scandinavian, or minimalist bedrooms, making the wall feel intentional and designed, which is exactly what Pinterest users love to see in DIY projects.
This DIY project allows endless creativity—adjust the texture thickness, layering patterns, or even blend in soft metallic accents for a touch of luxury. Grouping multiple canvases in a horizontal or vertical arrangement can enhance the visual appeal for larger walls. The process is beginner-friendly, yet the result appears custom-made and gallery-ready. A neutral textured canvas is a versatile piece that seamlessly integrates into any decor style while providing a calm, stylish, and photo-worthy backdrop for your bedroom or living space.
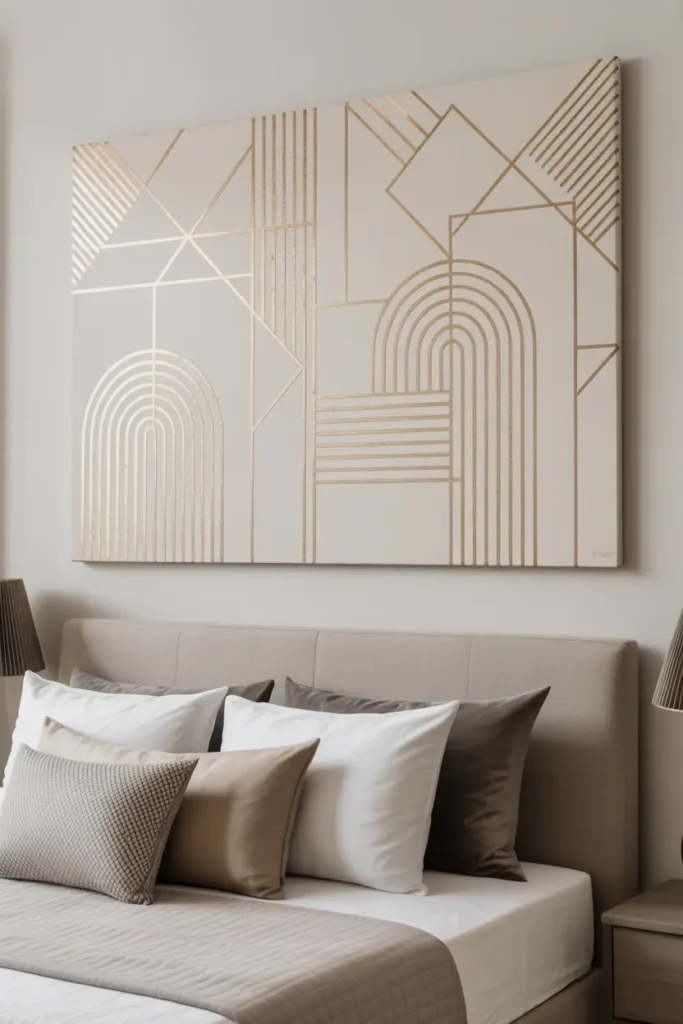
3. Geometric Gold Accent Canvas
Materials Needed
- Canvas
- Acrylic paints (neutral/muted tones)
- Gold leaf or metallic paint
- Painter’s tape
Steps
- Tape geometric shapes on canvas
- Paint the background in muted tones
- Remove tape for crisp lines
- Add gold accents along shapes
- Let dry completely before display
Geometric gold accent canvases are a trendy DIY that instantly elevates a wall. The crisp shapes and metallic shimmer catch the eye, creating a sense of sophistication. Even small canvases make a bold statement when placed strategically. The metallic accents add luxury without expensive materials, making this project cost-effective yet high-impact. Perfect for bedrooms or offices, the design complements both modern and classic interiors. With precise tape placement and layering, you can create a professional-looking canvas that feels both polished and unique.
You can create a triptych or multiple panels for a larger effect, aligning shapes across canvases for a cohesive gallery wall. Mixing muted tones with the metallic accents allows the design to blend with most room color schemes. This project encourages experimentation with shapes, size, and foil patterns, offering a customizable approach for DIY enthusiasts. It’s perfect for Pinterest-driven decor lovers who want a DIY canvas art project that feels luxurious, visually striking, and professionally styled while still being achievable at home.
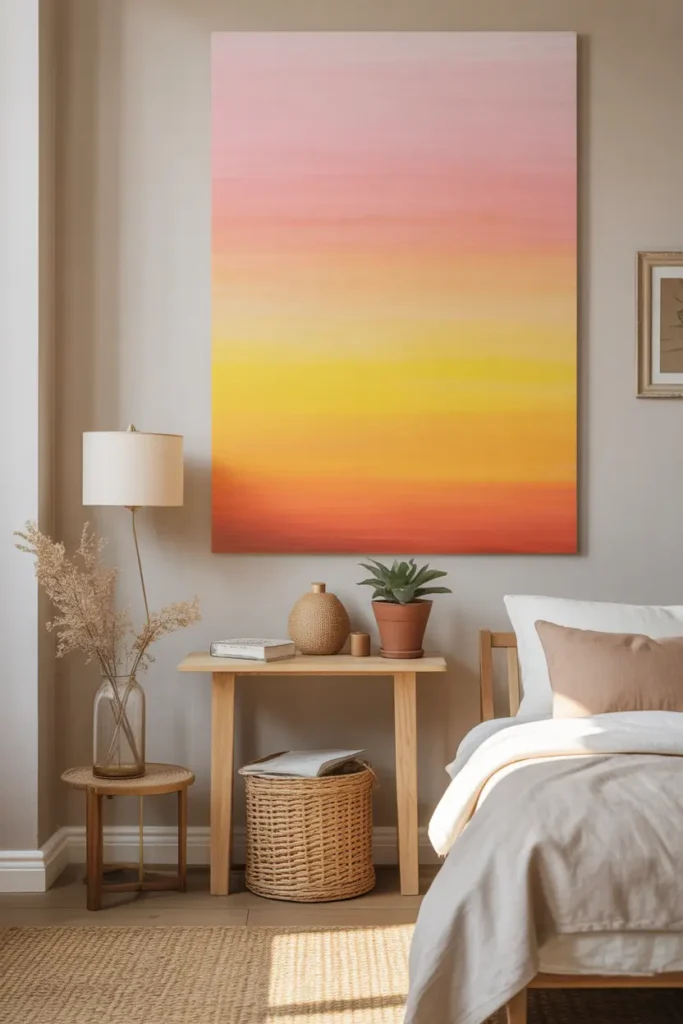
4. Ombre Sunset Canvas
Materials Needed
- Canvas
- Acrylic paints: yellow, orange, pink
- Large flat brush
- Sponge for blending
Steps
- Paint top section with pink
- Blend orange in middle
- Add yellow at bottom
- Smooth transitions with sponge
- Let dry before hanging
Ombre sunset canvases bring warmth and serenity to a space. The gradient effect is visually calming and works beautifully as a focal point in bedrooms. By layering colors and blending carefully, even beginners can create an artful sunset that evokes tranquility. This project also allows you to experiment with your favorite color palette, whether warm tones for coziness or cooler tones for a calming retreat. The canvas can be hung above the bed, reading nook, or dresser to instantly lift the room’s ambiance.
Adding subtle texture with a sponge or palette knife enhances the gradient, giving depth and a realistic sky-like effect. Multiple smaller canvases arranged together can create a panoramic feel, making the wall feel expansive. This DIY is budget-friendly yet visually impressive, providing a soft, inviting aesthetic that’s perfect for Pinterest users. It’s also highly customizable, allowing you to match the gradient to room decor or seasonally update colors for a fresh look anytime.
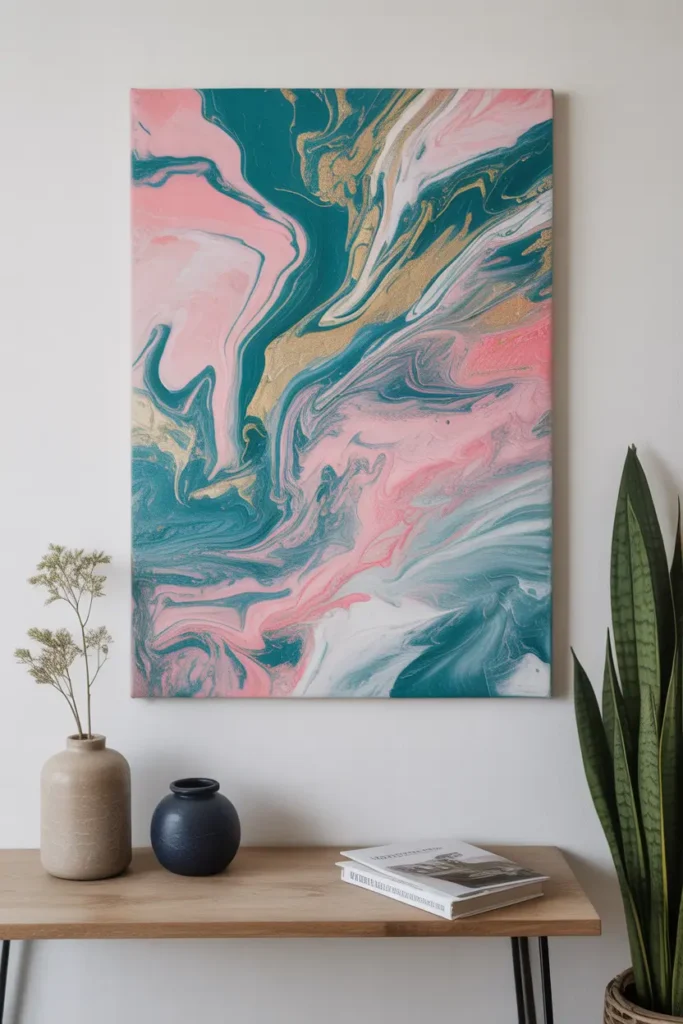
5. Abstract Pour Canvas
Materials Needed
- Canvas
- Acrylic pour paints (multiple colors)
- Pouring medium
- Disposable cups + stir sticks
- Gloves
Steps
- Mix paints with pouring medium in separate cups
- Pour paints onto canvas in layers
- Tilt canvas to create flowing patterns
- Let paint settle and dry
- Seal with clear varnish
Abstract pour canvases are a fun and forgiving DIY project. The paint naturally creates beautiful patterns, making every piece unique. This technique is perfect for beginners or anyone intimidated by precise drawing or painting skills. The final canvas is bold, colorful, and modern, instantly adding character to a plain wall. Fluid art also encourages creativity, as you can mix color combinations that suit your personal aesthetic and room color palette, resulting in a piece that feels fully customized.
This DIY canvas art is perfect for those seeking a statement piece. Oversized pours make walls feel luxurious, while smaller canvases can be grouped for a gallery effect. Using metallic or contrasting colors enhances depth and visual intrigue. Once sealed, the piece becomes a long-lasting artwork that brightens any space. Ideal for Pinterest boards, bedrooms, or living areas, the abstract pour technique combines ease, creativity, and a professional look in a single, fun DIY project.
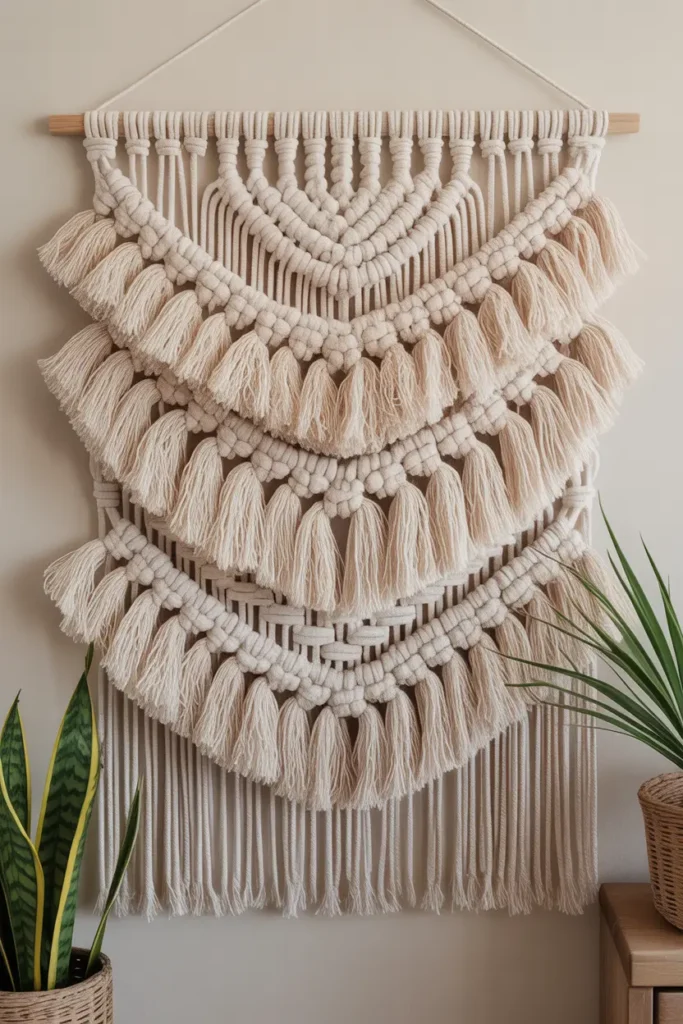
6. Macramé Texture Canvas
Materials Needed
- Canvas
- Cotton yarn in neutral tones
- Hot glue gun
- Scissors
- Optional beads
Steps
- Cut yarn into varying lengths
- Tie knots or create loops for texture
- Glue yarn onto canvas in layered patterns
- Add beads for accent if desired
- Let dry completely before hanging
Macramé texture canvases blend craft and art, giving your walls a cozy, handmade feel. The layered yarn creates dimension and warmth, making the piece feel inviting and sophisticated. It’s a beginner-friendly project with a high-end look, perfect for adding personality without overwhelming a space. This DIY canvas art works well above a bed, next to a reading chair, or even in a gallery wall arrangement. Its neutral tones and tactile quality make it a versatile addition to many decor styles, from boho to modern.
This canvas allows for endless creativity—you can mix textures, layer patterns, or even incorporate metallic threads for subtle shimmer. Grouping multiple macramé canvases together creates a cohesive gallery wall with depth and visual interest. The tactile nature of this DIY makes it stand out on Pinterest, encouraging visitors to recreate the project. It’s a relaxing craft that results in a stylish, statement-making canvas suitable for any room seeking personality and texture.
7. Minimal Line Art Canvas
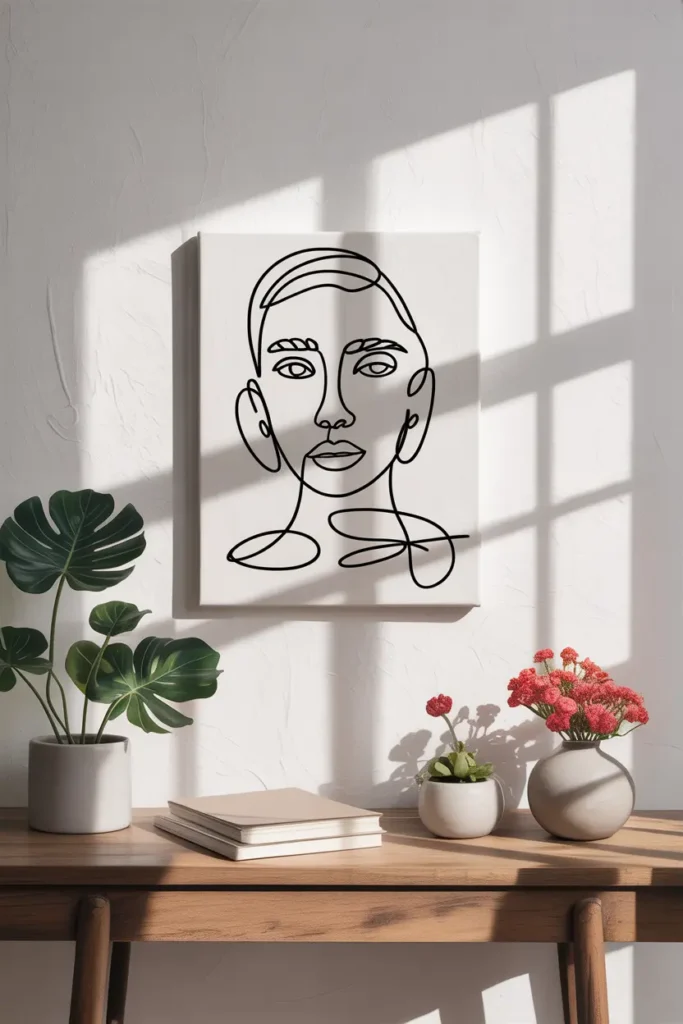
Materials Needed
- Canvas
- Acrylic paint: black and white
- Fine brush or paint pen
- Pencil for sketching
Steps
- Sketch design lightly with pencil
- Trace lines with black paint pen or fine brush
- Erase visible pencil lines after drying
- Touch up as needed
- Hang in desired location
Minimal line art is a trending DIY canvas art style because it balances simplicity with sophistication. Continuous line sketches create visual intrigue while keeping the space airy and modern. Perfect for bedrooms or home offices, it complements a wide variety of decor styles. The clean design draws the eye without dominating the room, making it ideal for smaller walls or gallery arrangements. With just black and white paint, you can craft a timeless piece that looks professional yet personal.
You can create a series of small canvases with different line sketches for a cohesive gallery wall, or make one large piece as a statement. The project encourages creativity, as you can choose abstract shapes, portraits, or motifs that resonate with your personality. This DIY canvas art is highly Pinterestable, combining modern minimalism with an artistic touch, perfect for anyone who wants a stylish, elegant focal point without complicated techniques.
8. Floating Rainbow Canvas
Materials Needed
- Canvas
- Acrylic paints in pastel rainbow tones
- Round brushes
- Painter’s tape (optional for neat arcs)
Steps
- Lightly sketch rainbow arcs
- Paint each section with desired pastel colors
- Blend edges for soft transitions
- Touch up for clean lines
- Allow to dry before displaying
Floating rainbow canvases bring a whimsical yet sophisticated touch to walls. The soft, curved lines and pastel palette make the room feel airy and cheerful without being overpowering. This DIY canvas art is great for bedrooms, nurseries, or creative spaces, providing a fun focal point that enhances the decor. Even beginners can achieve professional-looking results by sketching light guidelines and carefully layering the colors, making this both an enjoyable and rewarding project.
You can expand this idea by creating a series of canvases, each featuring a portion of the rainbow, to form a panoramic effect across a larger wall. Using muted tones ensures the piece integrates seamlessly into various interior styles. This DIY is perfect for Pinterest enthusiasts looking for playful yet elegant canvas art, combining visual impact with easy execution and creative flexibility, giving every room a personal and stylish flair.
9. Resin Wave Canvas
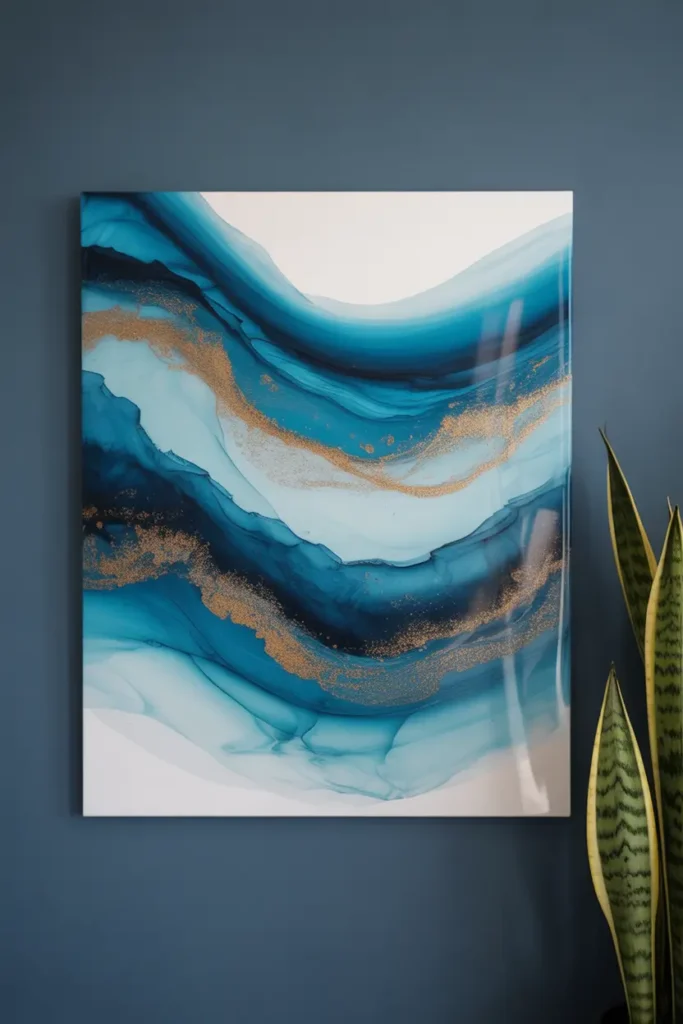
Materials Needed
- Canvas
- Resin
- Acrylic paints: blue, teal, white, gold
- Mixing cups + sticks
- Gloves and protective sheet
Steps
- Mix resin with paint colors
- Pour resin in layers to create wave patterns
- Tilt canvas for natural flow
- Let cure completely
- Seal edges and display
Resin wave canvases are a visually striking way to elevate walls with a glossy, flowing art piece. The blending of blues, teals, and metallic gold creates a luxurious, coastal vibe that feels expensive yet is DIY-friendly. This project allows you to experiment with color mixing and movement, resulting in a unique canvas each time. It works especially well in bedrooms above the bed or on feature walls, creating a sophisticated, gallery-worthy effect that draws attention and enhances the room’s aesthetic.
Using resin adds depth and shine, giving a 3D appearance that makes the canvas pop. You can also combine smaller canvases to create a cascading wave effect across a wall. The glossy surface reflects light beautifully, adding dynamic energy to the space. For Pinterest appeal, this project offers both creativity and luxury at home, making it ideal for DIY enthusiasts seeking a professional-looking canvas art project that transforms blank walls into stylish focal points.
10. 3D Floral Canvas
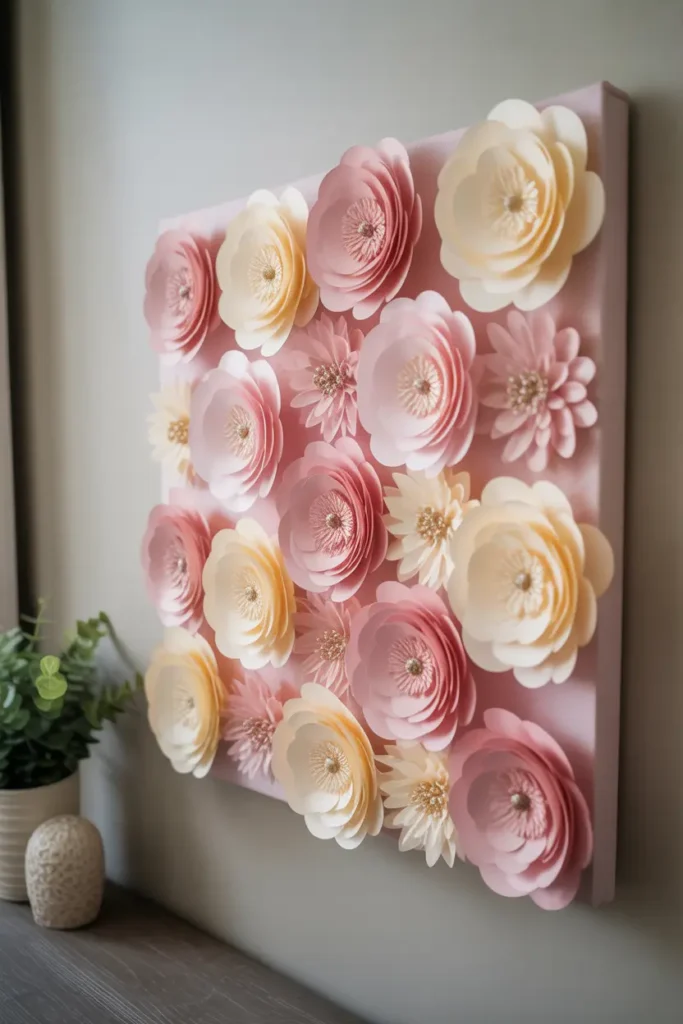
Materials Needed
- Canvas
- Paper or fabric flowers
- Hot glue gun
- Scissors
- Optional: leaves or beads for accents
Steps
- Arrange flowers on canvas to plan composition
- Secure with hot glue
- Layer smaller flowers on top for depth
- Add leaves or beads for accents
- Hang securely on the wall
3D floral canvases bring life and dimension to a wall. The layered flowers create texture that catches the eye and gives a luxurious handcrafted look. This DIY project allows for personalization—you can choose colors, flower types, and layouts that match your bedroom or living space. Perfect for creating a romantic, feminine, or whimsical vibe, these canvases elevate interiors with a tactile and visually stunning appeal that is highly Pinterest-worthy.
Grouping multiple 3D floral canvases or mixing with painted backgrounds enhances the depth and complexity of the display. This project is beginner-friendly and highly customizable, allowing crafters to experiment with materials and composition. Its versatility makes it suitable for any space that needs a stylish focal point. For DIY enthusiasts, this canvas art combines artistry, creativity, and interior design skills to produce a piece that feels professionally made while staying budget-friendly.
11. Marbled Metallic Canvas
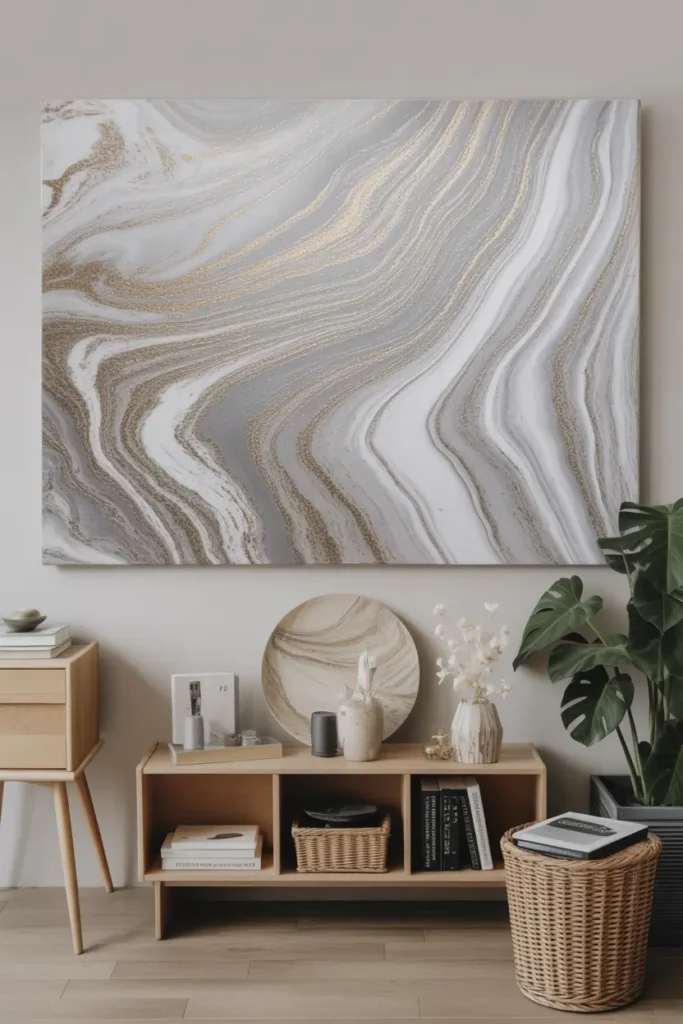
Materials Needed
- Canvas
- Acrylic paints: metallic silver, gold, white
- Pouring medium
- Disposable cups + stir sticks
- Gloves
Steps
- Mix each metallic color with pouring medium
- Pour paints onto canvas in layers
- Tilt and swirl to create marbled effect
- Let paint settle and dry completely
- Seal with clear varnish
Marbled metallic canvases instantly add a touch of elegance and modern sophistication to any wall. The flowing, organic patterns mimic high-end art gallery pieces, making your DIY project look professional. Metallic paints catch light and create a subtle shimmer, ideal for bedrooms seeking a luxe aesthetic. This project encourages experimentation with color blending and flow, ensuring that each canvas is one-of-a-kind. The result is a stunning, eye-catching focal point that enhances the room’s visual appeal without overwhelming existing decor.
These canvases work beautifully as standalone pieces or grouped in sets for a gallery wall. Adjusting the ratio of gold, silver, and white can create more dramatic or subtle effects, depending on your room’s color palette. This DIY project is highly rewarding because the final piece feels expensive and curated. For Pinterest enthusiasts, marbled metallic canvases offer a combination of creativity, sophistication, and accessibility, providing a visually stunning DIY canvas art idea that’s both fun to make and impressive to display.
12. Stenciled Pattern Canvas
Materials Needed
- Canvas
- Wall or stencil paint
- Painter’s tape
- Foam roller or stencil brush
- Stencil template
Steps
- Secure stencil on canvas with painter’s tape
- Apply paint lightly with foam roller
- Carefully remove stencil
- Touch up edges if needed
- Let canvas dry before hanging
Stenciled canvases are a simple yet impactful DIY project. Using templates allows even beginners to create precise, professional-looking designs. Whether geometric, floral, or abstract, stencils offer consistency and a clean aesthetic. The contrast between the painted shapes and the canvas background adds depth and visual interest, perfect for bedrooms or living spaces. This DIY canvas art lets you achieve high-end design results without extensive painting skills, making it accessible, enjoyable, and highly satisfying to complete.
You can customize this project by layering multiple stencil designs or experimenting with color palettes to match your room decor. Grouping smaller stenciled canvases can create a modern gallery wall, while a single large canvas becomes a bold focal point. This project is both affordable and versatile, allowing you to refresh walls with a personalized touch. For Pinterest users, stenciled canvases combine elegance and simplicity, offering a quick DIY canvas art idea that looks curated and stylish.
13. Splatter Paint Canvas
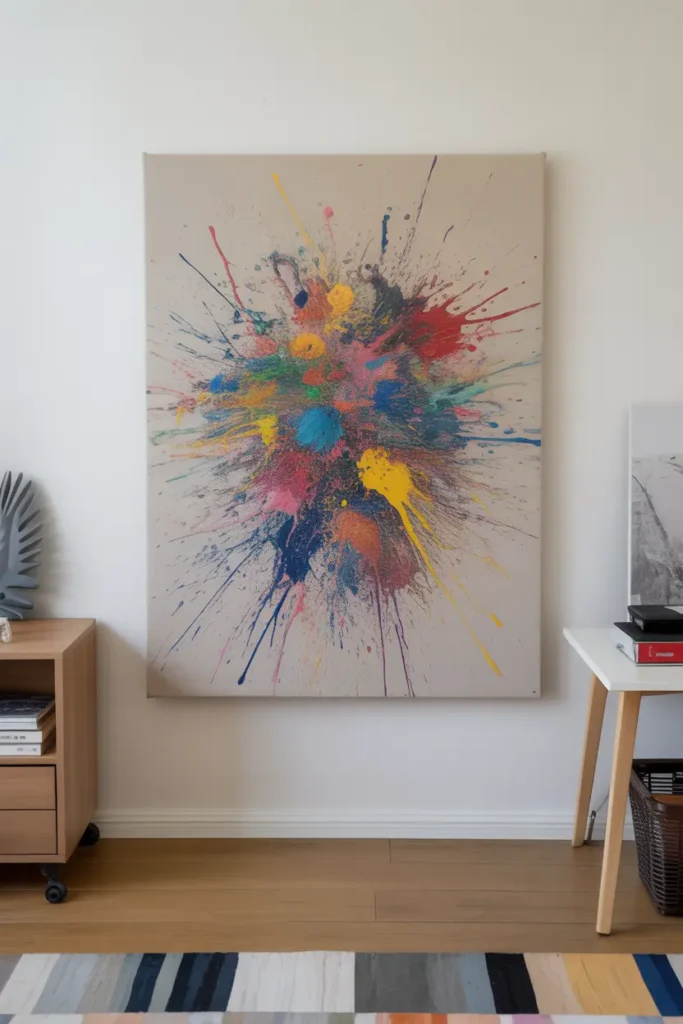
Materials Needed
- Canvas
- Acrylic paints (variety of colors)
- Brushes or toothbrush
- Protective covering for workspace
Steps
- Cover your workspace to avoid mess
- Dip brush in paint and flick onto canvas
- Repeat with different colors
- Layer splatters for depth
- Let dry completely before displaying
Splatter paint canvases bring energy, color, and personality to any wall. This technique is easy for beginners yet produces dynamic, visually striking results. The randomness of the splatters ensures every piece is unique, making it perfect for DIY canvas art enthusiasts. It adds a modern, artistic vibe to bedrooms, making walls look vibrant and curated. Even a small canvas can have a big impact when placed thoughtfully, and layering colors adds richness and texture for an eye-catching effect.
Experimenting with color combinations allows you to coordinate with bedding, curtains, or room accents. You can also create a series of smaller canvases to form a playful gallery wall. The process is fun, freeing, and encourages creativity, making it ideal for Pinterest DIY projects. Splatter paint canvases are versatile, affordable, and visually exciting, offering a beginner-friendly route to vibrant, professional-looking DIY canvas art that enhances the energy and style of your bedroom or living space.
14. Typography Quote Canvas
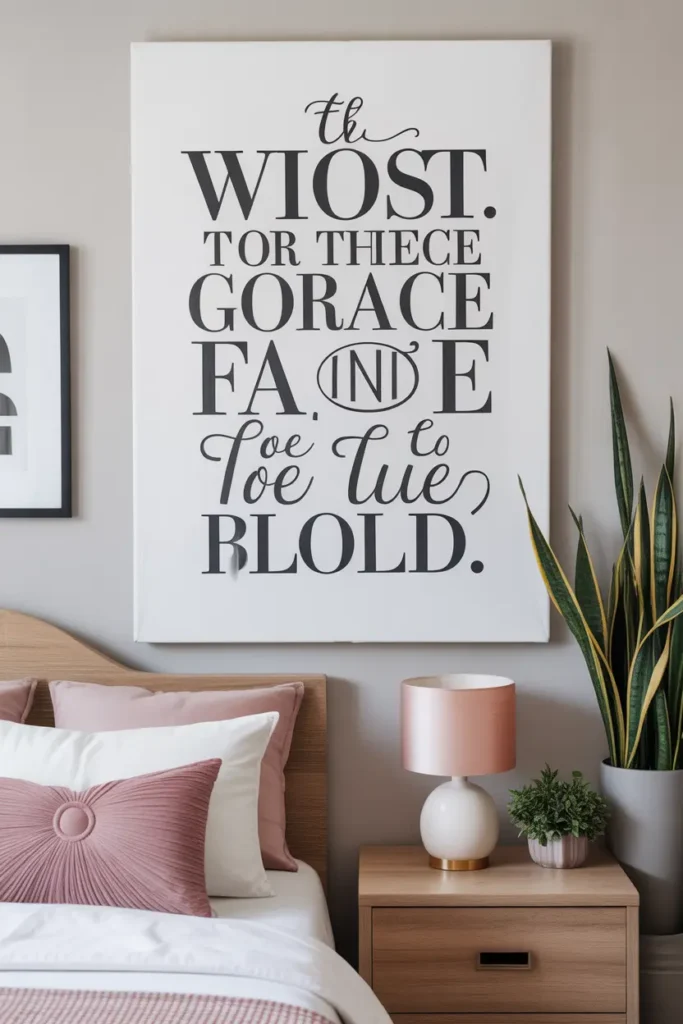
Materials Needed
- Canvas
- Acrylic paints or paint pens
- Pencil for sketching letters
- Ruler or stencil for precision
Steps
- Sketch quote lightly on canvas
- Trace and fill letters with paint
- Add decorative flourishes if desired
- Touch up edges for neatness
- Allow canvas to dry before display
Typography quote canvases are perfect for personalizing a space while making a design statement. Whether it’s motivational, funny, or poetic, text-based art draws attention and reflects your personality. Using bold letters against a neutral background ensures readability and elegance. This DIY canvas art project is beginner-friendly, allowing even novice crafters to create clean, professional-looking results. Positioned above a bed, desk, or reading nook, the canvas inspires and enhances the decor, while serving as a visually striking piece that’s highly shareable on Pinterest.
Customizing fonts, colors, and quotes makes each piece unique. Combining typography with subtle background textures or metallic accents elevates the design further. Multiple canvases with complementary quotes can form a cohesive gallery wall, while a single canvas makes a bold statement. This DIY canvas art allows for creativity, personalization, and impactful interior styling, providing both aesthetic and emotional value. It’s an ideal project for Pinterest enthusiasts seeking stylish, beginner-friendly ways to refresh walls and make their rooms feel curated and meaningful.
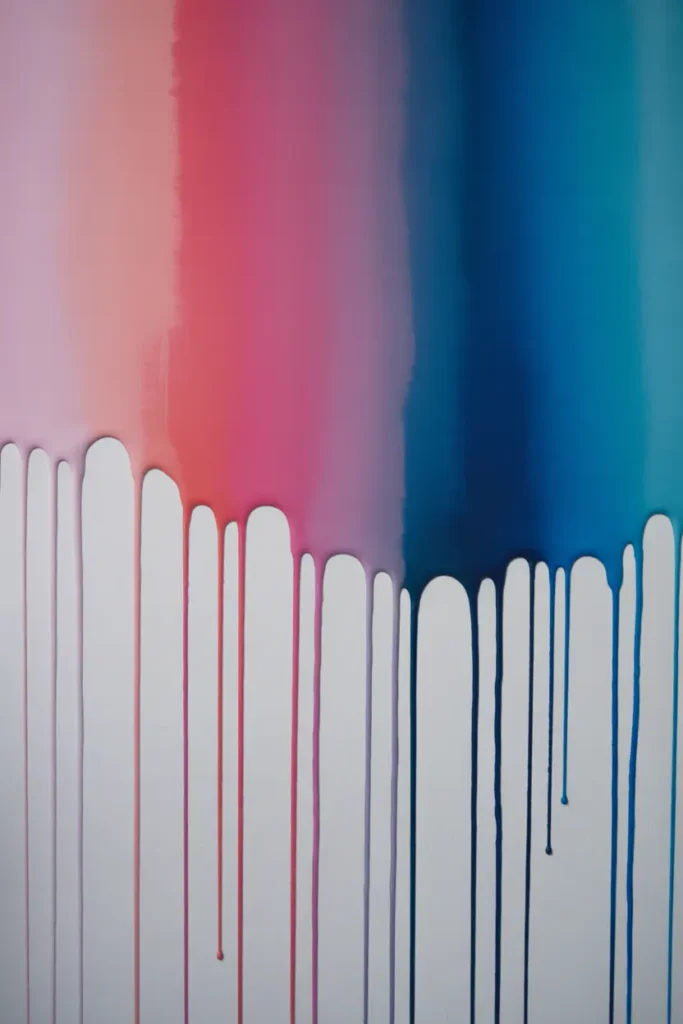
15. Ombre Drip Canvas
Materials Needed
- Canvas
- Acrylic paints in gradient colors
- Pouring medium
- Brushes or squeeze bottles
Steps
- Mix paints with pouring medium
- Start with darkest color at top
- Apply drips flowing downward
- Blend edges for smooth gradient
- Let canvas dry completely
Ombre drip canvases combine color gradients with dynamic textures for a modern, artistic wall feature. The vertical flow creates a sense of movement, transforming a simple wall into a gallery-worthy display. This technique is accessible to beginners while delivering professional-looking results. Choosing complementary colors or pastels allows you to tailor the canvas to your bedroom decor. The visual impact is immediate, making the space feel curated and stylish, while the gradient adds softness and sophistication that works for any room aesthetic.
You can create multiple small ombre drip canvases to form a cohesive set or use a large canvas as a standalone focal point. Metallic highlights or subtle splatters can enhance depth and shimmer. This DIY canvas art project is ideal for Pinterest enthusiasts, combining ease, creativity, and visual impact. It allows you to experiment with colors, techniques, and compositions, creating a custom piece that brings life and style to your walls while reflecting personal taste.
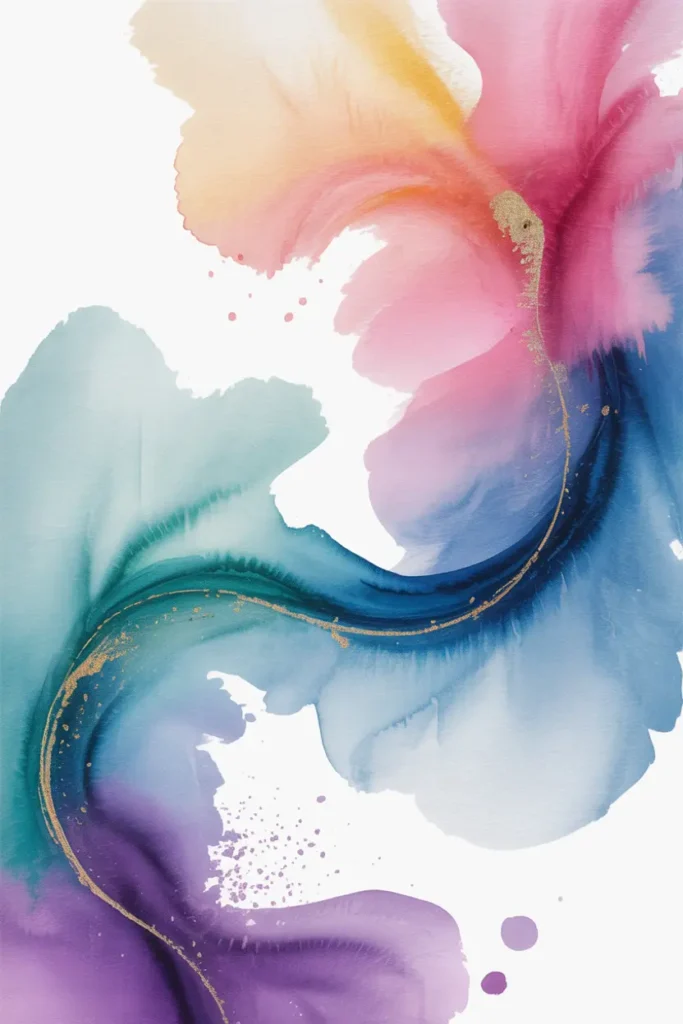
16. Watercolor Splatter Canvas
Materials Needed
- Canvas
- Watercolor paints or watered-down acrylics
- Brushes or spray bottles
- Water cup and paper towels
Steps
- Wet the canvas lightly with water
- Apply watercolor in soft washes
- Layer colors for depth and blending
- Add subtle splatters for texture
- Allow to dry completely
Watercolor splatter canvases are perfect for creating soft, airy wall art that feels calming and artistic. The blending of hues produces a serene gradient effect that enhances bedrooms, nurseries, or meditation corners. This DIY canvas art project is beginner-friendly and allows freedom to experiment with color combinations and layering techniques. Its ethereal quality brings a light, airy aesthetic to a room, while the randomness of splatters ensures each piece is unique. This project is ideal for anyone wanting Pinterest-worthy art without complex skills.
You can create multiple canvases to form a continuous gradient or a set of complementary pieces for a gallery wall. Adding metallic watercolors or shimmer highlights elevates the visual impact. This DIY is versatile and can match any color palette, making it easy to coordinate with bedding, curtains, or furniture. Watercolor splatter canvases are a stylish, accessible project that brings charm, personality, and creativity to your walls while producing visually stunning, professional-looking results.
17. Pressed Leaf Canvas

Materials Needed
- Canvas
- Pressed leaves or foliage
- Mod Podge or clear glue
- Brush for sealing
- Optional frame
Steps
- Arrange pressed leaves on canvas
- Glue leaves carefully in place
- Apply Mod Podge over entire surface
- Let dry completely
- Frame or hang canvas
Pressed leaf canvases bring nature indoors, creating a serene, botanical focal point for bedrooms. The texture and natural colors of leaves add warmth and organic beauty, making the wall feel lively yet peaceful. This DIY project is simple and beginner-friendly, allowing for personalization with different leaf types and arrangements. It’s perfect for anyone looking to add a natural, Pinterest-worthy accent to their home without spending on expensive art pieces. The combination of texture and pattern creates a sophisticated yet approachable aesthetic.
You can create a series of small canvases with different leaves or one large botanical composition. Adding gold or metallic accents over the leaves can add subtle glamour while maintaining a natural feel. This project is also eco-friendly, as you can use leaves collected from local parks or gardens. Pressed leaf canvas art merges creativity, nature, and DIY accessibility, offering a charming way to refresh your walls while creating a personalized, visually appealing statement piece for your bedroom.
18. Textured Sand Canvas

Materials Needed
- Canvas
- Acrylic paints in earth tones
- Fine sand
- Glue or modeling paste
- Palette knife
Steps
- Mix sand with glue or modeling paste
- Apply mixture onto canvas in desired patterns
- Layer acrylic paint over sand texture
- Blend colors for depth
- Let dry completely before hanging
Textured sand canvases combine tactile and visual elements to create a warm, rustic, and unique DIY wall piece. The natural texture adds depth and dimension, making the art stand out while complementing bedroom decor. This project allows creative freedom in patterns and layering, resulting in a one-of-a-kind piece. The earthy tones bring a calm, grounded atmosphere to the room, perfect for cozy corners, reading nooks, or feature walls. It’s a beginner-friendly DIY that produces professional-looking results with minimal tools.
You can enhance the canvas by adding metallic paint highlights, small pebbles, or shells for a coastal or natural accent. This DIY canvas art works well as a standalone focal point or in combination with neutral textured canvases for a cohesive gallery wall. The process is affordable and versatile, allowing room-specific customization. Pinterest users love projects that combine creativity, texture, and easy execution, and textured sand canvases deliver all three, making them ideal for modern, boho, or rustic-inspired bedrooms.
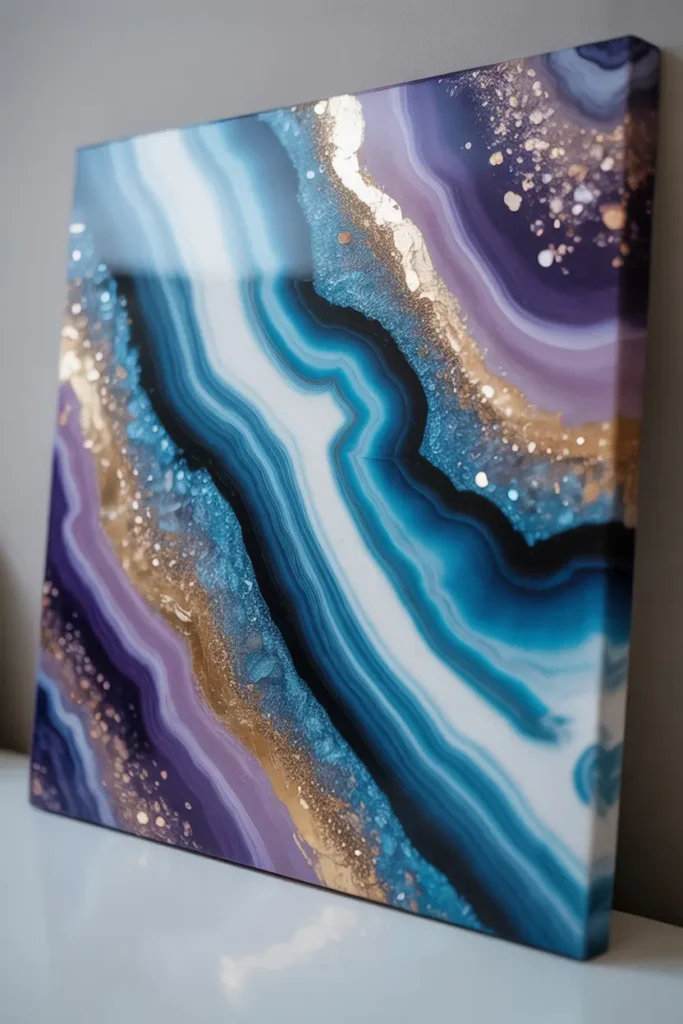
19. Geode Resin Canvas
Materials Needed
- Canvas
- Resin
- Acrylic paints: deep blues, purples, white
- Glitter and metallic powders
- Mixing cups and sticks
Steps
- Mix resin with paints and glitter
- Pour resin to create geode shapes
- Layer colors for depth and texture
- Add metallic veins with stick or brush
- Let resin cure completely
Geode resin canvases are visually striking, offering luxurious, gem-inspired wall art. The layered resin creates depth, shimmer, and a 3D effect that makes the canvas feel expensive and curated. This DIY project allows experimentation with colors and metallic accents, ensuring every piece is unique. Perfect for bedrooms seeking a modern, artistic focal point, geode canvases combine elegance, creativity, and craft, offering Pinterest-ready results. Even beginners can achieve professional-looking outcomes with careful layering and thoughtful color selection.
Multiple small geode canvases can be arranged to form a larger art display, while one large piece serves as a bold statement. The interplay of glitter, metallic accents, and resin depth captures light beautifully, adding dynamic energy to a room. This DIY canvas art project merges creativity, luxury, and accessibility, offering a visually impressive and highly shareable bedroom decor solution that transforms plain walls into sophisticated, attention-grabbing focal points.
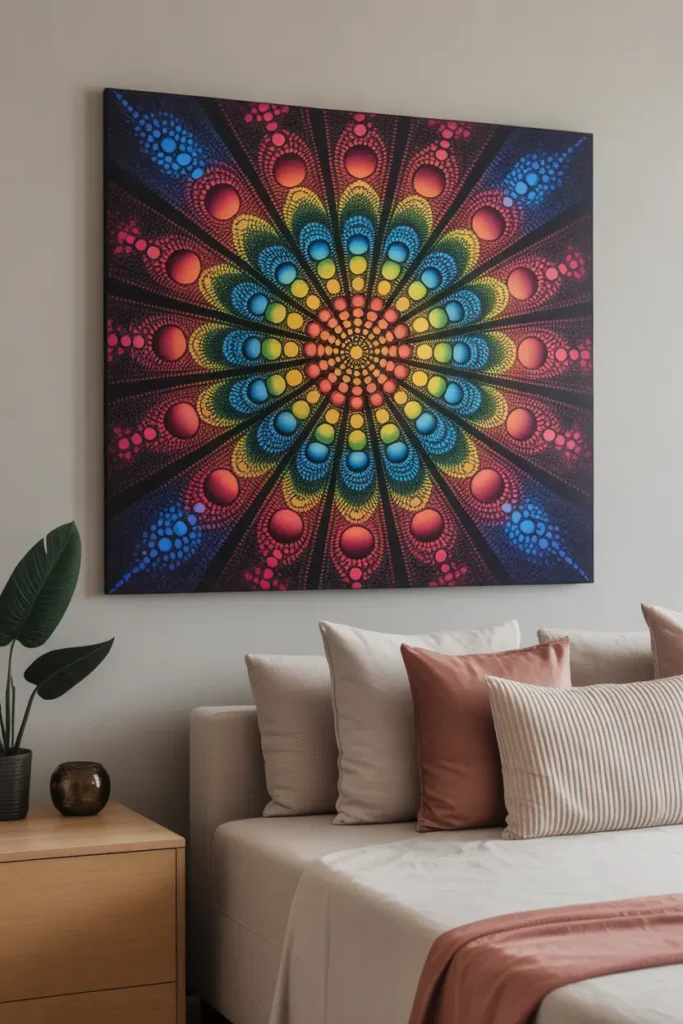
20. Dot Mandala Canvas
Materials Needed
- Canvas
- Acrylic paints in multiple colors
- Dotting tools, toothpicks, or brushes
- Compass or pencil for guidelines
Steps
- Draw a central point and guidelines with pencil
- Use dotting tools to create concentric circles
- Layer colors for vibrancy and depth
- Add smaller details for intricacy
- Let dry completely before hanging
Dot mandala canvases create hypnotic, visually engaging wall art with a meditative quality. The symmetry and repeating patterns draw the eye and add a sense of calm to bedrooms or relaxation spaces. Using simple dotting tools, anyone can achieve intricate and professional-looking results. The process is satisfying and encourages patience, making it both a creative and mindful DIY project. Color combinations can be tailored to match room decor, creating a highly personalized and Instagram-worthy piece.
Multiple small mandala canvases can be grouped for a cohesive gallery wall or used individually as focal points. Metallic or pastel accents enhance the visual depth, while larger dots create a bold, modern effect. This DIY canvas art is perfect for Pinterest enthusiasts who enjoy detailed, eye-catching projects that balance creativity and visual harmony. It brings charm, personality, and sophistication to bedroom walls while allowing flexibility in design and color customization.
21. Abstract Geometric Canvas
Materials Needed
- Canvas
- Acrylic paints
- Painter’s tape
- Brushes or paint pens
- Ruler
Steps
- Sketch geometric shapes lightly with pencil
- Use painter’s tape to mask edges
- Fill in shapes with acrylic paint
- Remove tape carefully once dry
- Touch up edges and hang
Abstract geometric canvases bring modern sophistication and structure to walls while still allowing creative freedom. The contrast between bold shapes and neutral backgrounds creates visual interest, making bedrooms or workspaces feel contemporary and curated. This DIY canvas art project is beginner-friendly thanks to painter’s tape and clear outlines, yet produces professional-looking results. Color choices can reflect your personal style, whether bold and vibrant or soft and muted, offering a versatile piece that complements various interior aesthetics while making a strong statement on any wall.
Creating multiple small canvases allows you to form patterns or modular gallery walls, while a single large piece serves as a striking focal point. Experimenting with metallic accents or layered shapes enhances depth and sophistication. This DIY canvas art is highly Pinterest-worthy, combining simplicity, modernity, and visual impact. It’s ideal for anyone seeking to refresh a bedroom or creative space with a bold yet accessible DIY project that transforms a plain wall into a stylish, artistic feature.
22. Fabric Collage Canvas
Materials Needed
- Canvas
- Fabric scraps (cotton, silk, velvet, etc.)
- Scissors
- Hot glue gun
- Optional: buttons or small embellishments
Steps
- Cut fabric into shapes or strips
- Arrange pieces on canvas in desired pattern
- Glue each piece securely
- Layer additional fabrics for depth
- Add embellishments if desired and hang
Fabric collage canvases bring texture, color, and a handmade touch to any wall. The combination of different textiles creates depth and a cozy, inviting vibe perfect for bedrooms. This DIY project allows endless creativity—you can mix patterns, colors, and textures for a unique composition. It’s beginner-friendly yet looks professional, making it an ideal way to upcycle old fabrics while producing a stunning, tactile canvas art piece. The result adds warmth, personality, and a sophisticated handcrafted aesthetic to your interior decor.
You can create a single large statement piece or a series of small canvases for a modular gallery wall. Incorporating embellishments like buttons, beads, or metallic threads adds subtle shimmer and interest. This DIY canvas art combines accessibility, creativity, and texture, providing a highly Pinterestable project that transforms plain walls into dynamic, personalized art. Perfect for bedrooms or cozy creative corners, it balances style, uniqueness, and tactile appeal, giving your space a warm and visually engaging focal point.
Conclusion
These 22 DIY canvas art projects are a fantastic way to elevate your bedroom or living space with unique, handcrafted decor. Whether you prefer bold colors, subtle textures, or inspirational typography, there’s a project for every style and skill level. Easy, affordable, and highly customizable, these ideas allow you to express your creativity while transforming walls into stunning visual statements. Start crafting today and turn ordinary canvases into extraordinary art that truly reflects your personality.