22 DIY Photo Frame Ideas to Showcase Memories
Showcasing your favorite memories has never been more fun with DIY photo frames! From rustic mason jars to vibrant watercolor designs, these 22 creative ideas turn simple photos into standout décor. Perfect for beginners and craft enthusiasts alike, each project combines style, personalization, and hands-on creativity. Whether you want a playful button frame, a chic fabric-covered design, or a nautical rope-and-shell creation, these DIY frames are perfect for bedrooms, living rooms, or gifting. Explore these fun projects and bring your memories to life in unique, handmade ways.
1. Rustic Wooden Pallet Frame
Materials Needed:
- Reclaimed wooden pallet pieces
- Wood glue or nails
- Sandpaper
- Photo clip or glass panel
Steps:
- Cut wooden pieces to desired frame size.
- Sand edges for smoothness.
- Assemble frame using glue or nails.
- Attach clips or glass panel for the photo.
- Place or hang in your favorite spot.
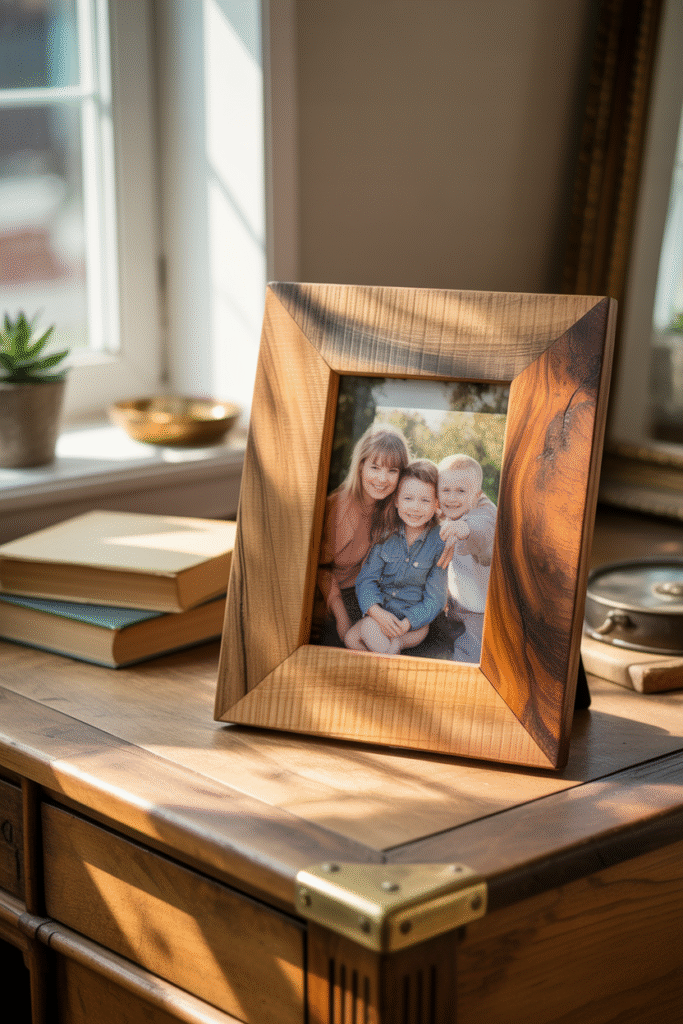
A rustic wooden pallet frame adds a warm, natural touch to your home décor. Beginners can easily assemble the frame using basic tools, while the reclaimed wood gives each piece a unique character. It’s perfect for showcasing family photos, travel memories, or artwork. Sanding and assembling the pieces provides a satisfying hands-on DIY experience, and the natural grain enhances the aesthetic appeal. This frame works well as a gift or as a personalized décor item that blends seamlessly with rustic, farmhouse, or vintage-style interiors.
This DIY project is budget-friendly, eco-conscious, and beginner-friendly. Adding clips allows you to swap photos anytime, keeping your display fresh and dynamic. The rustic wooden frame complements plants, candles, or other decorative items on shelves and mantels. It’s versatile enough for desktops, wall mounting, or as part of a gallery wall. Personalized touches such as painting, staining, or distressing the wood further elevate the charm. This project combines creativity, practicality, and style, making it an ideal craft for home décor enthusiasts or handmade gift givers.
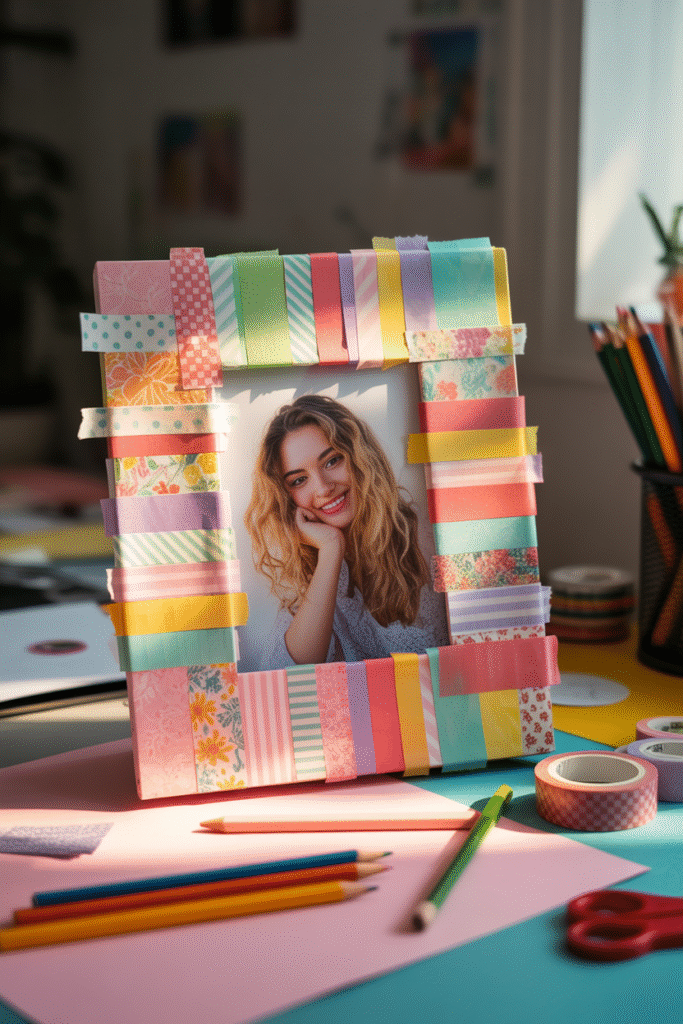
2. Washi Tape Decorative Frame
Materials Needed:
- Plain photo frame
- Washi tape in assorted colors
- Scissors
- Ruler (optional)
Steps:
- Measure frame edges for tape placement.
- Apply washi tape along frame borders.
- Cut excess tape neatly.
- Add layers or patterns as desired.
- Place your photo inside.
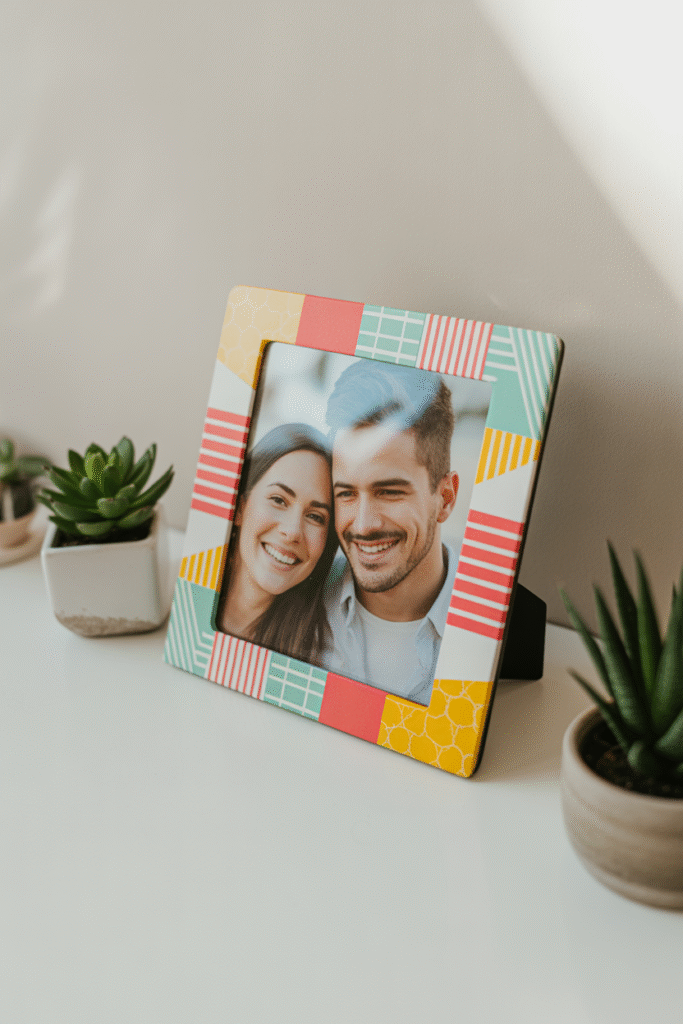
A washi tape decorative frame is perfect for beginners and anyone who loves colorful, DIY décor. It’s an easy, low-cost way to personalize a plain frame without tools or woodworking skills. The tape can be arranged in stripes, chevrons, or random patterns to match your aesthetic. This craft allows experimentation with colors and patterns, making each frame a unique creation. Perfect for bedrooms, offices, or as gifts, it transforms ordinary photos into creative displays, showcasing your personality in a simple yet stylish way.
The beauty of this DIY lies in its flexibility. You can swap tape designs whenever you want, keeping your display fresh. It’s ideal for decorating kids’ rooms, dorms, or creative workspaces. Mixing bright, pastel, or metallic tapes creates endless possibilities for unique patterns. The project is fast, fun, and satisfying, giving a professional-looking result without advanced skills. Adding small embellishments like stickers or rhinestones can further enhance the aesthetic. This DIY frame demonstrates how minimal effort can create maximum visual impact.
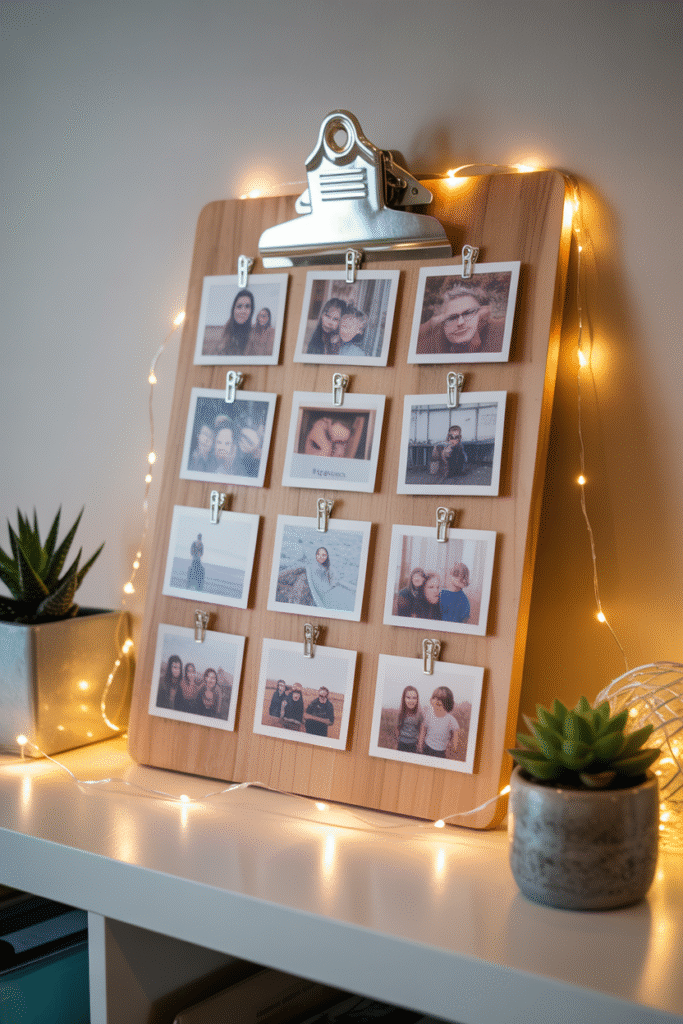
3. Photo Collage Clipboard Frame
Materials Needed:
- Wooden clipboard
- Mini binder clips
- Photos or printed memories
- Decorative string or ribbon (optional)
Steps:
- Arrange photos on clipboard to visualize layout.
- Clip each photo with mini binder clips.
- Use string for hanging multiple photos if desired.
- Adjust spacing evenly.
- Place clipboard on shelf or hang on wall.
A photo collage clipboard frame is an interactive and customizable way to display memories. Beginners can easily clip and rearrange photos as desired, making it ideal for seasonal or changing displays. It’s a casual DIY option that doesn’t require permanent adhesives or frames. The wooden clipboard adds a rustic touch, while mini clips make swapping images effortless. This creative method lets you combine travel photos, family moments, or inspirational quotes, turning a simple clipboard into a focal point for your personal space.
This versatile DIY is perfect for bedrooms, dorm rooms, or home offices. Adding string, fairy lights, or ribbon enhances the visual appeal and creates a fun, modern display. It encourages creativity and allows you to personalize your space without spending much. The lightweight design makes it easy to move or hang. Whether gifting to friends or decorating your own room, the clipboard frame showcases memories in a unique, approachable way. It’s a budget-friendly and beginner-friendly project with endless possibilities for customization.
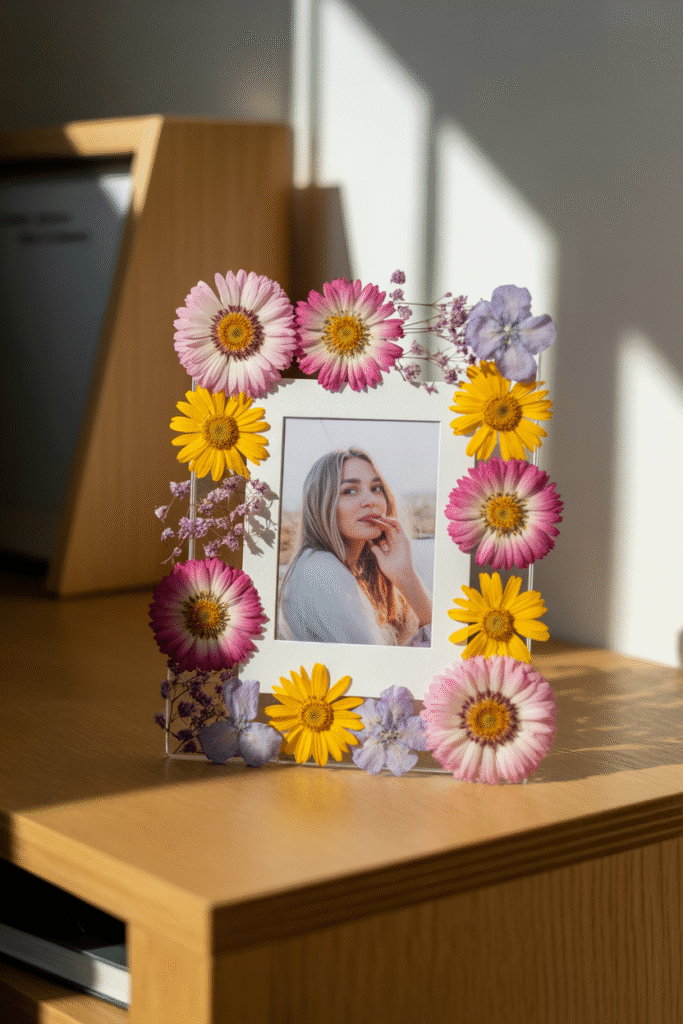
4. Pressed Flower Frame
Materials Needed:
- Plain photo frame with glass
- Pressed flowers or leaves
- Clear-drying glue
- Tweezers
- Optional: clear resin or spray sealant
Steps:
- Arrange pressed flowers on frame glass.
- Use tweezers to position flowers precisely.
- Secure flowers with clear glue or resin.
- Let dry completely.
- Insert photo and display.
Pressed flower frames bring natural beauty into your home while allowing beginners to practice delicate crafting. The combination of vibrant flowers and personal photos creates a soft, organic aesthetic that’s perfect for bedrooms or living areas. It’s a calming, hands-on project that enhances both creativity and attention to detail. Each frame is unique, depending on the flowers chosen and their arrangement, making it a highly personalized gift or décor item. The project doesn’t require advanced skills but delivers professional-looking results.
This DIY frame is versatile, making it suitable for gifts, weddings, or seasonal décor. Combining different flower types and colors adds interest and depth, while the glass protects the delicate blooms. You can experiment with layouts or add embellishments such as dried moss or tiny pebbles. This project is beginner-friendly, budget-conscious, and offers a stunning way to preserve nature’s beauty alongside cherished memories. A pressed flower frame transforms ordinary photographs into a visually striking and sentimental display.
5. Chalkboard Memory Frame

Materials Needed:
- Photo frame with chalkboard backing
- Chalk or chalk markers
- Eraser
- Photo to display
Steps:
- Insert photo into frame.
- Use chalk to write messages or doodle around the photo.
- Adjust spacing and design as desired.
- Erase and rewrite to change displays.
- Place on desk or wall.
A chalkboard memory frame combines photos with interactive creativity. It’s ideal for beginners because it allows repeated experimentation without permanent mistakes. Kids, teens, and adults can personalize messages, doodles, or quotes alongside their pictures, creating a fun, dynamic display. The chalkboard background adds a playful and versatile touch, blending well with casual or modern décor styles. This frame encourages frequent updates, making memories feel alive and fresh. It’s also a budget-friendly way to enhance bedroom walls or home offices with a personalized touch.
The reusable nature of chalkboard frames makes them perfect for rotating seasonal themes, birthdays, or special events. You can experiment with colors, patterns, and fonts, making it ideal for creative expression. The frame doubles as both décor and an activity for children or adults, fostering engagement with memories in a fun way. Its simplicity and versatility make it a unique gift or a personal project to refresh your space regularly. This DIY combines functionality, charm, and a hands-on artistic element in one creative package.
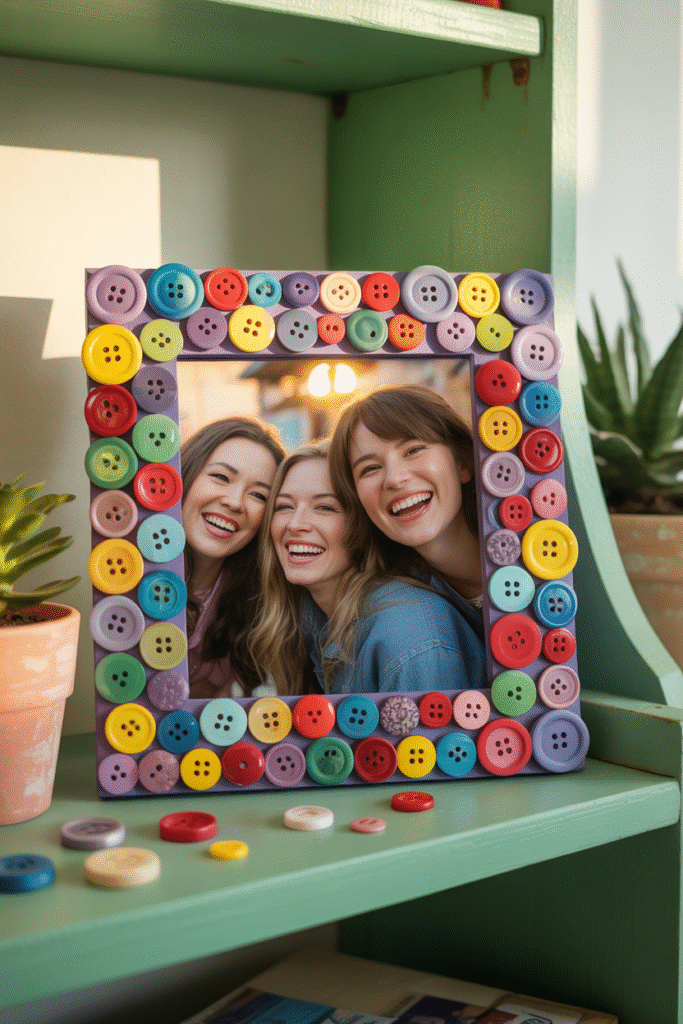
6. Button Embellished Frame
Materials Needed:
- Plain photo frame
- Assorted buttons
- Strong craft glue
- Tweezers (optional)
Steps:
- Plan button placement around the frame.
- Glue buttons securely using craft glue.
- Layer or overlap for texture.
- Let dry completely.
- Insert your favorite photo.
Button embellished frames are a fun and simple way to personalize photos while exploring DIY crafts. Beginners can easily create a vibrant, textured look with minimal tools and no advanced skills. Each frame becomes unique depending on the colors, sizes, and arrangements of buttons, offering endless creative possibilities. It’s perfect for kids’ bedrooms, playrooms, or creative studios. Beyond aesthetics, this project encourages hands-on crafting and experimentation with color and pattern, making it an ideal gift or decorative piece that adds personality and charm to any space.
This DIY frame is budget-friendly and highly customizable. Buttons can be grouped by color, size, or theme to match your décor. Adding small embellishments like beads or sequins enhances the playful look. The project is beginner-friendly and provides a tactile crafting experience. Whether displayed on a desk, shelf, or mounted on a wall, the button frame brings energy, fun, and a handcrafted vibe to any space. It’s a great way to showcase memories while creating a cheerful, eye-catching decorative element.
7. Fabric Wrapped Frame

Materials Needed:
- Plain wooden frame
- Fabric scraps
- Scissors
- Fabric glue or Mod Podge
Steps:
- Cut fabric strips to fit frame edges.
- Apply glue to frame surfaces.
- Wrap fabric tightly around the frame.
- Smooth out wrinkles or folds.
- Let dry and insert the photo.
Fabric-wrapped frames transform plain photo frames into cozy, textured décor pieces. This beginner-friendly DIY project allows creativity in selecting patterns, colors, and textures to match room aesthetics. Whether using floral prints, stripes, or soft cottons, the fabric adds warmth and personality. Wrapping the frame is simple, making it accessible for all skill levels. It’s a tactile, satisfying craft that enhances any bedroom, living room, or workspace with soft, handcrafted charm. These frames make thoughtful gifts while preserving memories in a visually unique way.
This DIY offers endless possibilities for personalization, from fabric choices to decorative accents like ribbons or buttons. It’s perfect for seasonal updates, gifting, or creating a cohesive gallery wall. The soft texture complements other home décor elements, adding depth and a handcrafted touch. This beginner-friendly craft requires minimal tools and provides a visually striking result, turning any ordinary photograph into a cherished, stylish display. Fabric-wrapped frames encourage experimentation, giving your home a warm, personalized, and inviting feel.
8. Cork Board Photo Frame

Materials Needed:
- Wooden frame
- Cork sheet cut to size
- Pushpins or mini clips
- Scissors or craft knife
Steps:
- Cut cork to fit inside the frame.
- Secure cork with glue or staples.
- Pin or clip photos to cork surface.
- Arrange as desired.
- Place frame on desk or hang on wall.
A cork board frame is a functional and interactive way to showcase multiple memories. Beginners benefit from its flexibility, as photos can be rearranged or swapped without damage. It’s ideal for desks, dorm rooms, or creative workspaces, providing a mix of display and utility. The tactile surface encourages hands-on interaction and creativity, while the natural cork tone complements various interior styles. This DIY offers both aesthetic appeal and practical benefits, creating a personalized display that adapts to changing photos or themes over time.
This project is perfect for those who love customizable displays. Adding decorative pushpins, string lights, or notes can further enhance its charm. The cork board frame encourages creativity and can be updated seasonally or for special occasions. Its simple assembly and low-cost materials make it beginner-friendly while providing professional-looking results. This DIY craft balances practicality with artistry, transforming a simple frame into a dynamic, interactive showcase for cherished memories, making it suitable for personal spaces or gifts.
9. Polaroid Grid Frame

Materials Needed:
- Large frame
- Polaroid-style prints or small photos
- Double-sided tape or photo corners
- Ruler
Steps:
- Arrange photos in a grid on a table.
- Measure spacing for even layout.
- Secure photos with tape or corners.
- Adjust overlap for visual interest.
- Place frame on shelf or hang.
A Polaroid grid frame is a fun, nostalgic way to display multiple memories. Beginners can easily assemble this layout with minimal tools, creating a playful and personalized showcase. The overlapping photos add depth and movement, making it visually dynamic. This style is perfect for bedrooms, dorms, or creative workspaces. It captures casual moments and encourages creativity in photo selection and arrangement. It’s a low-cost, beginner-friendly craft that transforms simple snapshots into a stylish, professional-looking display.
This DIY frame allows flexibility in updating photos or rearranging the grid, making it interactive and adaptable. Adding small embellishments, captions, or handwritten notes further personalizes the display. Its simplicity, combined with a creative layout, enhances both the aesthetic and sentimental value of your space. The Polaroid grid frame merges nostalgia, style, and easy DIY execution, making it an engaging project for beginners and a charming way to celebrate memories with a handcrafted touch.
10. Washi Tape Collage Frame
Materials Needed:
- Plain photo frame
- Assorted washi tape rolls
- Scissors
- Ruler (optional)
Steps:
- Cut and layer washi tape in patterns or randomly.
- Smooth tape edges for neatness.
- Overlap colors for texture.
- Ensure the center remains free for the photo.
- Insert photo and display frame.
A washi tape collage frame is a beginner-friendly craft that brings vibrant color and texture to any space. The layering technique allows endless creativity, letting you experiment with patterns, colors, and overlaps. This project requires minimal tools yet delivers striking visual results. Perfect for bedrooms, offices, or creative studios, it transforms ordinary frames into playful art pieces. The DIY process encourages creativity, personalization, and a sense of accomplishment, making it a great project for crafters of all ages.
This frame is versatile and allows updates by adding or replacing tape layers over time. It’s a budget-friendly way to elevate photos into a decorative centerpiece. Combining different colors and textures enhances depth and visual interest. Ideal for gifts, seasonal décor, or personal display, the washi tape collage frame merges simplicity with creativity. It’s an engaging, hands-on craft that personalizes memories, turning a plain frame into a lively, colorful showcase suitable for any space.
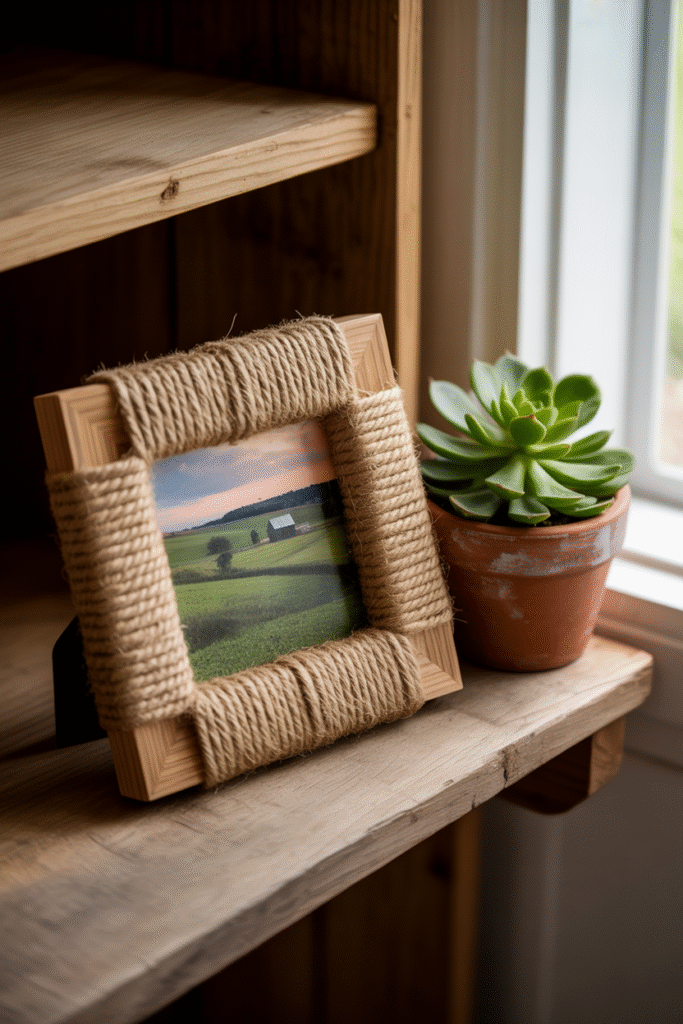
11. Twine Wrapped Frame
Materials Needed:
- Plain wooden frame
- Jute twine
- Hot glue gun or strong craft glue
- Scissors
Steps:
- Apply glue along one side of the frame.
- Wrap twine tightly around the frame, securing ends with glue.
- Continue until entire frame is covered.
- Trim excess twine.
- Insert photo and display.
Twine-wrapped frames are perfect for adding a rustic and handmade touch to home décor. This beginner-friendly DIY project combines texture and simplicity, requiring only a wooden frame, twine, and glue. The natural fibers add warmth and tactile appeal, complementing farmhouse or boho interiors. Each frame becomes unique based on the thickness, wrapping style, and placement of twine. It’s a fun way to explore hands-on crafting while creating a functional décor piece. The rustic look also makes it ideal as a thoughtful, handcrafted gift.
This DIY project is versatile, as you can experiment with colors of twine or add small embellishments like beads or dried flowers. It’s perfect for bedrooms, living rooms, or creative spaces, bringing a touch of nature and handcrafted charm. The project is budget-friendly and simple enough for beginners to achieve professional-looking results. Twine-wrapped frames encourage creativity, offering a tactile and visually appealing way to showcase your favorite photos while adding warmth and personality to your home.
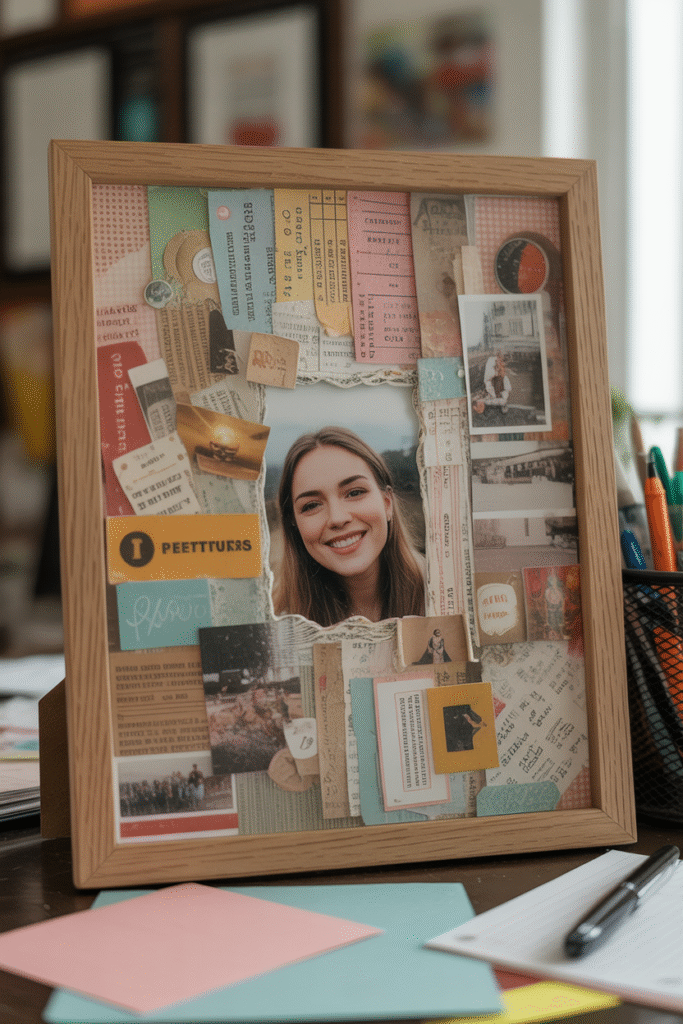
12. Scrapbook Collage Frame
Materials Needed:
- Wooden photo frame
- Scrapbook paper
- Small mementos (tickets, notes, stickers)
- Glue or double-sided tape
- Scissors
Steps:
- Arrange scrapbook papers and mementos around the frame.
- Secure each element with glue or tape.
- Layer items for depth and interest.
- Leave space for central photo.
- Insert photo and display.
A scrapbook collage frame is a creative way to showcase memories while adding personality and color to a room. Beginners can easily combine small mementos, patterned papers, and photos for a unique, personalized display. This DIY encourages experimentation with composition and layering, making each frame one-of-a-kind. It’s perfect for displaying cherished moments from trips, celebrations, or everyday life, while fostering a hands-on crafting experience. The vibrant mix of materials creates a visually dynamic frame that draws attention and brings warmth and nostalgia to any space.
This project offers flexibility in design—adding stickers, tickets, or handwritten notes enhances the personal touch. It’s beginner-friendly and ideal for gifting, seasonal displays, or decorating bedrooms and study spaces. The scrapbook collage frame encourages creativity and storytelling, allowing you to combine different textures, colors, and memories into a cohesive display. By personalizing each element, you create a meaningful keepsake that not only displays photos but also tells a story, making it a memorable addition to any home décor collection.
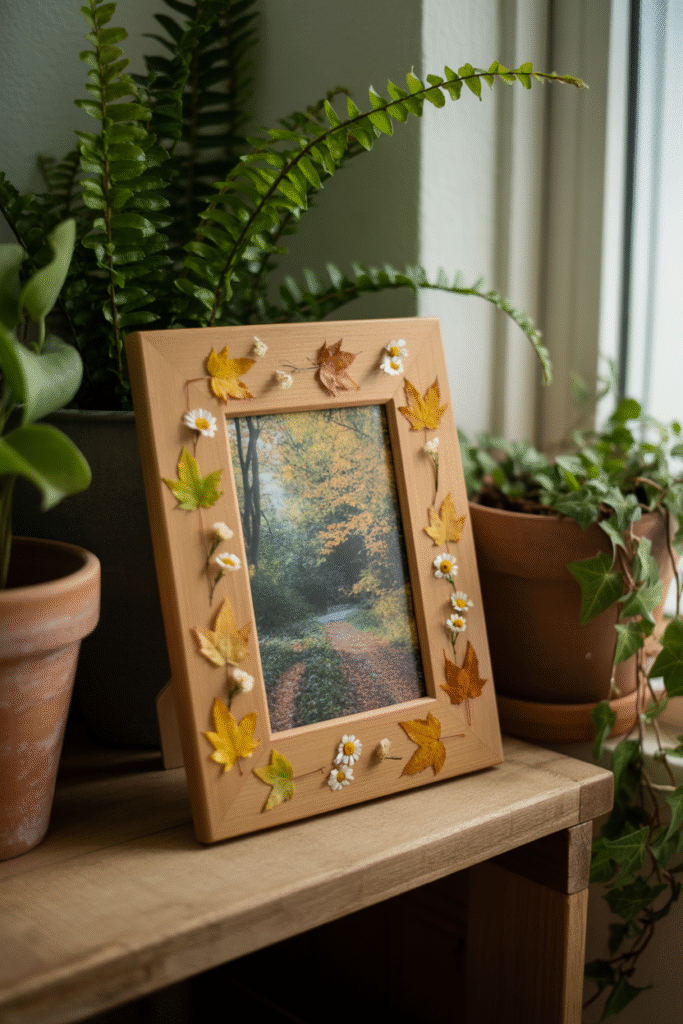
13. Nature Inspired Leaf Frame
Materials Needed:
- Plain frame
- Pressed leaves and flowers
- Clear-drying glue or Mod Podge
- Paintbrush
Steps:
- Arrange pressed leaves and flowers around the frame edges.
- Apply glue carefully to secure items.
- Seal with Mod Podge for durability.
- Allow to dry completely.
- Insert photo and display.
Nature-inspired leaf frames bring the outdoors inside, adding organic beauty and tranquility to your space. This beginner-friendly DIY project allows you to work with natural materials while creating a unique and visually appealing frame. Pressed leaves and flowers provide texture and color, making each frame distinctive. It’s perfect for nature lovers or anyone looking to enhance their home décor with handcrafted, earthy elements. The simple process requires minimal tools yet delivers a polished, professional-looking display that complements photos and highlights natural beauty.
These frames are highly customizable based on seasonal leaves, flower types, or color preferences. Adding a protective coating ensures longevity and keeps your natural elements safe. Ideal for bedrooms, living rooms, or offices, nature-inspired frames enhance any space with a calm, organic touch. Beginners can enjoy experimenting with composition and layering to create a balanced and aesthetically pleasing design. This DIY project is both rewarding and visually stunning, combining personal creativity with the beauty of the natural world to display cherished memories.
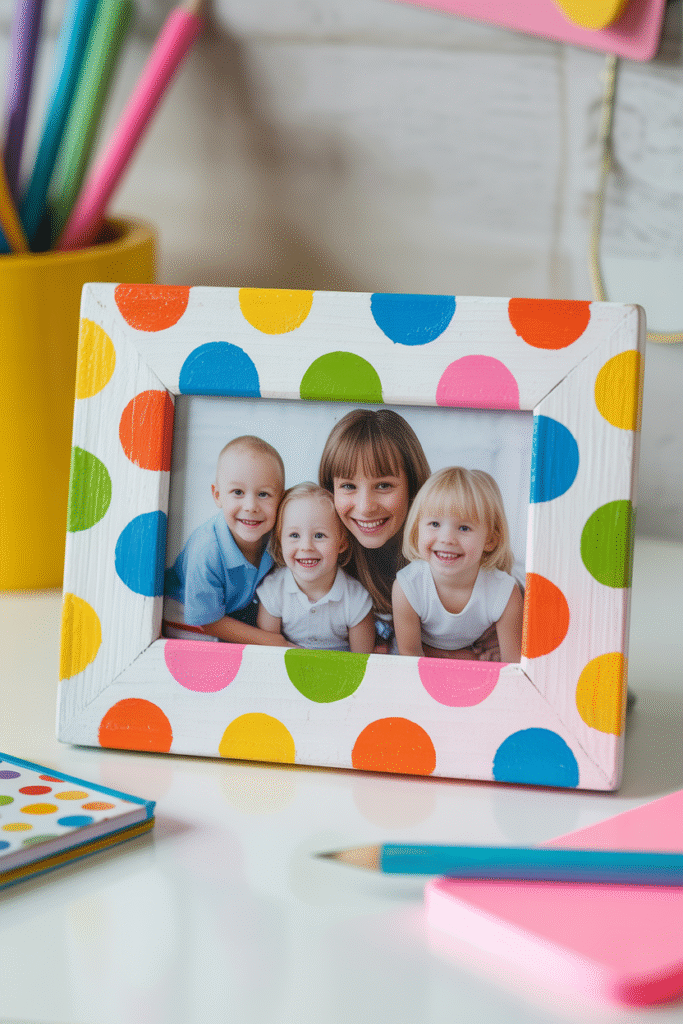
14. Polka Dot Painted Frame
Materials Needed:
- Wooden frame
- Acrylic paints
- Small round brushes or cotton swabs
- Palette and water
Steps:
- Paint frame base with white or neutral color.
- Dip brush or cotton swab in colored paint.
- Apply polka dots evenly or randomly.
- Allow paint to dry completely.
- Insert photo and display.
Polka dot painted frames are playful, cheerful, and beginner-friendly. This DIY allows experimentation with colors, dot sizes, and spacing, making each frame unique. It’s perfect for children’s rooms, creative spaces, or gifts, adding a vibrant and handcrafted touch. Painting polka dots is simple yet visually striking, creating a frame that instantly brightens the surroundings. The tactile painting process is satisfying for crafters of all skill levels, providing a fun and accessible way to enhance photographs with color and personality.
This project is easy to customize based on favorite colors, seasonal themes, or patterns. Multiple layers of dots can create depth and texture, while coordinating colors can match room décor. Polka dot frames encourage creativity and experimentation, offering a low-cost, high-impact DIY option. They are ideal for gifting, bedroom décor, or desk displays. The colorful design elevates even a simple photograph, making it a playful and stylish centerpiece that celebrates memories in a fun, handcrafted way.
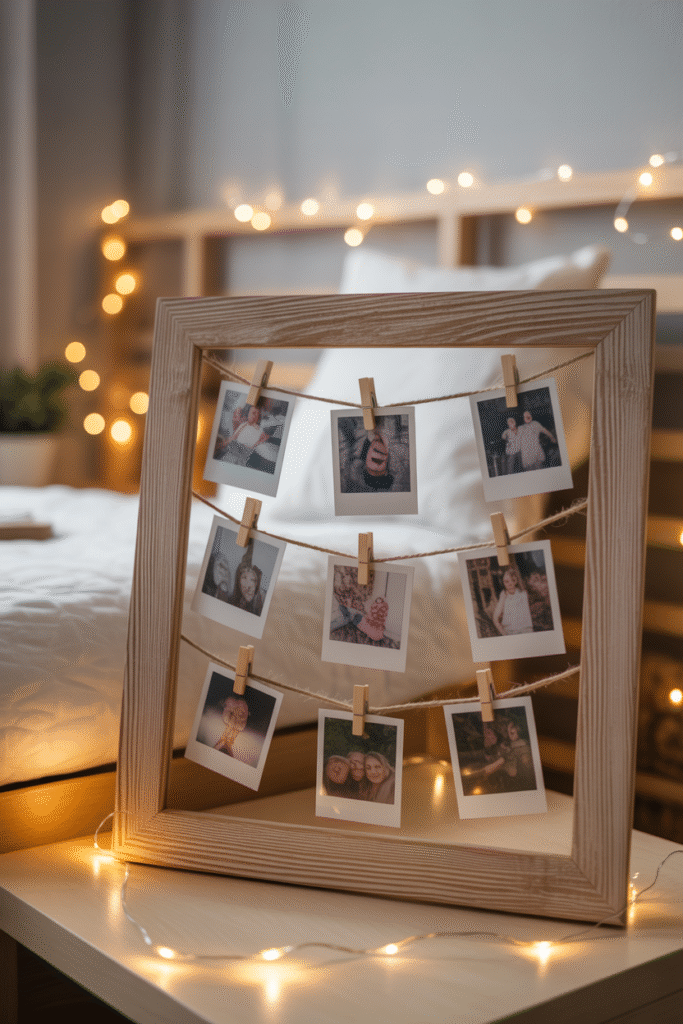
15. Mini Clip String Frame
Materials Needed:
- Wooden frame
- Twine or string
- Mini clothespins
- Scissors and glue
Steps:
- Stretch string across the frame horizontally or vertically.
- Secure ends with glue or small nails.
- Clip photos onto string using mini clothespins.
- Adjust spacing for balance.
- Display frame on shelf or wall.
Mini clip string frames provide an interactive and flexible way to display multiple photos. Beginners can easily assemble this DIY using minimal materials. The use of clothespins allows for quick swapping or rearranging of images, making it perfect for seasonal updates or rotating memories. It’s an engaging craft that adds movement and charm to any space, whether displayed on a desk, shelf, or wall. This project combines functionality, creativity, and a personal touch, making it a delightful way to celebrate favorite moments.
This frame is perfect for bedrooms, dorm rooms, or creative studios, where versatility and personalization are appreciated. You can enhance it with string lights, small decorations, or seasonal accents. The DIY is budget-friendly and beginner-friendly while delivering a visually appealing and interactive result. Mini clip string frames encourage creativity and make it easy to showcase multiple memories simultaneously. The combination of rustic materials, playful display, and handcrafted charm creates a frame that’s both functional and aesthetically pleasing.
16. Rope-Wrapped Nautical Frame
Materials Needed:
- Wooden frame
- Jute rope
- Hot glue gun
- Scissors
- Seashells (optional)
Steps:
- Apply glue to one corner of the frame.
- Wrap the rope tightly around the entire frame.
- Trim excess and secure ends with glue.
- Add seashell accents if desired.
- Insert photo and display.
A rope-wrapped nautical frame adds rustic warmth and seaside charm to your décor. This DIY works perfectly for vacation photos, beach portraits, or ocean memories. Wrapping the rope around the frame is simple, relaxing, and creates a textured look that feels both natural and visually striking. The rope’s earthy tone blends beautifully with coastal themes, making it ideal for living rooms, bedrooms, or beach cottages. You can also personalize the design by adding seashells, starfish, or small charms. It’s a beginner-friendly project that instantly upgrades any plain frame.
The natural fibers of jute rope bring a calming, organic feel to the frame, making it a great choice for rustic or nautical interiors. It’s a budget-friendly DIY that requires minimal materials while delivering a polished, professional finish. Adding optional embellishments helps customize the final look, ensuring every frame feels unique. Whether displayed on shelves, desks, or gallery walls, this rope-wrapped design becomes a beautiful reminder of travel moments or ocean adventures. It’s a creative yet simple way to highlight treasured photos with handmade personality.
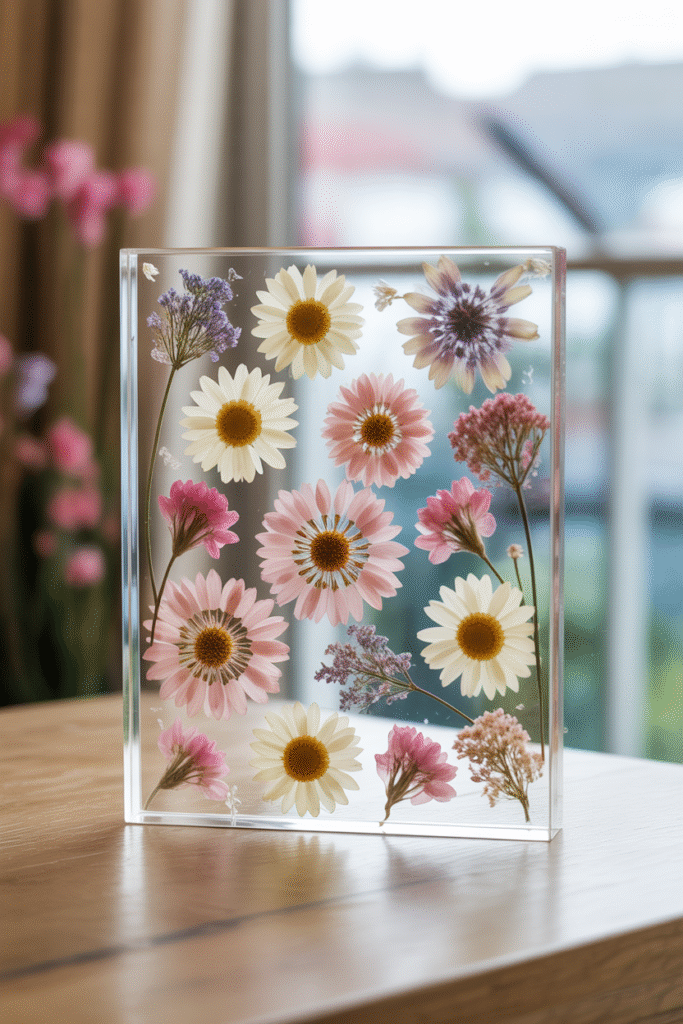
17. Pressed Flower Resin Frame
Materials Needed:
- Clear acrylic frame
- Pressed flowers
- UV or epoxy resin
- Mixing cup
- Gloves
Steps:
- Arrange pressed flowers on the acrylic surface.
- Mix resin according to instructions.
- Pour resin carefully to cover the flowers.
- Remove bubbles and let cure fully.
- Insert photo and assemble.
A pressed flower resin frame creates a stunning, nature-inspired display with its preserved botanical elements. The transparent acrylic paired with crystal-clear resin gives the flowers a floating effect, turning the frame into an elegant piece of art. This DIY is perfect for showcasing sentimental memories, especially nature photos, romantic moments, or travel snapshots. Pressed flowers add delicate charm and soft color, making the frame suitable for bedrooms, living rooms, or gallery walls. Resin work requires patience but the final result feels luxurious, smooth, and long-lasting.
This project captures the beauty of dried flowers in a timeless, durable form. The frame becomes both a functional display and a decorative accent piece that stands out from traditional designs. Resin protects the flowers and enhances their colors, creating a glossy, professional finish. It’s ideal for gifting, anniversaries, or handmade décor collections. Even beginners can achieve stunning results with careful preparation. The finished resin frame brings botanical elegance and artistic flair to any space, making it a meaningful way to showcase cherished memories.
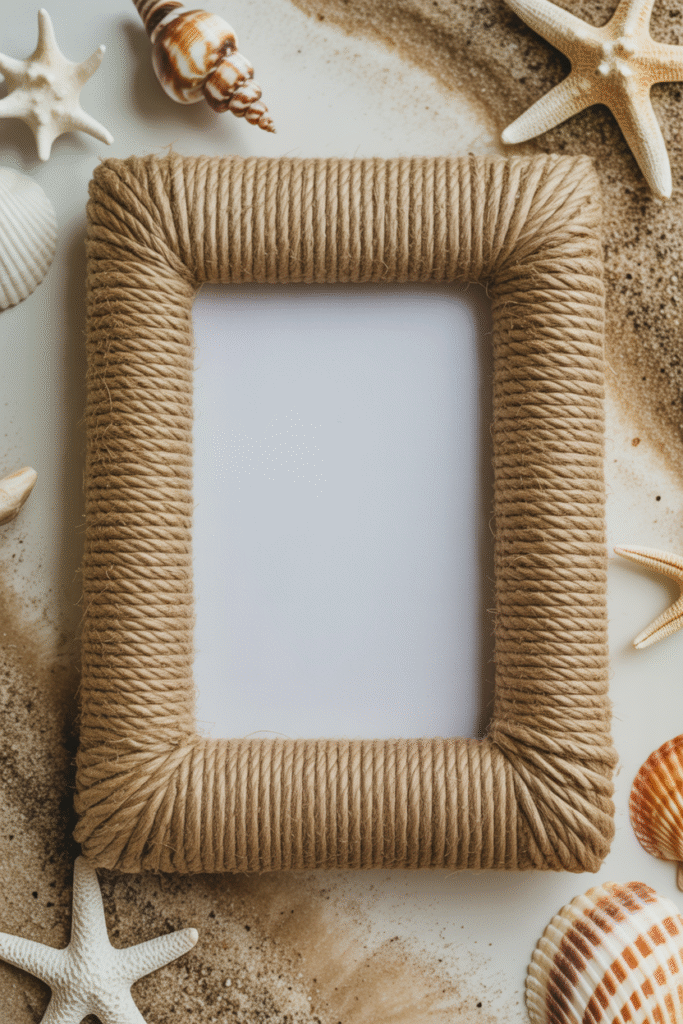
18. Rope and Shell Beach Frame

Materials Needed:
- Wooden frame
- Natural rope or twine
- Small seashells
- Hot glue gun
Steps:
- Wrap rope around the frame edges and secure with glue.
- Arrange seashells in desired pattern along rope.
- Glue seashells firmly in place.
- Let frame dry completely.
- Insert photo and display.
Rope and shell frames bring coastal charm into any space, making them perfect for beach vacation photos or summer décor. This beginner-friendly DIY allows for creativity in rope wrapping and shell placement. The textures of rope and shells create a tactile and visual appeal, while the natural tones complement a variety of interiors. Each frame is unique based on the type of rope, shells, and layout, making it a personal and memorable project. It’s a fun way to showcase cherished memories with a handcrafted, nautical touch.
This DIY frame is versatile, ideal for bedrooms, living rooms, or beach houses. It encourages creativity while providing a polished, finished look. Adding small embellishments like sand, starfish, or tiny driftwood pieces enhances the theme. Rope and shell frames are beginner-friendly, cost-effective, and visually striking, making them suitable for gifting or decorating your home. They turn simple photographs into a personalized display, evoking memories of the sea and creating a charming, coastal-inspired décor element that’s both functional and decorative.
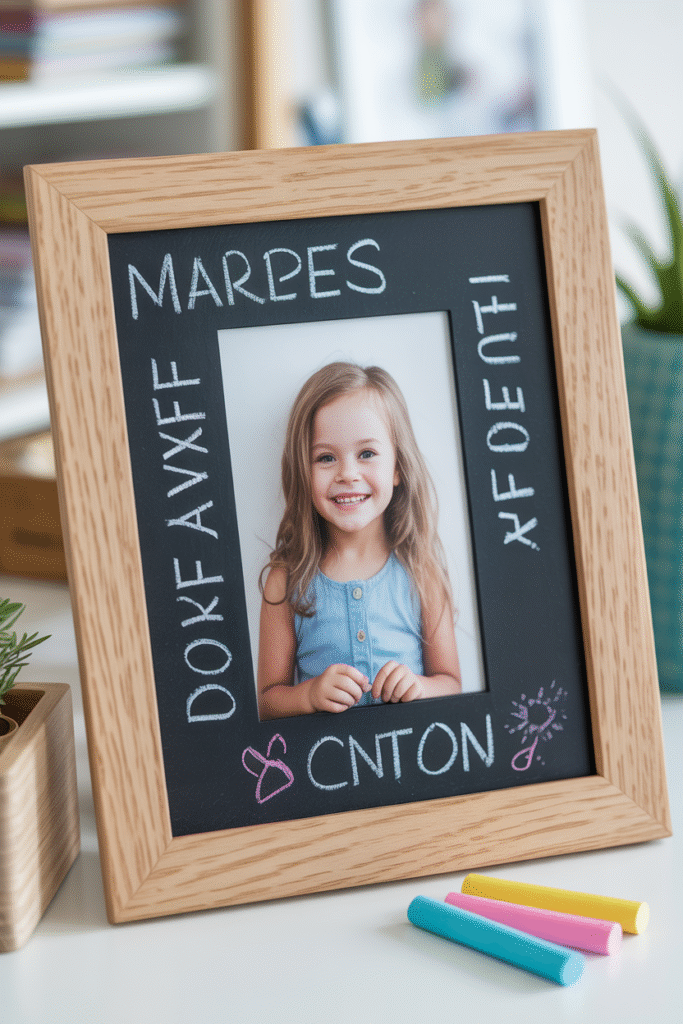
19. Chalkboard Photo Frame
Materials Needed:
- Wooden frame
- Chalkboard paint or pre-made chalkboard panel
- Chalk or chalk markers
- Paintbrush
Steps:
- Paint frame edges or insert with chalkboard paint.
- Let paint dry completely.
- Insert photo in center.
- Write personalized messages or dates around photo.
- Display and update as desired.
Chalkboard photo frames are interactive, versatile, and beginner-friendly. They allow for personalization with quotes, dates, or small drawings surrounding the central photo. This DIY encourages creativity while providing a practical, functional display. Chalkboard frames are perfect for bedrooms, offices, or as gifts for friends and family, offering a playful and engaging way to highlight cherished memories. The combination of chalkboard texture and a photo adds visual interest and hands-on fun, making it a unique and memorable craft project.
These frames are highly versatile, as messages can be updated or changed seasonally or for special occasions. They’re perfect for celebratory events, milestones, or daily motivation. Beginners appreciate the simplicity and instant satisfaction of this project, while the tactile chalkboard surface adds an extra layer of creativity. Chalkboard photo frames are both functional and decorative, allowing you to showcase photos with a fun, customizable twist. They provide a perfect blend of personal expression, interactive design, and handcrafted charm that enhances any room décor.
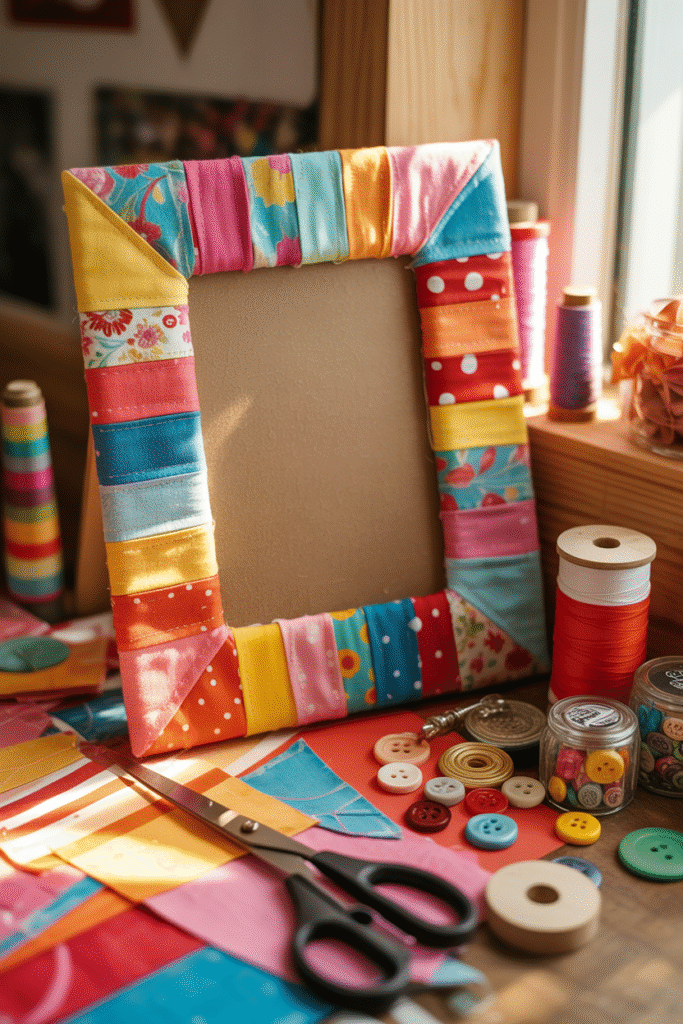
20. Fabric Patchwork Frame
Materials Needed:
- Wooden frame
- Fabric scraps
- Fabric glue
- Scissors
- Mod Podge (optional)
Steps:
- Cut fabric pieces into small squares or rectangles.
- Arrange them in a patchwork layout.
- Glue each fabric piece onto the frame.
- Apply Mod Podge for sealing, if desired.
- Insert photo and display.
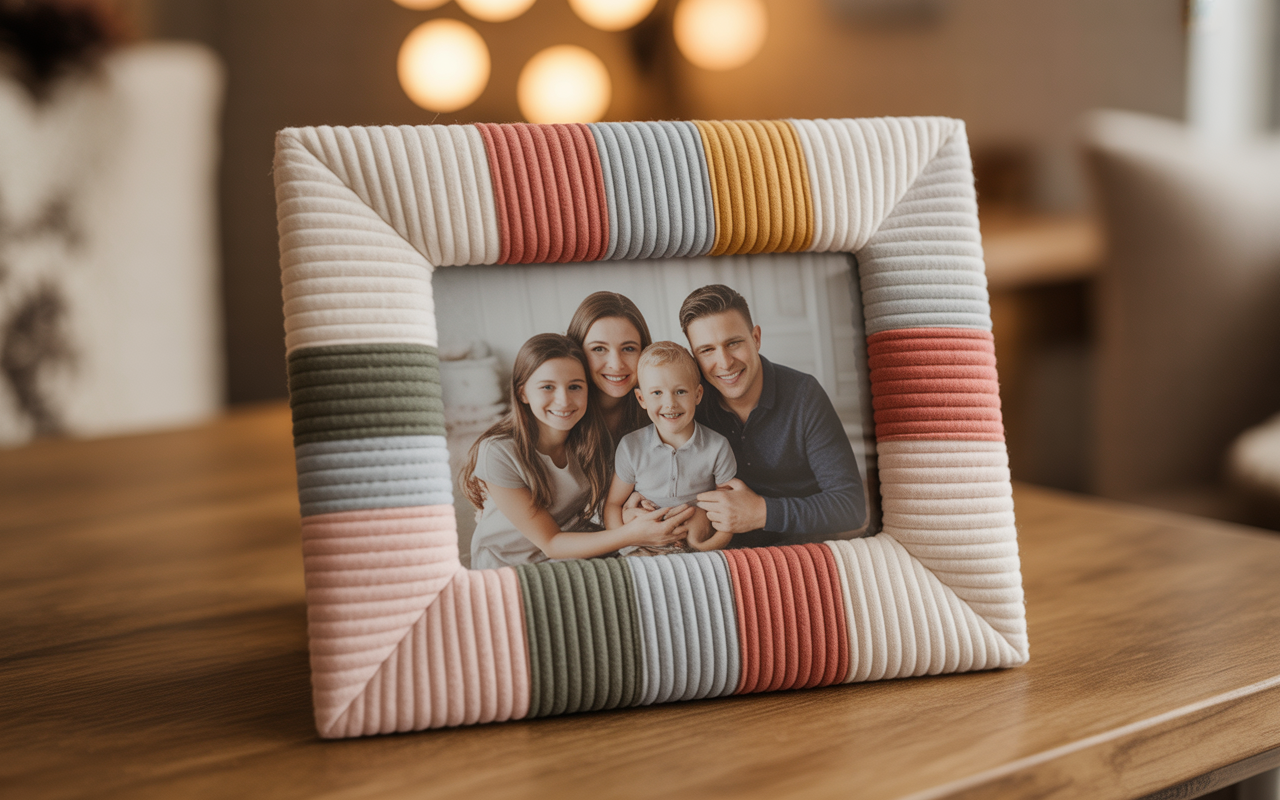
A fabric patchwork frame is a charming and colorful DIY project that brings warmth and creativity into your home. Using leftover fabric scraps makes this design budget-friendly and eco-conscious. Each piece adds a unique pattern, turning the frame into a cheerful, quilt-inspired display. This craft is easy to customize with colors that match your interior or the theme of your photo. Whether you prefer bold, bright prints or soft, neutral tones, the result always feels cozy and handmade. It’s perfect for kids’ portraits, craft rooms, or playful gallery walls.
The patchwork technique allows unlimited personalization, making each frame truly one of a kind. It’s a great way to reuse fabric remnants and create something meaningful for your space. The combination of textures and prints adds visual interest, transforming a simple frame into a vibrant decorative piece. This DIY also makes thoughtful gifts, especially for those who appreciate handmade crafts. The optional sealer enhances durability and gives the frame a polished finish. Overall, a fabric patchwork frame is an easy, fun, and expressive project that celebrates creativity and color.
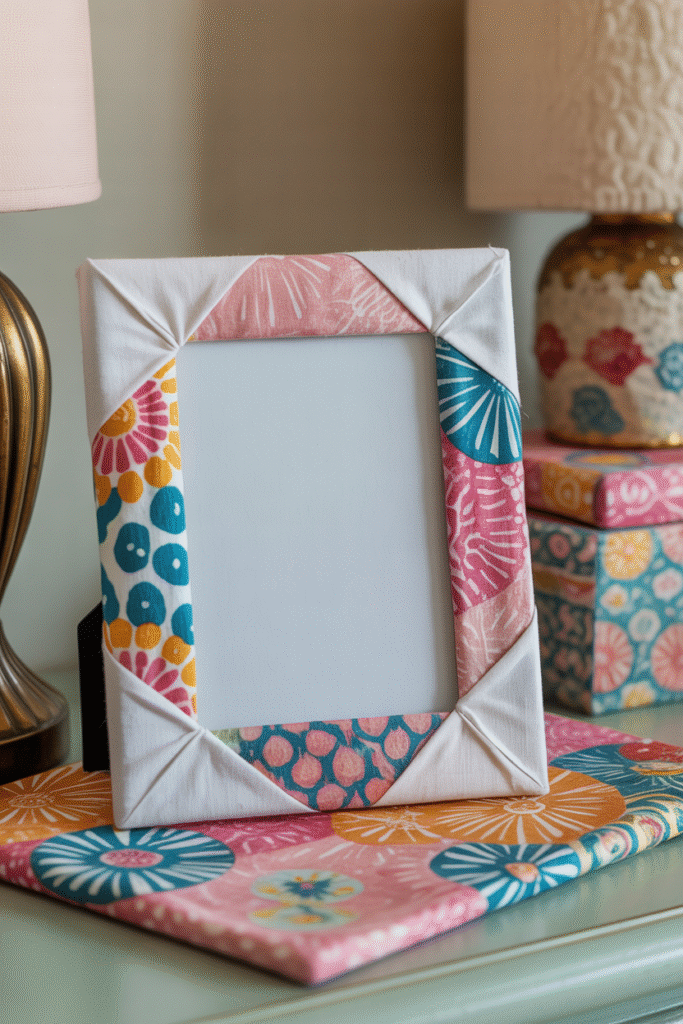
21. Fabric Covered Frame
Materials Needed:
- Wooden frame
- Decorative fabric
- Craft glue or Mod Podge
- Scissors
Steps:
- Measure and cut fabric slightly larger than frame.
- Apply glue to frame edges.
- Wrap fabric around frame, folding corners neatly.
- Press and secure all edges.
- Insert photo and display.
Fabric-covered frames are stylish, beginner-friendly, and customizable. They allow you to incorporate colors, patterns, and textures to match room décor or create a themed display. This DIY project is simple yet yields professional-looking results, making it perfect for personal use or gifting. The fabric adds warmth and tactile appeal while enhancing the visual impact of the photo. By experimenting with different materials, patterns, and folding techniques, each frame becomes unique and expressive.
This DIY encourages creativity in fabric selection and placement, enabling seasonal or thematic variations. Beginners can achieve clean, polished results without prior experience. Fabric-covered frames are ideal for bedrooms, living areas, or creative studios, offering a handcrafted touch that complements décor. The combination of soft texture, vibrant patterns, and personalized photos results in a cozy, visually appealing display. It’s a functional craft that celebrates memories while showcasing your style and creativity.
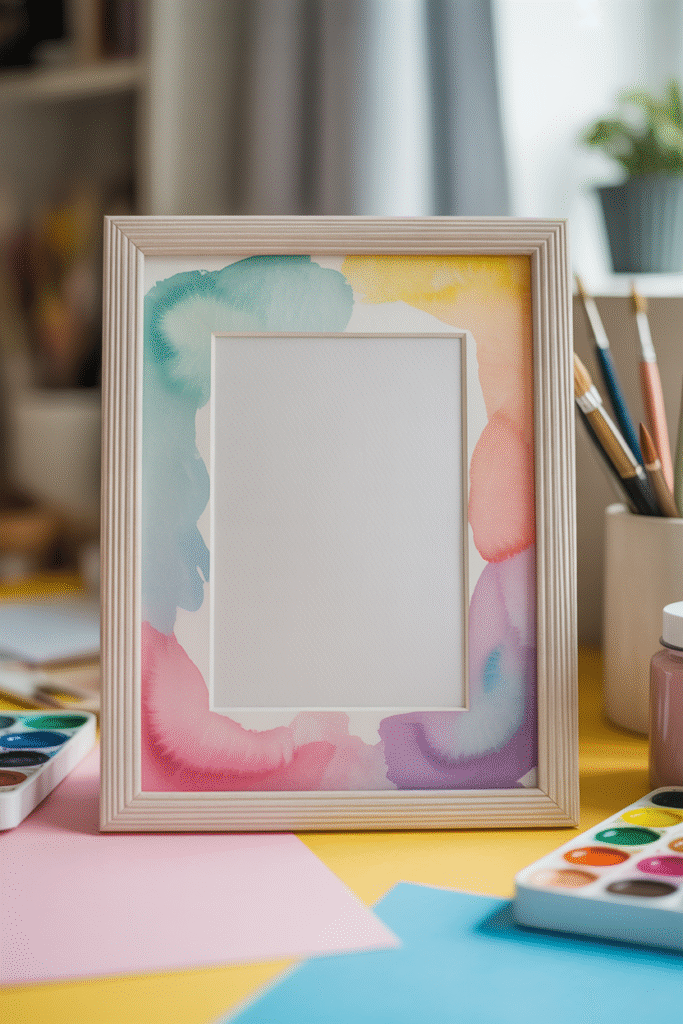
22. Painted Watercolor Frame
Materials Needed:
- Wooden frame
- Watercolor paints
- Paintbrushes
- Water container
- Paper towels
Steps:
- Lightly wet the frame surface.
- Apply watercolor paints in soft washes.
- Blend colors seamlessly for gradient effects.
- Allow to dry completely.
- Insert photo and display.
Painted watercolor frames offer a soft, artistic touch to any photo display. Beginners can enjoy experimenting with color blending and gradient techniques while creating a unique frame. The fluid, delicate colors complement a wide variety of photos and décor styles. This DIY allows for creativity without precision, making it approachable and rewarding. It’s perfect for bedrooms, offices, or craft spaces, and can be personalized with favorite color palettes. Watercolor frames highlight photos beautifully while adding a dreamy, handcrafted charm.
Watercolor frames encourage experimentation with color, blending techniques, and brush styles, making each piece distinctive. They’re suitable for gifting, seasonal décor, or personal memory displays. This DIY is simple, cost-effective, and visually impactful, combining the softness of watercolor with the structure of a frame. The resulting frame adds elegance and charm to any space, celebrating photos while showcasing creativity. Watercolor frames are a perfect beginner-friendly project for those looking to infuse artful, handmade beauty into their home décor.
Conclusion
DIY photo frames are a fantastic way to celebrate memories while adding personality to your space. With 22 versatile ideas ranging from whimsical buttons to elegant watercolor frames, there’s a project for every style and skill level. These beginner-friendly crafts are perfect for personal use, gifts, or home décor, offering creativity, fun, and charm. Get inspired, gather your materials, and start crafting memorable frames that highlight your favorite moments beautifully and uniquely.